Best Chocolate Thumbprint Cookies
There is something incredibly comforting about a warm cookie fresh from the oven, especially when it is soft, chocolatey, and filled with a glossy pool of rich chocolate. These Best Chocolate Thumbprint Cookies bring together everything you love in a cozy homemade treat. As the scent of cocoa fills the kitchen and the centers melt into that perfect silky texture, you just know this is going to be a batch worth every single bite. And now let’s slip into the delicious story behind them.
Behind the Recipe
These little cookies have always reminded me of childhood afternoons spent baking something simple yet special. Thumbprint cookies were the kind of treat that felt playful, almost like crafting tiny edible treasures. This chocolate version takes that nostalgia and turns it into a deeper, richer moment of indulgence. They feel homemade in the best way, full of warmth and a touch of whimsy.
Recipe Origin or Trivia
Thumbprint cookies have been around for generations, originally coming from European baking traditions where small pastries were pressed in the center and filled with jams or creams. The chocolate version is an American twist that took off because chocolate lovers wanted something chewier and more decadent. Over time, bakers found that cocoa dough with a chocolate center created the perfect two layer bite, soft and intense all at once.
Why You’ll Love Best Chocolate Thumbprint Cookies
Before we grab our mixing bowl, let me tell you why these cookies stand out.
Versatile: Perfect for holidays, gifting, or simple everyday baking.
Budget-Friendly: Uses pantry staples like cocoa, flour, and butter.
Quick and Easy: Comes together in minutes with simple steps.
Customizable: You can add sprinkles, drizzle chocolate, or change fillings.
Crowd-Pleasing: Trust me, you’re going to love this because chocolate lovers always ask for seconds.
Make-Ahead Friendly: Dough chills perfectly for later baking.
Great for Leftovers: They stay soft for days and taste even better the next morning.
Chef’s Pro Tips for Perfect Results
Before you start mixing, here are a few tricks that make these cookies a total game changer.
- Chill the dough so the cookies keep their shape while baking.
- Roll the dough in sugar for shiny crackled edges.
- Press the centers again right after baking to deepen the thumbprint.
- Fill warm cookies so the chocolate melts smoothly into place.
- Use high quality cocoa for richer flavor.
Kitchen Tools You’ll Need
Gather these simple tools to make your baking smoother and more enjoyable.
Mixing bowls: For preparing dough and filling.
Hand mixer: Helps cream butter and sugar for fluffy texture.
Baking tray: To bake cookies evenly.
Parchment paper: Prevents sticking and keeps bottoms soft.
Measuring cups: For keeping ingredient ratios accurate.
Teaspoon or thumb: To create perfect centers.
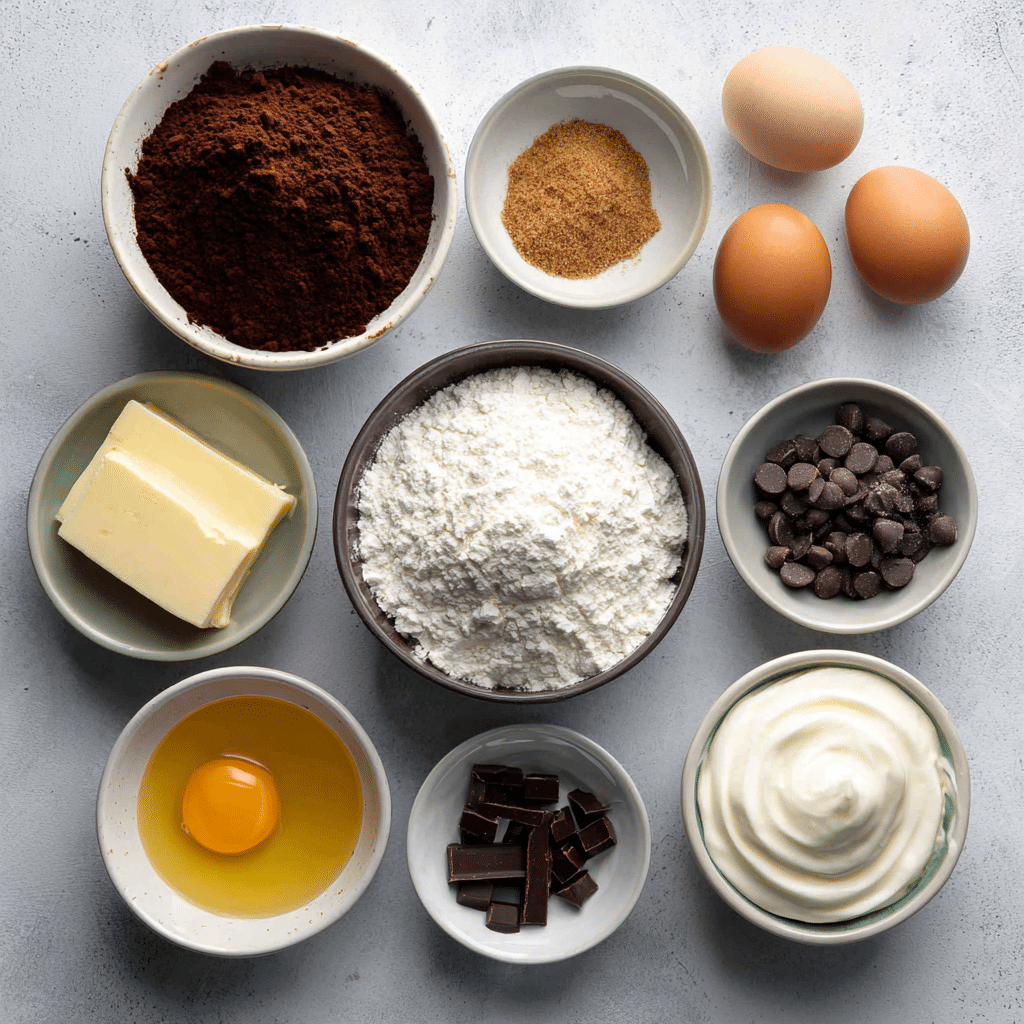
Ingredients in Best Chocolate Thumbprint Cookies
These ingredients come together like a little symphony of chocolatey comfort. Here’s what you’ll need to achieve that soft, rich texture.
- All purpose flour: 1 and a quarter cups, provides the cookie structure.
- Unsweetened cocoa powder: Half cup, gives deep chocolate flavor.
- Butter: Half cup softened, adds richness and tenderness.
- Granulated sugar: Half cup, sweetens and helps crisp the edges.
- Brown sugar: Quarter cup, adds moisture and caramel notes.
- Egg yolk: 1 yolk, keeps the dough soft and rich.
- Vanilla extract: 1 teaspoon, adds warmth and aroma.
- Salt: Quarter teaspoon, balances sweetness.
- Milk: 2 tablespoons, softens dough slightly.
- Semi sweet chocolate chips: Half cup, melts into the centers.
- Heavy cream: 2 tablespoons, creates a smooth chocolate filling.
- Extra sugar for rolling: 2 tablespoons, adds sparkle and texture.
Ingredient Substitutions
If you need a quick swap, here are some great alternatives.
Butter: Margarine or dairy free butter.
Cocoa powder: Dark cocoa for deeper flavor.
Semi sweet chocolate chips: Milk chocolate or white chocolate.
Heavy cream: Warm milk to soften chocolate.
Brown sugar: Coconut sugar for a more natural note.
Flour: Gluten free flour blend.
Ingredient Spotlight
Unsweetened cocoa powder: This is the heart of the cookie which gives that deep flavor and beautiful color.
Brown sugar: Keeps the cookies chewy, soft, and tender with light caramel undertones.
Instructions for Making Best Chocolate Thumbprint Cookies
Let’s bake these together step by step so your cookies turn out irresistibly soft and chocolatey.
- Preheat Your Equipment: Set your oven to 350 degrees Fahrenheit and line a baking tray with parchment.
- Combine Ingredients: Cream butter, granulated sugar, and brown sugar until fluffy. Add egg yolk, milk, and vanilla. Stir in flour, cocoa, and salt until a soft dough forms.
- Prepare Your Cooking Vessel: Roll dough into balls and coat them in sugar. Set them evenly on your tray.
- Assemble the Dish: Press your thumb or a teaspoon into each dough ball to create a small well.
- Cook to Perfection: Bake for 10 to 12 minutes until edges are set. Repress centers gently after baking.
- Finishing Touches: Melt chocolate chips and heavy cream into a smooth ganache, then spoon into each warm cookie.
- Serve and Enjoy: Let them cool slightly before eating, although they are irresistible warm.
Texture & Flavor Secrets
These cookies work beautifully because the edges stay slightly crisp while the centers remain soft and fudgy. The warm chocolate filling melts into the thumbprint and creates a double chocolate effect that feels decadent with every bite. The sugar coating adds a delicate crunch that pairs perfectly with the tender cookie.
Cooking Tips & Tricks
Here are a few extra nudges to help your cookies turn out bakery perfect.
- Chill dough for 20 minutes if it feels too soft.
- Press the cookies gently so they do not crack too much.
- Use parchment to prevent overbrowning.
What to Avoid
To keep your cookies delightful, watch out for these common mistakes.
- Overbaking which makes them dry.
- Using cold butter which prevents proper creaming.
- Skipping the second thumbprint press which makes filling shallow.
Nutrition Facts
Servings: 20 cookies
Calories per serving: 140
Note: Values are approximate.
Preparation Time
Prep Time: 15 minutes
Cook Time: 12 minutes
Total Time: 27 minutes
Make-Ahead and Storage Tips
You can make the dough ahead and refrigerate it for up to two days. The baked cookies store well in an airtight container for four days. You can also freeze the dough balls and bake them later for fresh cookies anytime.
How to Serve Best Chocolate Thumbprint Cookies
Serve with a warm drink, a scoop of vanilla ice cream, or simply enjoy them on their own. They look beautiful on a holiday cookie platter or packed inside gift boxes.
Creative Leftover Transformations
Turn them into cookie crumble for parfaits, crumble over ice cream, or use two to make a mini cookie sandwich. They stay delicious in every form.
Additional Tips
Add a sprinkle of flaky salt on top for a gourmet touch. Use room temperature ingredients for smoother mixing. If ganache thickens, warm it slightly to make it easier to spoon.
Make It a Showstopper
Add festive sprinkles, drizzle white chocolate, or serve them on a rustic wooden board. A little shimmer of powdered sugar also makes them look bakery ready.
Variations to Try
- Peppermint chocolate thumbprints with crushed candy canes.
- Dark chocolate espresso thumbprints with a hint of coffee.
- White chocolate raspberry thumbprints with fruity drizzle.
- Nutella filled thumbprints for extra creaminess.
- Salted caramel thumbprints with soft caramel centers.
FAQ’s
1. Can I freeze the cookie dough
Yes, freeze shaped dough balls and bake later.
2. Can I use melted chocolate instead of ganache
Yes, but ganache stays softer in the center.
3. Why did my cookies crack too much
The dough may have been too dry or pressed too hard.
4. Can I make these dairy free
Use dairy free butter and chocolate.
5. Can I double the recipe
Absolutely, it scales nicely.
6. Should I chill the dough
Only if it feels sticky or warm.
7. How do I make them fudgier
Add an extra tablespoon of brown sugar.
8. Can I add nuts
Yes, you can roll edges in finely chopped nuts.
9. Can I fill them with jam
Yes, raspberry jam tastes amazing.
10. How long do they stay fresh
About four days in an airtight container.
Conclusion
These Best Chocolate Thumbprint Cookies are soft, rich, and filled with chocolate comfort in every bite. They bring joy to any gathering and make baking feel fun and heartwarming. Let me tell you, once you try them, they might just become your new favorite cookie to bake again and again.
Print
Best Chocolate Thumbprint Cookies
- Total Time: 27 minutes
- Yield: 20 cookies 1x
- Diet: Vegetarian
Description
Soft, rich, double chocolate cookies with a fudgy center and a tender, melt in your mouth texture. These classic thumbprint cookies are perfect for gifting, holidays, or everyday chocolate cravings.
Ingredients
- 1 and a quarter cups all purpose flour
- Half cup unsweetened cocoa powder
- Half cup softened butter
- Half cup granulated sugar
- Quarter cup brown sugar
- 1 egg yolk
- 1 teaspoon vanilla extract
- Quarter teaspoon salt
- 2 tablespoons milk
- Half cup semi sweet chocolate chips
- 2 tablespoons heavy cream
- 2 tablespoons extra sugar for rolling
Instructions
- Preheat oven to 350 degrees Fahrenheit and line a baking tray with parchment paper.
- In a bowl, cream butter, granulated sugar, and brown sugar until fluffy.
- Mix in egg yolk, vanilla, and milk until smooth.
- Add flour, cocoa powder, and salt, stirring until a soft dough forms.
- Roll dough into small balls and coat in extra sugar.
- Place on tray and gently press the center with your thumb or a teaspoon.
- Bake for 10 to 12 minutes until edges are set.
- Repress centers if needed, then fill with melted chocolate chips mixed with heavy cream.
- Let cool slightly before serving.
Notes
- Chill dough for 20 minutes if it feels too soft.
- Use high quality cocoa for richer flavor.
- Do not overbake or cookies may become dry.
- Prep Time: 15 minutes
- Cook Time: 12 minutes
- Category: Dessert
- Method: Baking
- Cuisine: American
Nutrition
- Serving Size: 1 cookie
- Calories: 140
- Sugar: 11g
- Sodium: 65mg
- Fat: 7g
- Saturated Fat: 4g
- Unsaturated Fat: 3g
- Trans Fat: 0g
- Carbohydrates: 18g
- Fiber: 1g
- Protein: 2g
- Cholesterol: 22mg
Keywords: chocolate thumbprint cookies, thumbprint cookies, chocolate cookies, holiday cookies