Ultimate Skillet Brownie
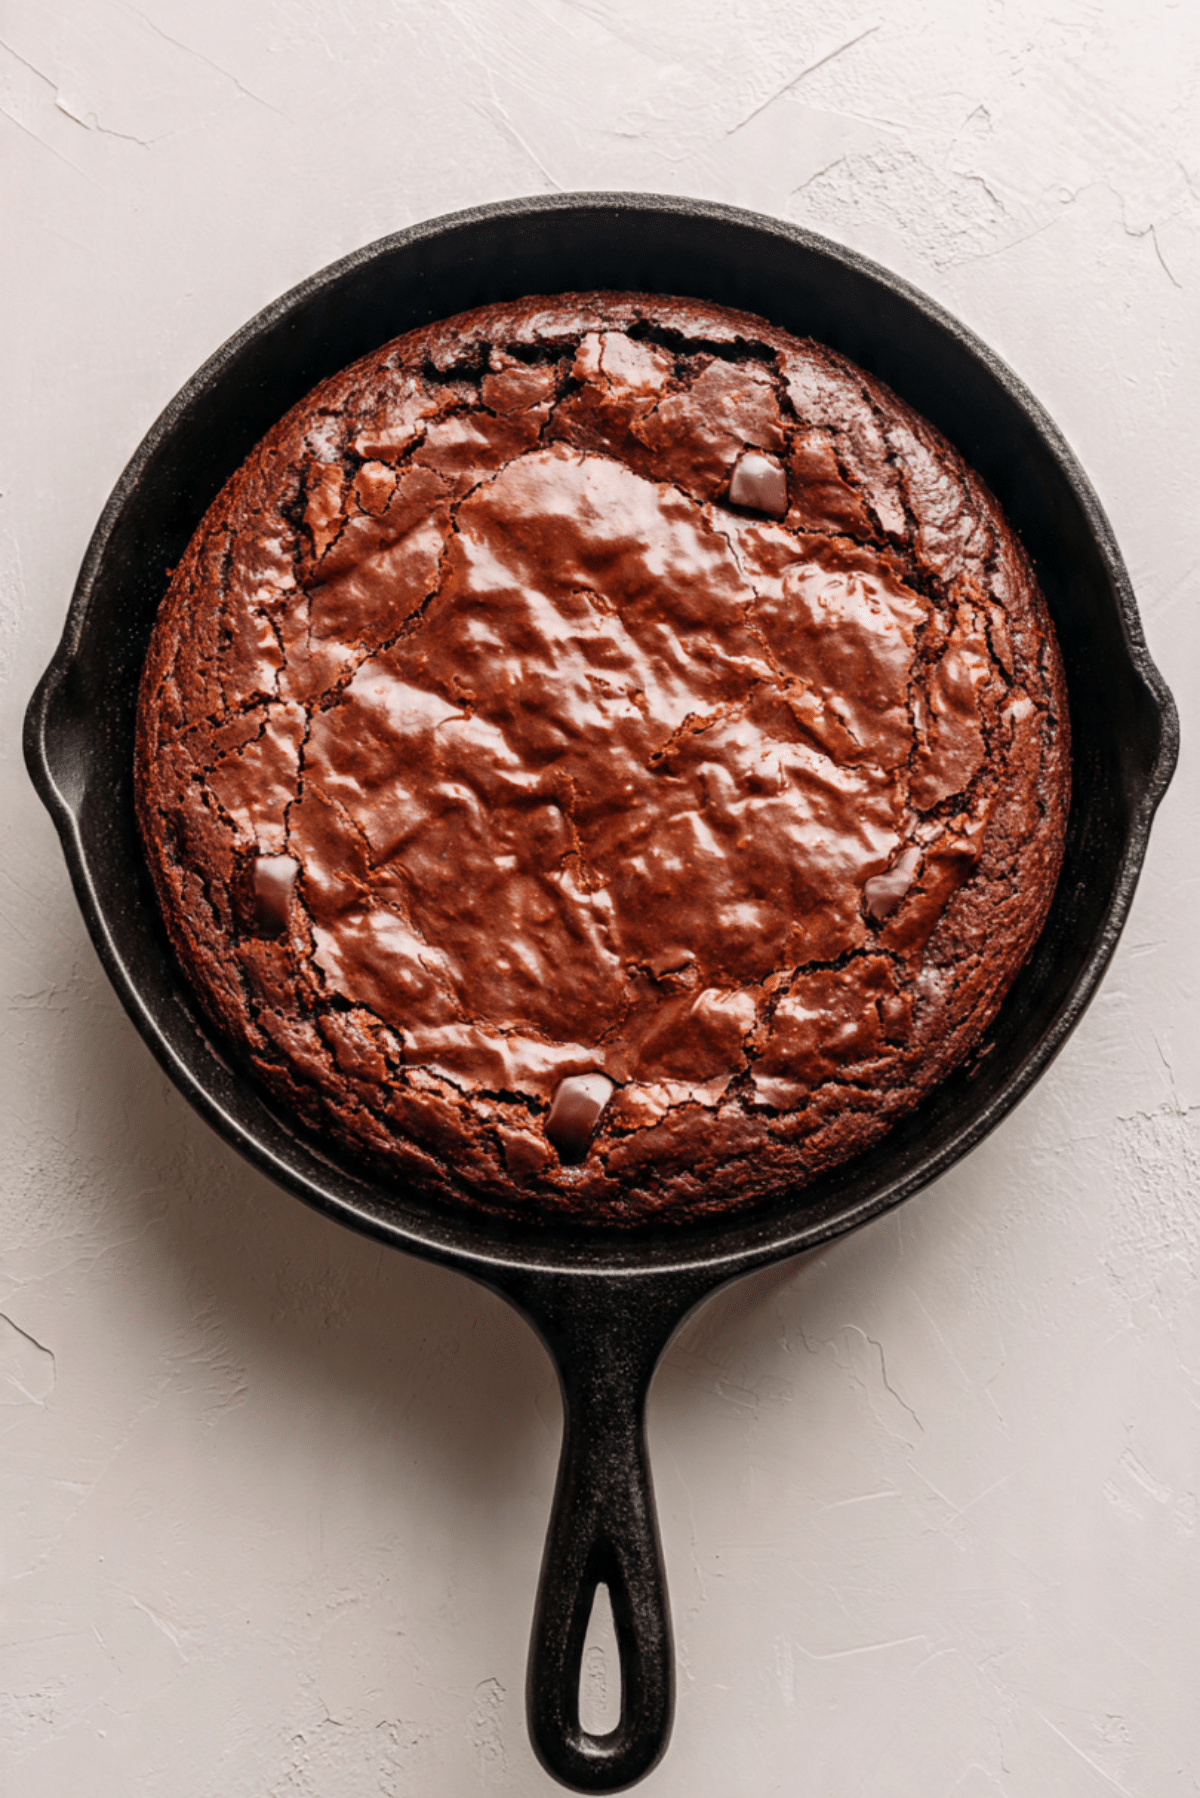
There is something almost magical about pulling a warm skillet straight from the oven and catching that first whiff of deep, rich chocolate. The top is glossy and crackled, the edges slightly crisp, and the center still soft and fudgy. Trust me, you’re going to love this. This Ultimate Skillet Brownie is the kind of dessert that feels both rustic and indulgent, the kind you set in the center of the table and watch everyone lean in with spoons ready.
And now let us dive into what makes this beauty so unforgettable.
The Chocolate Lover’s Dream in One Pan
This dessert is everything you crave in a brownie, only better. Baking it in a cast iron skillet creates those irresistible chewy edges while keeping the center perfectly gooey. Each bite gives you that contrast of crisp top and melt in your mouth middle. Let me tell you, it’s worth every bite.
It is bold, rich, and comforting. It feels homemade in the best possible way, slightly imperfect on top with that shiny crust that crackles when you press it gently. And when served warm, maybe with a scoop of vanilla ice cream slowly melting into the center, it becomes a total game changer.
A Classic Dessert with Rustic American Roots
Brownies have been a staple in American kitchens for over a century. They first appeared in the late nineteenth and early twentieth centuries, and since then they have taken on countless forms. From cakey versions to ultra fudgy squares, they have always been a symbol of simple comfort baking.
The skillet version adds a rustic charm that feels both nostalgic and modern. Cast iron cooking has deep roots in American home kitchens, and combining it with chocolate dessert just feels right. It brings together tradition and indulgence in one warm, chocolate filled pan.
Why This Recipe Always Works
Before we step into the kitchen, let me share why this one earns a permanent spot in your dessert rotation.
Versatile: You can serve it plain, top it with ice cream, drizzle it with chocolate sauce, or scatter a few chocolate chips on top. It adapts to whatever mood you are in.
Budget-Friendly: The ingredients are pantry staples like flour, sugar, cocoa powder, butter, and eggs. No fancy extras required.
Quick and Easy: The batter comes together in minutes, and it bakes in about half an hour. Perfect for last minute cravings.
Customizable: Stir in nuts, extra chocolate chunks, or even a swirl of peanut butter if you like to experiment.
Crowd-Pleasing: It is rich and chocolatey, which means it disappears fast at gatherings.
Make-Ahead Friendly: You can bake it earlier in the day and gently rewarm before serving.
Great for Leftovers: If there are any leftovers, they stay fudgy and delicious the next day.
Pro Tips for the Perfect Fudgy Center
Now that you are excited, here are a few insider tricks to make sure it turns out flawless every time.
- Use room temperature eggs so they blend smoothly into the batter.
- Do not overmix once you add the flour, stir just until combined.
- Slightly underbake for a gooey center, the brownie will continue to set as it cools.
- Let it rest for at least ten minutes before slicing, this helps the texture settle.
Essential Tools for Skillet Success
You do not need much, which is part of the charm.
Cast Iron Skillet: A 10 inch skillet works beautifully and creates those crisp edges.
Mixing Bowl: Large enough to comfortably combine all ingredients.
Whisk: For blending butter, sugar, and eggs into a smooth base.
Spatula: Helps fold in dry ingredients without overmixing.
Measuring Cups and Spoons: Accuracy keeps the texture just right.
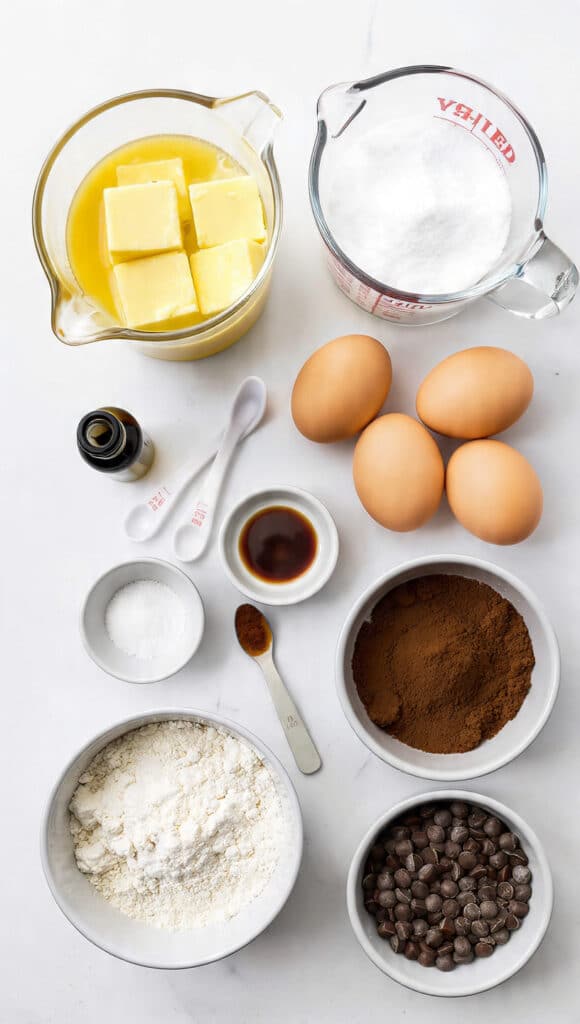
Ingredients You Will Need For This Chocolate Masterpiece
The magic comes from simple ingredients working together in harmony.
- Unsalted Butter: 1 cup, 226 grams, melted. Adds richness and moisture.
- Granulated Sugar: 1 1/4 cups, 250 grams. Sweetens and helps create that crackly top.
- Large Eggs: 3, room temperature. Provide structure and fudginess.
- Vanilla Extract: 2 teaspoons. Enhances the chocolate flavor.
- Unsweetened Cocoa Powder: 3/4 cup, 75 grams. Brings deep chocolate intensity.
- All Purpose Flour: 3/4 cup, 95 grams. Gives structure without making it cakey.
- Salt: 1/2 teaspoon. Balances sweetness.
- Semi Sweet Chocolate Chips: 1 cup, 170 grams. Melt into pockets of gooey chocolate.
Easy Ingredient Swaps You Can Try
Sometimes you need flexibility, and this dessert allows it.
Unsalted Butter: Salted butter, just reduce the added salt slightly.
All Purpose Flour: Gluten free flour blend in equal amount.
Semi Sweet Chocolate Chips: Dark chocolate chunks or milk chocolate chips.
Granulated Sugar: Half granulated and half light brown sugar for a deeper flavor.
Spotlight on the Stars of the Show
Let us take a closer look at what makes this dessert shine.
Unsweetened Cocoa Powder: This is where the bold chocolate flavor comes from. Choose a good quality cocoa for the richest result.
Semi Sweet Chocolate Chips: These create little molten pockets throughout the brownie, giving that irresistible gooey texture.
Let’s Bake This Skillet Beauty Together
Alright, apron on. Here are the steps you are going to follow.
- Preheat Your Equipment: Preheat your oven to 350 degrees Fahrenheit, 175 degrees Celsius. Lightly grease a 10 inch cast iron skillet.
- Combine Ingredients: In a large bowl, whisk together the melted butter and granulated sugar until smooth. Add the eggs and vanilla extract, then whisk until fully combined and slightly glossy.
- Prepare Your Cooking Vessel: If you have not already, make sure your skillet is lightly greased to prevent sticking.
- Assemble the Dish: Sift in the cocoa powder, flour, and salt. Gently fold the dry ingredients into the wet mixture using a spatula until just combined. Stir in the chocolate chips.
- Cook to Perfection: Spread the batter evenly into the prepared skillet. Bake for 25 to 30 minutes, until the edges are set and the center still looks slightly soft.
- Finishing Touches: Remove from the oven and let it cool in the skillet for at least 10 minutes. This allows the center to set while staying fudgy.
- Serve and Enjoy: Slice directly from the skillet and serve warm. Add a scoop of vanilla ice cream if you want to take it over the top.
The Texture and Flavor Journey
What makes this dessert so satisfying is the contrast. The top forms a delicate crackly crust while the inside stays dense and fudgy. As it bakes, the chocolate aroma fills the kitchen, deep and slightly bittersweet.
The edges develop a gentle chew thanks to the skillet, while the center stays soft and rich. Each bite delivers sweetness balanced by cocoa and a hint of salt. It is simple, yet layered in flavor.
Helpful Baking Tips for Best Results
Here are a few extra pointers to make sure everything goes smoothly.
- Use high quality cocoa powder for deeper chocolate flavor.
- Check the center with a toothpick, a few moist crumbs are perfect.
- Let it cool slightly before slicing to avoid it falling apart.
Common Mistakes and How to Avoid Them
Even simple desserts can have little pitfalls, but do not worry.
- Overbaking, which leads to a dry texture. Remove it when the center is still slightly soft.
- Overmixing the batter, which can make it tough. Stir gently.
- Using a skillet that is too small, which can cause uneven baking.
A Quick Look at the Nutrition
Servings: 8
Calories per serving: 420
Note: These are approximate values.
Time Breakdown for Planning
Prep Time: 10 minutes
Cook Time: 30 minutes
Total Time: 40 minutes
Make-Ahead and Storage Tips
If you want to prepare ahead, bake it earlier in the day and let it cool completely. Cover the skillet tightly with foil or transfer slices to an airtight container.
It keeps at room temperature for up to two days, or refrigerated for up to five days. To reheat, warm slices in the microwave for about 15 to 20 seconds. You can also freeze individual portions wrapped tightly for up to two months.
Serving Ideas to Make It Extra Special
Serve it warm straight from the skillet for that rustic look. Add a scoop of vanilla ice cream, a drizzle of chocolate sauce, or a sprinkle of powdered sugar.
Fresh berries on the side add a bright contrast to the rich chocolate. A glass of cold milk alongside makes it feel nostalgic and comforting.
Creative Leftover Transformations
If you somehow have leftovers, here are fun ways to reinvent them.
Crumble pieces over yogurt for a decadent breakfast treat. Layer chunks with whipped cream and fruit to make a quick trifle. Warm a slice and sandwich it with ice cream for an epic dessert sandwich.
Extra Tips for Flavor and Ease
You can toast chopped nuts before folding them into the batter for added depth. Sprinkle a tiny pinch of flaky salt on top right after baking for a sweet and salty finish.
And remember, slightly underbaked is better than overbaked when it comes to achieving that gooey center.
Turn It Into a Showstopping Dessert
Serve it right in the skillet at the table for a dramatic presentation. The dark cast iron against the rich chocolate looks stunning. Add a scoop of ice cream in the center and watch it slowly melt into the cracks. It is simple but impressive.
Fun Variations to Try
Try swirling in peanut butter before baking for a nutty twist. Stir in chopped walnuts for crunch. Add a handful of white chocolate chips for contrast. Mix in a teaspoon of instant espresso powder to deepen the chocolate flavor.
FAQ’s
Q1: Can I use a different pan if I do not have a skillet?
Yes, you can use a 9 inch square baking pan. The texture will be slightly different but still delicious.
Q2: How do I know when it is done?
The edges should be set and the center slightly soft. A toothpick should come out with moist crumbs.
Q3: Can I make it less sweet?
You can reduce the sugar slightly, but it may affect the texture and crackly top.
Q4: Can I add nuts?
Absolutely. Fold in about 1/2 cup of chopped walnuts or pecans.
Q5: Is it better warm or cold?
Warm is extra gooey, but it is delicious both ways.
Q6: Can I double the recipe?
Yes, use a larger skillet or baking dish and adjust baking time slightly.
Q7: Why is my top not crackly?
Make sure you whisk the sugar and eggs well, this helps create that shiny crust.
Q8: Can I freeze it?
Yes, wrap slices tightly and freeze for up to two months.
Q9: What cocoa powder works best?
Use a good quality unsweetened cocoa powder for the richest flavor.
Q10: Can I make it gluten free?
Yes, substitute with a gluten free flour blend in equal amount.
Conclusion
There is something deeply comforting about baking chocolate in a skillet. It feels cozy, a little rustic, and incredibly satisfying. This Ultimate Skillet Brownie brings together crisp edges, a fudgy center, and rich chocolate flavor in every bite. This one’s a total game changer for weeknights and gatherings alike. So preheat that oven, grab your skillet, and let the chocolate magic happen.
Print
Ultimate Skillet Brownie
- Total Time: 40 minutes
- Yield: 8 servings 1x
- Diet: Vegetarian
Description
A rich, fudgy skillet brownie baked in a cast iron pan with crackly edges and a gooey chocolate center. Perfect for sharing and even better served warm with ice cream.
Ingredients
- 1 cup (226 g) unsalted butter, melted
- 1 1/4 cups (250 g) granulated sugar
- 3 large eggs, room temperature
- 2 teaspoons vanilla extract
- 3/4 cup (75 g) unsweetened cocoa powder
- 3/4 cup (95 g) all purpose flour
- 1/2 teaspoon salt
- 1 cup (170 g) semi sweet chocolate chips
Instructions
- Preheat oven to 350 degrees Fahrenheit (175 degrees Celsius) and lightly grease a 10 inch cast iron skillet.
- In a large bowl, whisk together melted butter and granulated sugar until smooth.
- Add eggs and vanilla extract, whisking until fully combined and glossy.
- Sift in cocoa powder, flour, and salt. Gently fold until just combined.
- Stir in semi sweet chocolate chips evenly throughout the batter.
- Spread batter evenly into the prepared skillet.
- Bake for 25 to 30 minutes, until edges are set and the center remains slightly soft.
- Allow to cool for at least 10 minutes before slicing and serving.
Notes
- For an extra gooey center, slightly underbake and allow residual heat to finish cooking.
- Let the brownie rest before slicing to help it set properly.
- Serve warm with vanilla ice cream for a classic pairing.
- Prep Time: 10 minutes
- Cook Time: 30 minutes
- Category: Dessert
- Method: Baking
- Cuisine: American
Nutrition
- Serving Size: 1 slice
- Calories: 420
- Sugar: 35 g
- Sodium: 150 mg
- Fat: 25 g
- Saturated Fat: 15 g
- Unsaturated Fat: 8 g
- Trans Fat: 0.5 g
- Carbohydrates: 48 g
- Fiber: 3 g
- Protein: 5 g
- Cholesterol: 95 mg
Keywords: skillet brownie, chocolate dessert, cast iron brownie, fudgy brownie, easy brownie recipe