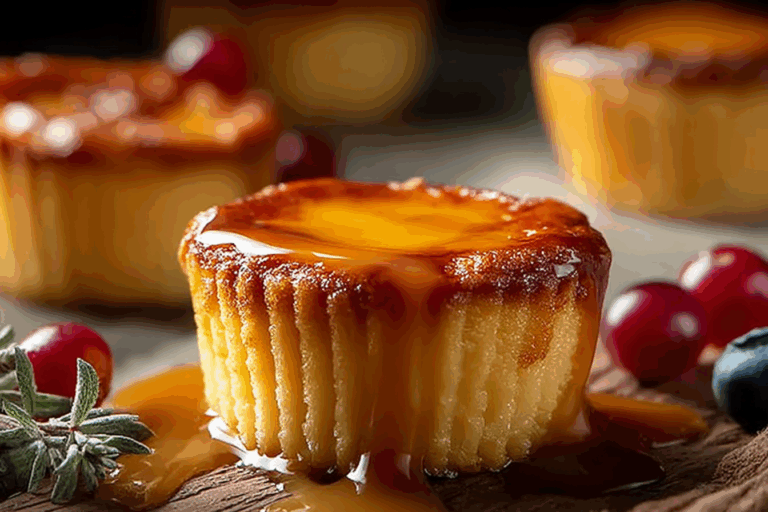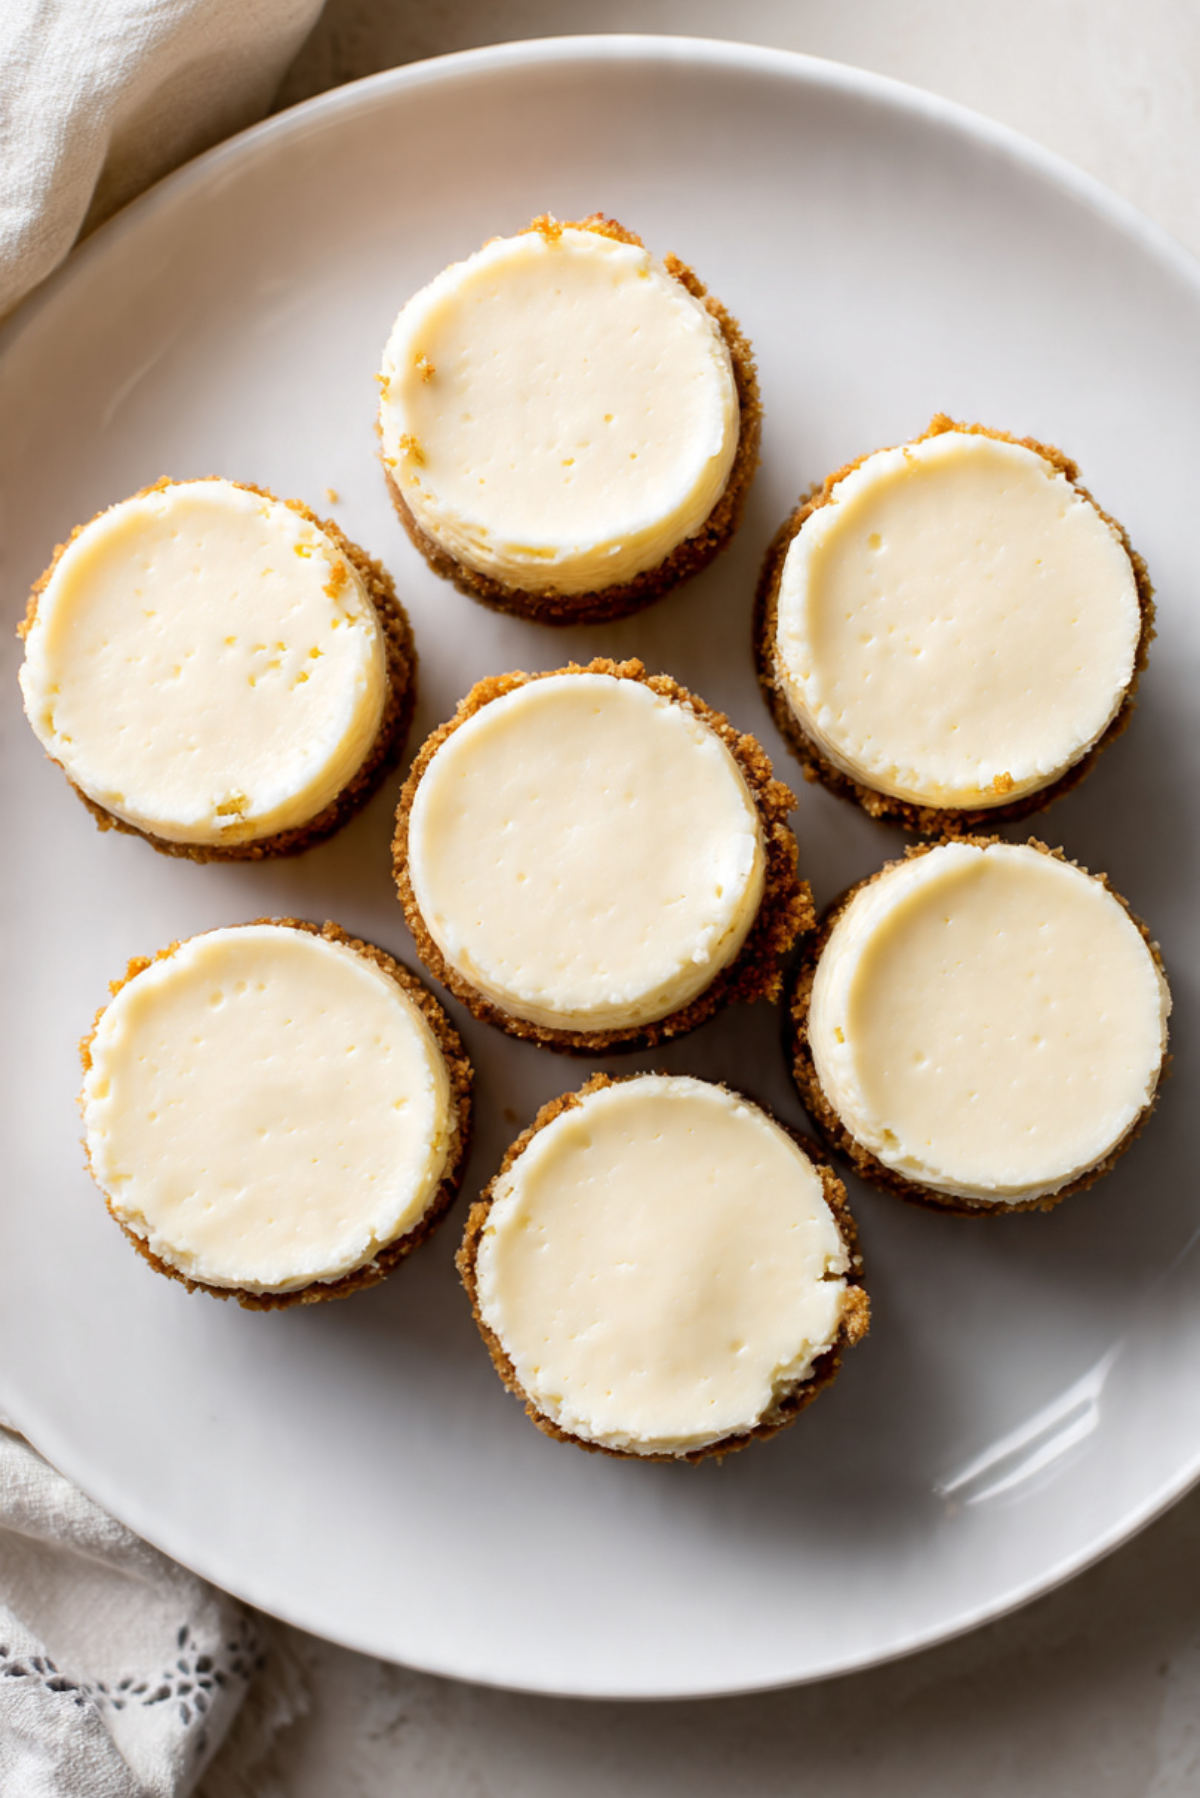
Mini Cheesecakes
There is something so comforting about a dessert that feels both elegant and playful at the same time. These Mini Cheesecakes are exactly that. Creamy, smooth, lightly sweet, with a buttery graham cracker crust that gives the perfect little crunch in every bite. They are the kind of treat that makes people pause mid conversation and say, wait, did you make these? Trust me, you’re going to love this.
They bake up beautifully in a muffin pan, which means no complicated water baths or cracking tops to stress about. Just simple ingredients coming together into something that feels bakery worthy. And now let’s dive into why these little beauties deserve a permanent spot in your dessert rotation.
Why These Little Cheesecakes Steal the Show
There is something magical about individual portions. They feel thoughtful and special, like you made each one just for the person holding it. The creamy center melts softly on your tongue while the crust anchors every bite with that golden, buttery crunch.
They are rich without being overwhelming, sweet but balanced with a slight tang from the cream cheese. Let me tell you, it’s worth every bite. And because they are smaller, you can easily dress them up with fruit, chocolate, or whipped cream without overpowering that silky base.
A Classic Dessert with a Modern Twist
Cheesecake has been around for centuries, evolving from simple baked cheese pies to the ultra smooth versions we know today. Traditionally, large cheesecakes required careful baking and sometimes a water bath to prevent cracking.
These Mini Cheesecakes keep all that creamy tradition but simplify the process. Baking them in a muffin tin makes them approachable for home bakers, especially when you want something impressive without the fuss. This one’s a total game changer for parties and gatherings.
Why This Recipe Works Every Single Time
Before we even step into the kitchen, let’s talk about why this version is so reliable.
Versatile: You can top them with berries, lemon curd, caramel, or even a spoonful of jam. The base is neutral enough to pair with almost anything.
Budget-Friendly: The ingredients are simple and easy to find, cream cheese, sugar, eggs, and graham crackers. No fancy extras required.
Quick and Easy: No water bath, no complicated steps. Just mix, fill, and bake.
Customizable: Add a swirl of chocolate or a hint of citrus zest to change the flavor profile.
Crowd-Pleasing: Individual servings mean no slicing, no mess, and everyone gets a perfect portion.
Make-Ahead Friendly: They chill beautifully and taste even better the next day.
Great for Leftovers: Store them in the fridge and enjoy a ready made dessert whenever a sweet craving hits.
Insider Secrets for Ultra Creamy Results
A few small details make a big difference here.
- Use room temperature cream cheese so it blends smoothly without lumps.
- Do not overmix once you add the eggs, gentle mixing keeps the texture creamy and prevents too much air.
- Fill each liner almost to the top, they will not rise dramatically.
- Let them cool gradually before chilling to prevent sinking centers.
Tools That Make It Easy
The right tools help everything flow smoothly.
Muffin Pan: This shapes and supports each cheesecake perfectly.
Cupcake Liners: They make removal simple and keep the edges neat.
Mixing Bowls: One for the crust and one for the filling keeps things organized.
Electric Mixer: Helps achieve that silky smooth filling.
Measuring Cups and Spoons: Accuracy keeps the texture just right.
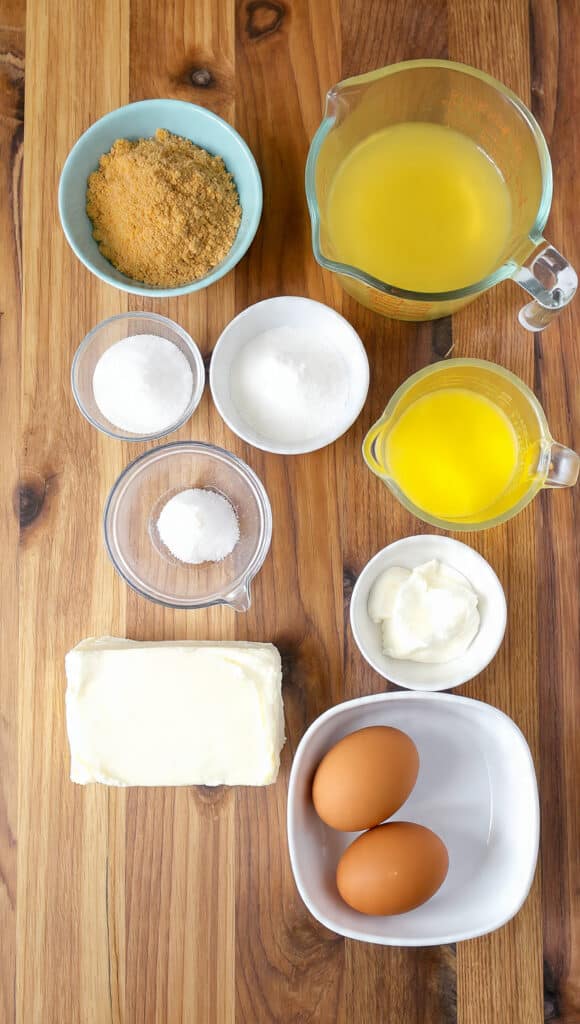
Ingredients That Create the Magic
Every ingredient here has a purpose, and together they create that classic creamy bite.
- Graham Cracker Crumbs: 1 cup, about 120 grams, form the buttery base that adds crunch and structure.
- Granulated Sugar: 2 tablespoons for the crust plus 1/2 cup, 100 grams for the filling, adds sweetness and balance.
- Unsalted Butter: 3 tablespoons, 45 grams, melted, binds the crust together.
- Cream Cheese: 16 ounces, 450 grams, softened, provides the rich and creamy body.
- Sour Cream: 1/4 cup, 60 grams, adds a subtle tang and smooth texture.
- Vanilla Extract: 1 teaspoon, enhances flavor and warmth.
- Large Eggs: 2, room temperature, give structure and silkiness.
Flexible Swaps If You Need Them
Sometimes you work with what you have, and that is perfectly fine.
Graham Cracker Crumbs: Crushed digestive biscuits work just as well.
Sour Cream: Plain full fat yogurt can replace it in equal amount.
Granulated Sugar: Fine caster sugar is a good alternative.
Vanilla Extract: A small splash of almond extract can add a different twist.
The Stars of the Show
Let’s spotlight what really makes these special.
Cream Cheese: The heart of the dessert. It creates that velvety, dense texture that defines every bite.
Graham Cracker Crumbs: They bring warmth and a slightly toasted flavor that balances the sweetness beautifully.
Let’s Bake Together
Now comes the fun part. Tie your apron, preheat that oven, and let’s get started.
- Preheat Your Equipment: Preheat your oven to 325 degrees F, which is 160 degrees C. Line a standard 12 cup muffin pan with cupcake liners.
- Combine Ingredients: In a bowl, mix the graham cracker crumbs, 2 tablespoons sugar, and melted butter until evenly coated.
- Prepare Your Cooking Vessel: Spoon about 1 tablespoon of crust mixture into each liner and press it down firmly to form a compact base.
- Assemble the Dish: In a separate bowl, beat the cream cheese until smooth. Add the remaining 1/2 cup sugar and mix until creamy. Blend in the sour cream and vanilla, then add the eggs one at a time, mixing gently after each addition.
- Cook to Perfection: Divide the filling evenly among the liners, filling almost to the top. Bake for 17 to 20 minutes, until the centers are just set but still slightly jiggly.
- Finishing Touches: Turn off the oven and let them cool inside with the door slightly open for about 10 minutes. Then transfer to a wire rack and cool completely before refrigerating for at least 2 hours.
- Serve and Enjoy: Once chilled, top with your favorite fruit or enjoy them plain. That first creamy bite is pure joy.
The Texture and Flavor Journey
The first thing you notice is the contrast. The crust is firm and slightly crisp, while the filling is smooth and luscious. As they chill, the flavors deepen and settle. The sweetness becomes balanced, the vanilla more fragrant, and the tang from the sour cream gently shines through.
Helpful Baking Tips for Success
A little extra guidance never hurts.
- Let all dairy ingredients reach room temperature before mixing.
- Do not rush the chilling step, it sets the texture properly.
- Use a cookie scoop for even filling distribution.
Common Mistakes and How to Avoid Them
Even simple desserts have a few traps.
- Overmixing the batter can create cracks, mix just until combined.
- Baking too long can dry them out, remove when centers are slightly jiggly.
- Skipping the chill time results in a softer texture, patience pays off.
Nutrition Snapshot
Servings: 12 mini cheesecakes
Calories per serving: Approximately 210
Note: These are approximate values.
Timing at a Glance
Prep Time: 15 minutes
Cook Time: 20 minutes
Total Time: 35 minutes plus chilling time
Make Ahead and Storage Guide
These chill beautifully, which makes them perfect for planning ahead. You can prepare them a day in advance and store them covered in the refrigerator for up to 4 days. They also freeze well for up to 2 months. Thaw overnight in the fridge before serving.
Serving Ideas to Impress
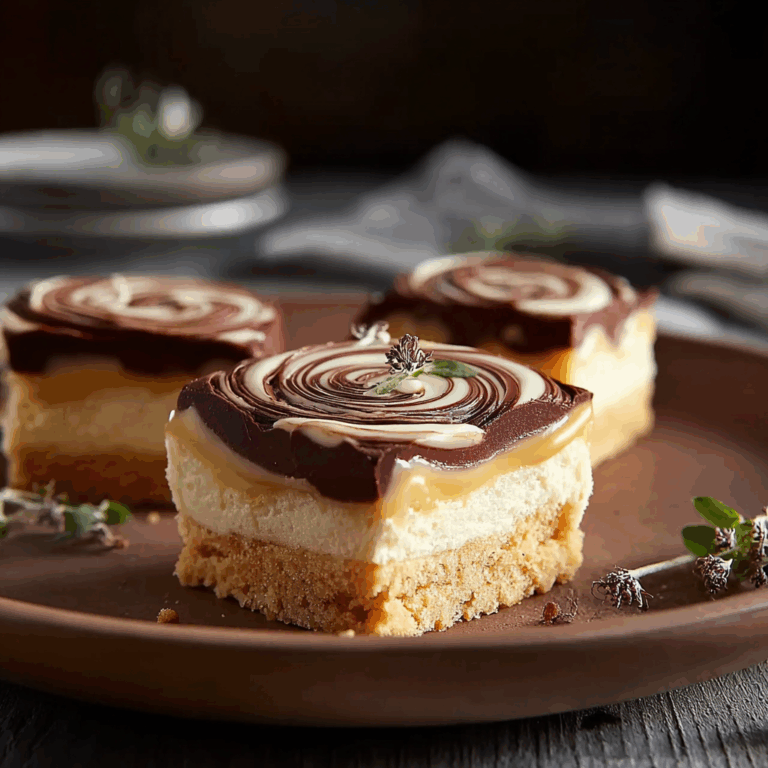
Serve them topped with fresh strawberries, a drizzle of chocolate, or a spoonful of blueberry compote. For a party platter, arrange them on a cake stand and let guests choose their own toppings.
Turn Leftovers Into Something New
Crumble leftover cheesecakes into parfait glasses with whipped cream and fruit. Blend one into a milkshake for an indulgent treat. Or freeze them and enjoy as a cool summer dessert.
Extra Tips for Even Better Results
Add a pinch of lemon zest to the filling for brightness. Warm your knife under hot water if you plan to slice one cleanly. And always store them covered to keep them from absorbing fridge odors.
Make Them Look Bakery Perfect
Use matching liners for a clean look. Add a single raspberry or mint leaf on top for a pop of color. Presentation makes a difference, especially when the texture is already flawless.
Fun Flavor Variations
Try swirling melted chocolate into the batter before baking. Add crushed cookies to the crust for extra crunch. Stir in a spoonful of peanut butter for richness. Or fold in finely chopped strawberries for a fruity twist.
FAQ’s
Q1: Can I use low fat cream cheese?
Yes, but the texture will be slightly less rich and creamy.
Q2: Why did my cheesecakes crack?
Usually from overmixing or overbaking. Mix gently and remove while centers are slightly jiggly.
Q3: Do I need a water bath?
No, that is the beauty of baking them in a muffin pan.
Q4: Can I double the recipe?
Absolutely, just bake in batches if needed.
Q5: How do I know they are done?
The edges should be set while the center has a slight wobble.
Q6: Can I make them crustless?
Yes, simply skip the crust and line the pan well.
Q7: How long should they chill?
At least 2 hours for best texture.
Q8: Can I add fruit inside the batter?
Yes, finely chopped fruit works best.
Q9: How do I remove them cleanly?
Use liners and let them chill fully before peeling.
Q10: Can I freeze them with toppings?
It is better to freeze plain and add toppings after thawing.
Conclusion
There is something deeply satisfying about pulling a tray of these Mini Cheesecakes from the oven and knowing each one is a little bundle of creamy happiness. They are simple, elegant, and endlessly customizable. Whether you serve them plain or dressed up, they never fail to impress. Go ahead and bake a batch, you might just find yourself making them again next week.
Print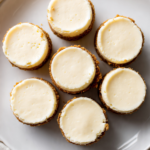
Mini Cheesecakes
- Total Time: 35 minutes plus 2 hours chilling
- Yield: 12 mini cheesecakes 1x
- Diet: Vegetarian
Description
Creamy, rich mini cheesecakes with a buttery graham cracker crust, baked in a muffin pan for perfectly portioned individual desserts. Smooth, lightly sweet, and incredibly easy to make, they are ideal for parties, holidays, or whenever you want a simple yet impressive treat.
Ingredients
- 1 cup (120 grams) graham cracker crumbs
- 2 tablespoons granulated sugar (for crust)
- 3 tablespoons (45 grams) unsalted butter, melted
- 16 ounces (450 grams) cream cheese, softened
- 1/2 cup (100 grams) granulated sugar (for filling)
- 1/4 cup (60 grams) sour cream
- 1 teaspoon vanilla extract
- 2 large eggs, room temperature
Instructions
- Preheat oven to 325 degrees F (160 degrees C) and line a 12 cup muffin pan with cupcake liners.
- In a bowl, mix graham cracker crumbs, 2 tablespoons sugar, and melted butter until evenly combined.
- Spoon about 1 tablespoon of the crust mixture into each liner and press down firmly to form the base.
- In a separate bowl, beat the cream cheese until smooth. Add 1/2 cup sugar and mix until creamy. Blend in sour cream and vanilla extract. Add eggs one at a time, mixing gently after each addition until just combined.
- Divide the filling evenly among the liners, filling almost to the top.
- Bake for 17 to 20 minutes, until the centers are set but still slightly jiggly.
- Turn off the oven and let cheesecakes cool inside with the door slightly open for 10 minutes. Transfer to a wire rack to cool completely, then refrigerate for at least 2 hours before serving.
Notes
- Make sure all dairy ingredients are at room temperature for a smooth filling.
- Do not overmix after adding the eggs to prevent cracks.
- Chill thoroughly for best texture and flavor.
- Top with fresh fruit, chocolate drizzle, or caramel before serving if desired.
- Prep Time: 15 minutes
- Cook Time: 20 minutes
- Category: Dessert
- Method: Baking
- Cuisine: American
Nutrition
- Serving Size: 1 mini cheesecake
- Calories: 210
- Sugar: 14g
- Sodium: 160mg
- Fat: 15g
- Saturated Fat: 9g
- Unsaturated Fat: 5g
- Trans Fat: 0g
- Carbohydrates: 16g
- Fiber: 0g
- Protein: 4g
- Cholesterol: 65mg
Keywords: mini cheesecakes, individual cheesecake, easy cheesecake dessert, graham cracker crust cheesecake, baked cheesecake cups