Blackout Cake
There is something almost dramatic about setting a Blackout Cake on the table. It is dark, intense, and unapologetically chocolate from top to bottom. The first time I baked it, I remember slicing through that thick layer of crumbs and watching the knife glide through soft cake and silky pudding. Trust me, you’re going to love this. It is rich without being heavy, indulgent without being complicated, and every bite feels like a little celebration.
Why This Chocolate Dream Wins Every Time
Some desserts whisper sweetly. This one makes a bold statement. From the deep cocoa aroma that fills your kitchen to the soft, melt-in-your-mouth crumb, this cake delivers pure chocolate satisfaction. It is the kind of dessert that makes guests pause mid-conversation just to savor another forkful. And honestly, that is exactly what we want.
A Slice of History in Every Bite
This beauty has roots in Brooklyn, where it was first created decades ago and quickly became a local legend. The name comes from the dark crumb coating that almost hides the cake beneath, like a sweet blackout. Over time, home bakers embraced it, adding their own touches while keeping that signature pudding filling and crumb finish. And now, we get to bring that tradition right into our kitchens.
What Makes This Cake So Reliable and Loved
Before we tie on our aprons, let me tell you why this one is a keeper.
Versatile: It works beautifully for birthdays, holidays, or even a cozy weekend treat. Dress it up or keep it simple.
Budget-Friendly: Most ingredients are pantry staples like flour, sugar, cocoa powder, and milk.
Quick and Easy: While it looks impressive, each step is straightforward and manageable.
Customizable: You can adjust the sweetness, deepen the chocolate flavor, or even add a hint of espresso.
Crowd-Pleasing: Chocolate lovers will be completely smitten, no convincing needed.
Make-Ahead Friendly: The flavors actually deepen after resting, making it perfect to prepare in advance.
Great for Leftovers: The texture stays moist, and slices taste even better the next day.
Pro Baker Secrets for Deep Flavor
Let me share a few insider tricks that make all the difference.
- Use high-quality unsweetened cocoa powder for a bold chocolate base.
- Bloom the cocoa in hot coffee to intensify the flavor.
- Do not overmix the batter once the flour is added, this keeps the crumb tender.
- Chill the pudding filling slightly before assembling so it spreads easily without running.
Essential Tools for a Smooth Bake
A few reliable tools will set you up for success.
9 inch Round Cake Pans: Ensure even layers and consistent baking.
Mixing Bowls: One for dry ingredients and one for wet keeps things organized.
Whisk: Perfect for blending cocoa and preventing lumps.
Rubber Spatula: Helps fold ingredients gently and scrape every bit of batter.
Offset Spatula: Makes spreading pudding and frosting smooth and effortless.
Ingredients That Build the Magic
Everything works together in perfect harmony here, creating layers of chocolate depth and creamy contrast.
- All Purpose Flour: 2 cups, gives structure and softness.
- Granulated Sugar: 2 cups, balances bitterness and keeps the cake moist.
- Unsweetened Cocoa Powder: 3/4 cup, forms the chocolate foundation.
- Baking Powder: 2 teaspoons, helps the cake rise evenly.
- Baking Soda: 1 1/2 teaspoons, adds lift and tenderness.
- Salt: 1 teaspoon, enhances overall flavor.
- Large Eggs: 2, provide richness and stability.
- Whole Milk: 1 cup, adds moisture.
- Vegetable Oil: 1/2 cup, keeps the crumb soft.
- Vanilla Extract: 2 teaspoons, rounds out the flavor.
- Hot Coffee: 1 cup, deepens the chocolate taste.
- Whole Milk for Pudding: 3 cups, base of the filling.
- Granulated Sugar for Pudding: 3/4 cup, sweetens the filling.
- Cornstarch: 1/4 cup, thickens the pudding.
- Unsweetened Cocoa Powder for Pudding: 1/2 cup, intensifies chocolate flavor.
- Egg Yolks: 3, create a silky texture.
- Unsalted Butter: 2 tablespoons, adds richness to the pudding.
Smart Swaps If You Need Them
Sometimes we improvise, and that is part of the fun.
Whole Milk: Use 2 percent milk if needed.
Vegetable Oil: Melted unsalted butter works well.
Hot Coffee: Hot water with a teaspoon of espresso powder.
All Purpose Flour: A good quality gluten free blend can substitute.
The Stars of the Show
Unsweetened Cocoa Powder: This is where the deep, slightly bitter chocolate note comes from. Choose a good one and you will taste the difference.
Hot Coffee: It does not make the cake taste like coffee. Instead, it amplifies the chocolate, making it richer and more complex.
Let’s Bake This Beauty Together
Now let’s dive into the process, step by step, so you feel confident from start to finish.
- Preheat Your Equipment: Preheat your oven to 350 degrees Fahrenheit. Grease and line two 9 inch round cake pans.
- Combine Ingredients: In a large bowl, whisk flour, sugar, cocoa powder, baking powder, baking soda, and salt. In another bowl, mix eggs, milk, oil, and vanilla. Slowly combine wet and dry ingredients, then stir in hot coffee until smooth.
- Prepare Your Cooking Vessel: Divide the batter evenly between the pans, smoothing the tops gently.
- Assemble the Dish: Bake for 30 to 35 minutes. Cool completely. Reserve one cake layer, crumble it finely for the topping.
- Cook to Perfection: For the pudding, whisk milk, sugar, cocoa powder, and cornstarch in a saucepan. Cook over medium heat until thickened. Temper egg yolks with a bit of hot mixture, then return to the pan. Cook briefly until silky. Stir in butter.
- Finishing Touches: Spread pudding between cake layers. Frost the outside lightly with extra pudding, then press cake crumbs all over the surface.
- Serve and Enjoy: Chill for at least 2 hours before slicing. Let me tell you, it is worth every bite.
A Symphony of Texture and Flavor
The crumb coating gives a delicate, almost sandy softness on the outside, while inside you get plush cake layers and creamy pudding. The cocoa brings gentle bitterness that balances the sweetness perfectly. As it rests, flavors deepen and become even more harmonious.
Helpful Tips for Chocolate Success
- Let the cake cool completely before assembling to prevent sliding layers.
- Stir pudding constantly to avoid lumps.
- Chill before slicing for clean, beautiful pieces.
Common Mistakes and How to Avoid Them
- Overbaking the cake can dry it out, check at the 30 minute mark.
- Skipping the crumb coating step takes away the classic look and texture.
- Pouring pudding while too hot can cause slipping, let it cool slightly first.
Nutrition Snapshot
Servings: 12
Calories per serving: 520
Note: These are approximate values.
Time Breakdown
Prep Time: 30 minutes
Cook Time: 35 minutes
Total Time: 1 hour 5 minutes
Plan Ahead and Store with Ease
You can bake the layers a day ahead and wrap them tightly. The assembled cake keeps well in the refrigerator for up to 4 days. For longer storage, freeze individual slices wrapped securely. Thaw overnight in the refrigerator for best texture.
Serving Ideas to Make It Shine
Serve slightly chilled with a glass of cold milk or a warm cup of coffee. Fresh berries on the side add a bright contrast. A small spoonful of whipped cream can lighten each bite beautifully.
Reinventing the Leftovers
Turn extra slices into cake parfaits layered with whipped cream. Crumble into ice cream for a chocolate explosion. Even cube it and fold into homemade trifle for something special.
Extra Touches for Even Better Results
Use room temperature eggs for smoother batter. Sift cocoa powder to avoid lumps. Trust your senses, the aroma will tell you when it is just right.
Presentation That Wows
Use a sharp knife wiped clean between cuts for neat slices. Serve on a white plate to let the dark color stand out. A light dusting of cocoa on the plate can add a simple yet elegant finish.
Fun Variations to Explore
Add a teaspoon of espresso powder to the batter for deeper flavor.
Fold mini chocolate chips into the pudding.
Add a thin layer of raspberry jam between layers for brightness.
Use dark cocoa powder for a nearly black appearance.
FAQ’s
Q1: Can I make this ahead of time?
Yes, and it actually tastes better the next day.
Q2: Can I freeze it?
Absolutely, wrap slices tightly and freeze up to 2 months.
Q3: Does it taste like coffee?
No, the coffee enhances chocolate flavor without being noticeable.
Q4: Can I use Dutch processed cocoa?
Yes, just ensure baking powder and soda quantities remain the same.
Q5: How do I get clean slices?
Chill well and wipe your knife between cuts.
Q6: Can I make it in one pan?
You can, but layering gives the classic look and texture.
Q7: What if my pudding is lumpy?
Whisk vigorously while cooking to smooth it out.
Q8: Can I reduce sugar?
You can reduce slightly, but it may affect texture.
Q9: How should I store leftovers?
Keep refrigerated in an airtight container.
Q10: Is this good for special occasions?
It is perfect for them, this one’s a total game changer.
Conclusion
Blackout Cake is bold, rich, and unforgettable. From its deep chocolate aroma to its creamy center and crumb coated finish, it delivers pure comfort in every slice. Gather your ingredients, preheat that oven, and dive in. Trust me, once you make it, it will become a favorite in your kitchen too.
Print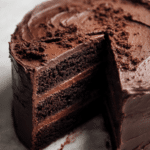
Blackout Cake
- Total Time: 1 hour 5 minutes
- Yield: 12 servings 1x
- Diet: Vegetarian
Description
A rich and indulgent chocolate blackout cake made with ultra-moist cocoa cake layers, silky homemade chocolate pudding filling, and finished with a signature coating of soft cake crumbs. Deep, bold chocolate flavor in every bite.
Ingredients
- 2 cups all purpose flour
- 2 cups granulated sugar
- 3/4 cup unsweetened cocoa powder
- 2 teaspoons baking powder
- 1 1/2 teaspoons baking soda
- 1 teaspoon salt
- 2 large eggs
- 1 cup whole milk
- 1/2 cup vegetable oil
- 2 teaspoons vanilla extract
- 1 cup hot coffee
- 3 cups whole milk (for pudding)
- 3/4 cup granulated sugar (for pudding)
- 1/4 cup cornstarch
- 1/2 cup unsweetened cocoa powder (for pudding)
- 3 egg yolks
- 2 tablespoons unsalted butter
Instructions
- Preheat oven to 350 degrees Fahrenheit. Grease and line two 9 inch round cake pans.
- In a large bowl whisk together flour, sugar, cocoa powder, baking powder, baking soda, and salt.
- In another bowl mix eggs, whole milk, vegetable oil, and vanilla extract.
- Gradually combine wet ingredients with dry ingredients. Stir in hot coffee until batter is smooth and thin.
- Divide batter evenly between prepared pans and smooth the tops.
- Bake for 30 to 35 minutes or until a toothpick inserted in the center comes out clean. Cool completely.
- Reserve one cooled cake layer and crumble it finely to use for the crumb coating.
- To prepare the pudding, whisk together 3 cups whole milk, 3/4 cup sugar, 1/2 cup cocoa powder, and cornstarch in a saucepan over medium heat.
- Cook while whisking constantly until thickened.
- Temper the egg yolks by slowly adding a small amount of hot pudding mixture into them, then return mixture to the saucepan and cook briefly until smooth and silky.
- Remove from heat and stir in butter until fully melted and incorporated. Allow pudding to cool slightly.
- Place one cake layer on a serving plate and spread a generous layer of pudding on top.
- Add the second cake layer and lightly frost the top and sides with remaining pudding.
- Press reserved cake crumbs all over the top and sides to fully coat the cake.
- Refrigerate for at least 2 hours before slicing and serving.
Notes
- Use high quality cocoa powder for the deepest chocolate flavor.
- Do not overmix the batter once combined to keep the cake tender.
- Chill thoroughly before slicing for clean, sharp cuts.
- The cake tastes even better the next day as flavors deepen.
- Prep Time: 30 minutes
- Cook Time: 35 minutes
- Category: Dessert
- Method: Baking
- Cuisine: American
Nutrition
- Serving Size: 1 slice
- Calories: 520
- Sugar: 48g
- Sodium: 320mg
- Fat: 24g
- Saturated Fat: 7g
- Unsaturated Fat: 15g
- Trans Fat: 0g
- Carbohydrates: 72g
- Fiber: 4g
- Protein: 8g
- Cholesterol: 95mg
Keywords: blackout cake, chocolate layer cake, chocolate pudding cake, brooklyn blackout cake, rich chocolate dessert