Tuna Salad
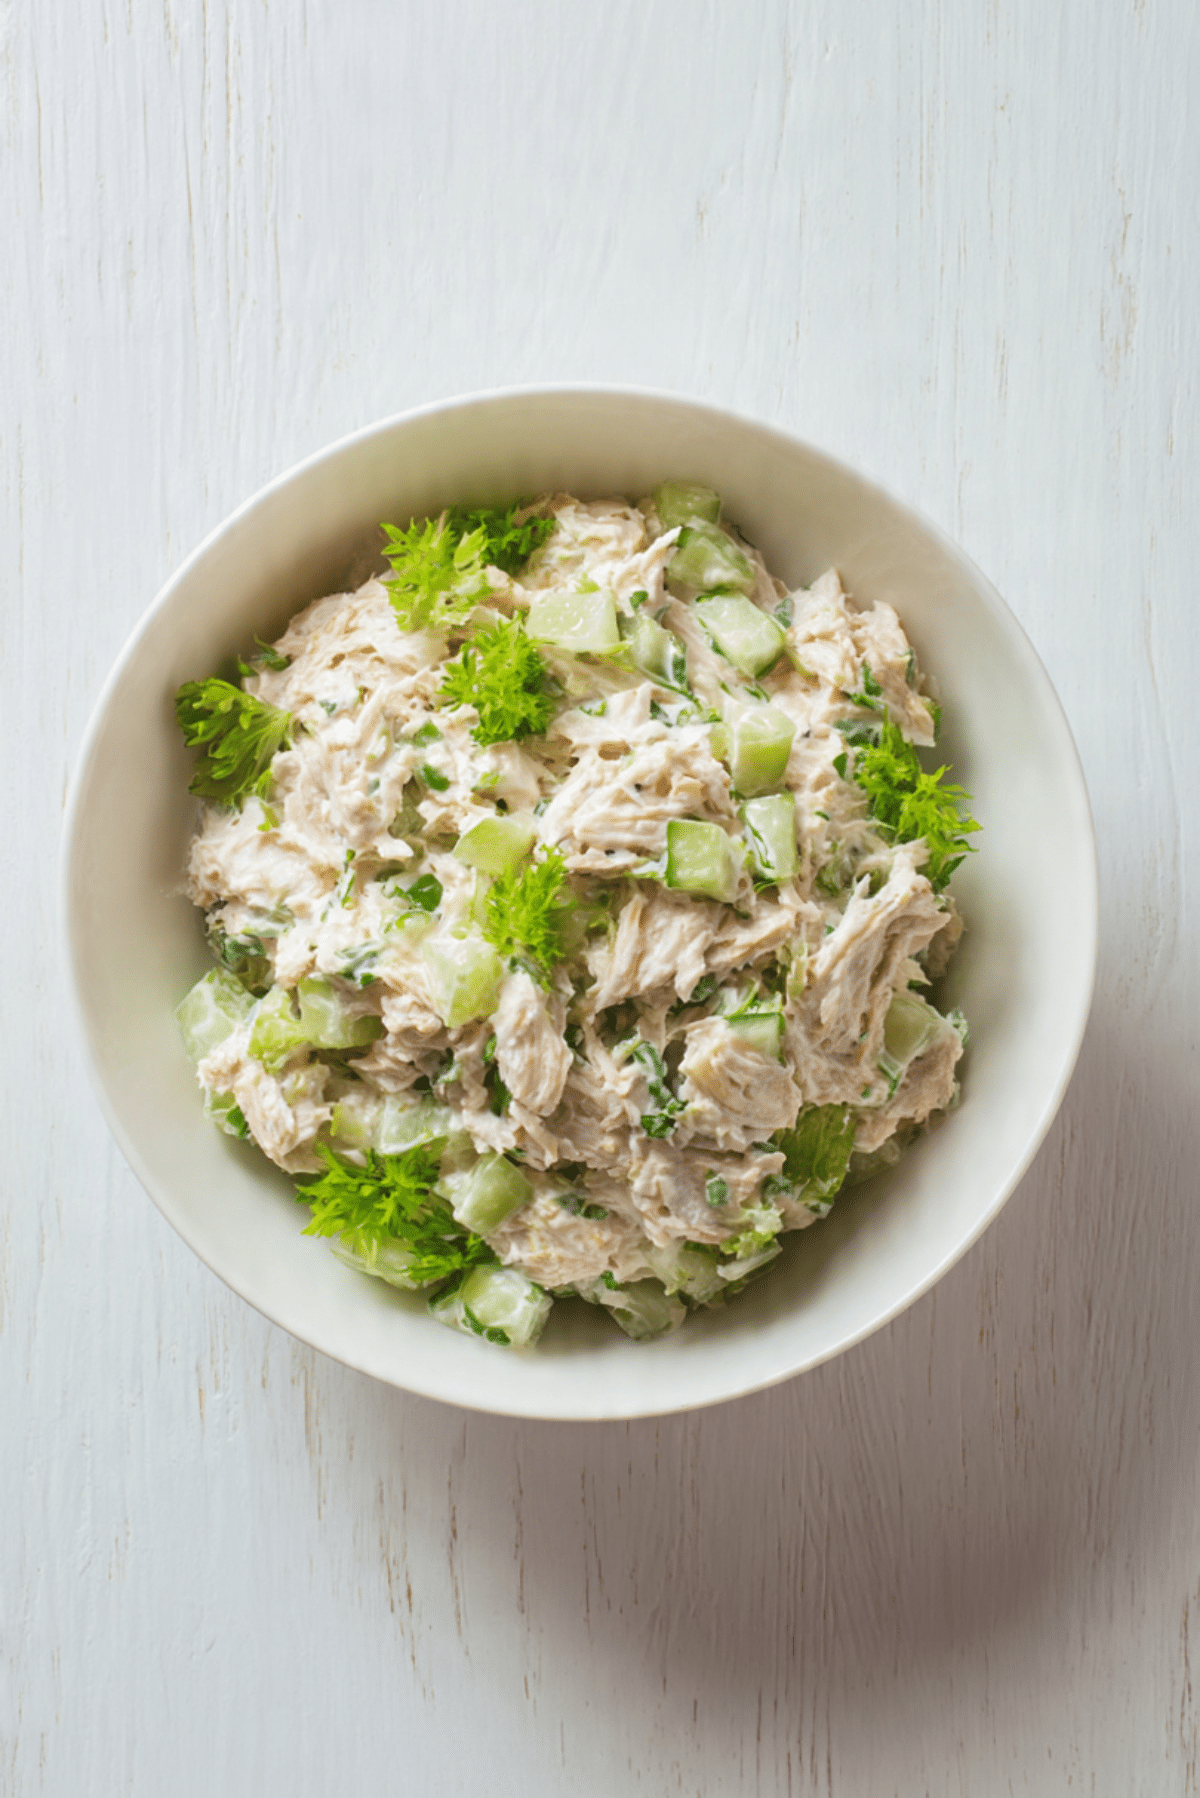
Tuna salad is one of those humble dishes that never really goes out of style. It is creamy, savory, and just a little bit tangy, with tender flakes of tuna folded into a silky dressing and dotted with crisp bits of celery. The smell alone, fresh and slightly briny, always takes me back to simple lunches that somehow felt completely satisfying. Trust me, you’re going to love this. It is comforting, quick, and surprisingly versatile.
Why This Classic Tuna Salad Still Wins Every Time
There is a reason this dish has been a staple in kitchens for decades. It is simple but packed with flavor. The contrast between creamy and crunchy makes every bite interesting, while the seasoning keeps it bright and balanced. Whether you pile it onto toasted bread, scoop it into lettuce cups, or enjoy it straight from the bowl, this one’s a total game-changer for quick meals.
A Little History Behind This Lunchtime Favorite
Tuna salad became popular in the United States in the early 20th century as a clever way to use canned tuna, which had just become widely available. Home cooks mixed it with mayonnaise and whatever fresh ingredients they had on hand. Over time, it turned into a beloved sandwich filling and picnic essential. Its simplicity is part of its charm, and that charm still holds strong today.
Why This Recipe Is So Appealing and Reliable
Versatile: Serve it in sandwiches, wraps, salads, or stuffed into avocados. It adapts beautifully.
Budget-Friendly: Canned tuna and pantry staples make it affordable and accessible.
Quick and Easy: Comes together in under 15 minutes with no cooking required.
Customizable: Add herbs, spices, or extra crunch to suit your taste.
Crowd-Pleasing: Familiar flavors make it a safe and satisfying choice.
Make-Ahead Friendly: Tastes even better after chilling for a bit.
Great for Leftovers: Keeps well in the fridge for easy meals later in the week.
Pro Tips for the Best Flavor and Texture
A few simple tricks make all the difference.
- Drain the tuna thoroughly to avoid a watery mixture.
- Use finely diced vegetables for even distribution.
- Chill the salad for at least 30 minutes before serving to let flavors meld.
- Taste and adjust seasoning at the end for balance.
Kitchen Tools You Will Need
Before we mix everything together, gather these essentials.
Mixing Bowl: Large enough to combine everything comfortably.
Fork: Perfect for flaking tuna evenly.
Sharp Knife: For finely dicing vegetables.
Measuring Spoons: Helps keep seasoning balanced.
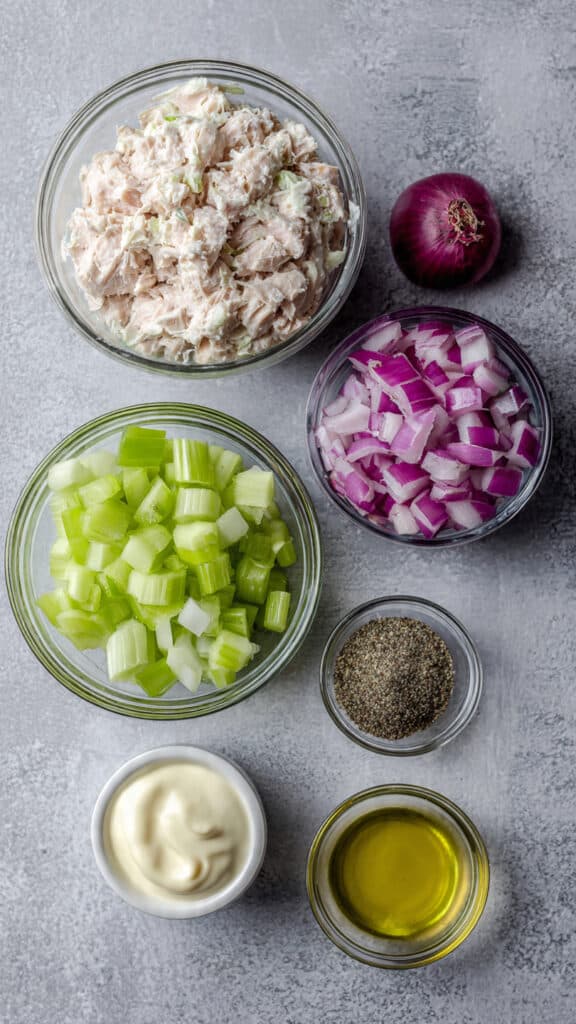
Ingredients You Will Need For Tuna Salad
Each ingredient plays a role in building that perfect creamy, crunchy balance.
- Canned Tuna: 2 cans, 5 ounces each, drained well, provides protein and savory flavor.
- Mayonnaise: 1/2 cup, creates the creamy base.
- Celery: 1/2 cup, finely diced, adds fresh crunch.
- Red Onion: 2 tablespoons, finely diced, gives a mild sharpness.
- Lemon Juice: 1 tablespoon, brightens the flavors.
- Salt: 1/4 teaspoon, enhances overall taste.
- Black Pepper: 1/4 teaspoon, freshly ground for subtle heat.
Easy Ingredient Substitutions
Mayonnaise: Use plain Greek yogurt for a lighter option.
Red Onion: Swap with green onions for a milder flavor.
Lemon Juice: Apple cider vinegar can work in a pinch.
Spotlight on the Key Ingredients
Canned Tuna: The heart of the dish, offering rich, savory depth and flaky texture.
Mayonnaise: Brings everything together with smooth creaminess that coats each bite perfectly.
Let’s Make This Tuna Salad Step by Step
Now let’s dive into the mixing process. It is simple, but technique matters.
Preheat Your Equipment: No preheating required for this no-cook recipe.
Combine Ingredients: In a large bowl, flake the drained tuna with a fork. Add mayonnaise, celery, red onion, lemon juice, salt, and black pepper.
Prepare Your Cooking Vessel: Ensure your mixing bowl is clean and dry for best texture.
Assemble the Dish: Gently fold everything together until evenly combined without overmixing.
Cook to Perfection: No cooking needed, but allow the mixture to rest in the refrigerator for at least 30 minutes.
Finishing Touches: Taste and adjust salt, pepper, or lemon juice as needed.
Serve and Enjoy: Serve chilled on bread, crackers, lettuce leaves, or over a bed of greens.
Texture and Flavor Development
The tuna stays tender and flaky while the mayonnaise wraps around it in a creamy coating. Celery adds that satisfying crunch, and lemon juice cuts through the richness with a bright, fresh note. The balance between creamy, crunchy, and tangy is what makes this dish so comforting.
Helpful Cooking Tips and Tricks
- Chill before serving for deeper flavor.
- Dice vegetables finely for better texture.
- Use high quality tuna for the best taste.
What to Avoid for the Best Results
- Do not skip draining the tuna thoroughly.
- Avoid overmixing, which can make the texture mushy.
- Do not overseason at the start, adjust gradually.
Nutrition Snapshot
Servings: 4
Calories per serving: 280
Note: These are approximate values.
Time Breakdown at a Glance
Prep Time: 15 minutes
Cook Time: 0 minutes
Total Time: 15 minutes
Make-Ahead and Storage Tips
Store in an airtight container in the refrigerator for up to 3 days. Stir before serving to refresh the texture. It is not ideal for freezing, as the mayonnaise can separate after thawing.
Serving Ideas to Keep It Exciting
Spoon it into toasted sandwich bread with crisp lettuce. Serve it over mixed greens for a light lunch. Fill halved avocados or tomatoes for an elegant presentation. You can even use it as a protein topping for baked potatoes.
Creative Leftover Transformations
Turn it into a tuna melt by spreading it on bread and topping with cheese, then baking until bubbly. Mix leftovers into cooked pasta for a quick tuna pasta salad. Use it as a filling for wraps with fresh greens.
Extra Tips for Even Better Flavor
Let the flavors sit together in the fridge before serving. Add a sprinkle of fresh herbs like parsley or dill for brightness. A small pinch of paprika can add subtle warmth.
Make It a Showstopper
Serve it in a chilled bowl lined with crisp lettuce leaves. Garnish with a thin lemon slice and a sprinkle of freshly cracked black pepper. Presentation may be simple, but the flavors speak loudly.
Variations to Try
- Add chopped pickles or relish for extra tang.
- Stir in chopped hard boiled eggs for added richness.
- Mix in a spoonful of Dijon mustard for depth.
- Add diced apples for a sweet crunch contrast.
- Sprinkle in fresh dill for a bright herbal finish.
FAQ’s
1. Can I use tuna packed in oil?
Yes, just drain it well for the best texture.
2. How long does it last in the fridge?
Up to 3 days in an airtight container.
3. Can I make it dairy free?
It already is dairy free if using traditional mayonnaise.
4. Is it healthy?
It is high in protein and can be part of a balanced meal.
5. Can I freeze it?
Freezing is not recommended due to texture changes.
6. What type of tuna works best?
Solid white albacore or chunk light both work well.
7. Can I add herbs?
Absolutely, parsley or dill are great options.
8. Why is my salad watery?
The tuna may not have been drained thoroughly.
9. Can I reduce calories?
Use Greek yogurt in place of some or all of the mayonnaise.
10. What bread pairs best?
Whole grain, sourdough, or soft sandwich bread all work beautifully.
Conclusion
Tuna salad is simple, satisfying, and endlessly adaptable. With creamy dressing, tender flakes of tuna, and just the right crunch, it turns everyday ingredients into something special. Once you make it this way, you will keep coming back to it again and again.
Print
Tuna Salad
- Total Time: 15 minutes
- Yield: 4 servings
- Diet: Low Calorie
Description
A creamy and flavorful tuna salad made with tender flakes of tuna, crisp celery, and a bright touch of lemon, perfect for sandwiches, wraps, or light lunches
Ingredients
- Canned Tuna: 2 cans, 5 ounces each, drained well
- Mayonnaise: 1/2 cup
- Celery: 1/2 cup, finely diced
- Red Onion: 2 tablespoons, finely diced
- Lemon Juice: 1 tablespoon
- Salt: 1/4 teaspoon
- Black Pepper: 1/4 teaspoon, freshly ground
Instructions
- Preheat Your Equipment: No preheating required for this no-cook recipe
- Combine Ingredients: In a large bowl, flake the drained tuna with a fork. Add mayonnaise, celery, red onion, lemon juice, salt, and black pepper
- Prepare Your Cooking Vessel: Ensure your mixing bowl is clean and dry
- Assemble the Dish: Gently fold everything together until evenly combined without overmixing
- Cook to Perfection: No cooking needed, but refrigerate for at least 30 minutes to allow flavors to blend
- Finishing Touches: Taste and adjust seasoning if needed
- Serve and Enjoy: Serve chilled on bread, crackers, lettuce leaves, or over greens
Notes
- Drain tuna thoroughly to prevent watery texture
- Chill before serving for best flavor
- Dice vegetables finely for even texture
- Stir gently to keep tuna flakes intact
- Prep Time: 15 minutes
- Cook Time: 0 minutes
- Category: Lunch
- Method: No-Cook
- Cuisine: American
Nutrition
- Serving Size: 1/4 of recipe
- Calories: 280
- Sugar: 1g
- Sodium: 480mg
- Fat: 22g
- Saturated Fat: 3g
- Unsaturated Fat: 17g
- Trans Fat: 0g
- Carbohydrates: 2g
- Fiber: 0g
- Protein: 20g
- Cholesterol: 45mg
Keywords: tuna salad, easy tuna recipe, creamy tuna, quick lunch idea, classic tuna salad