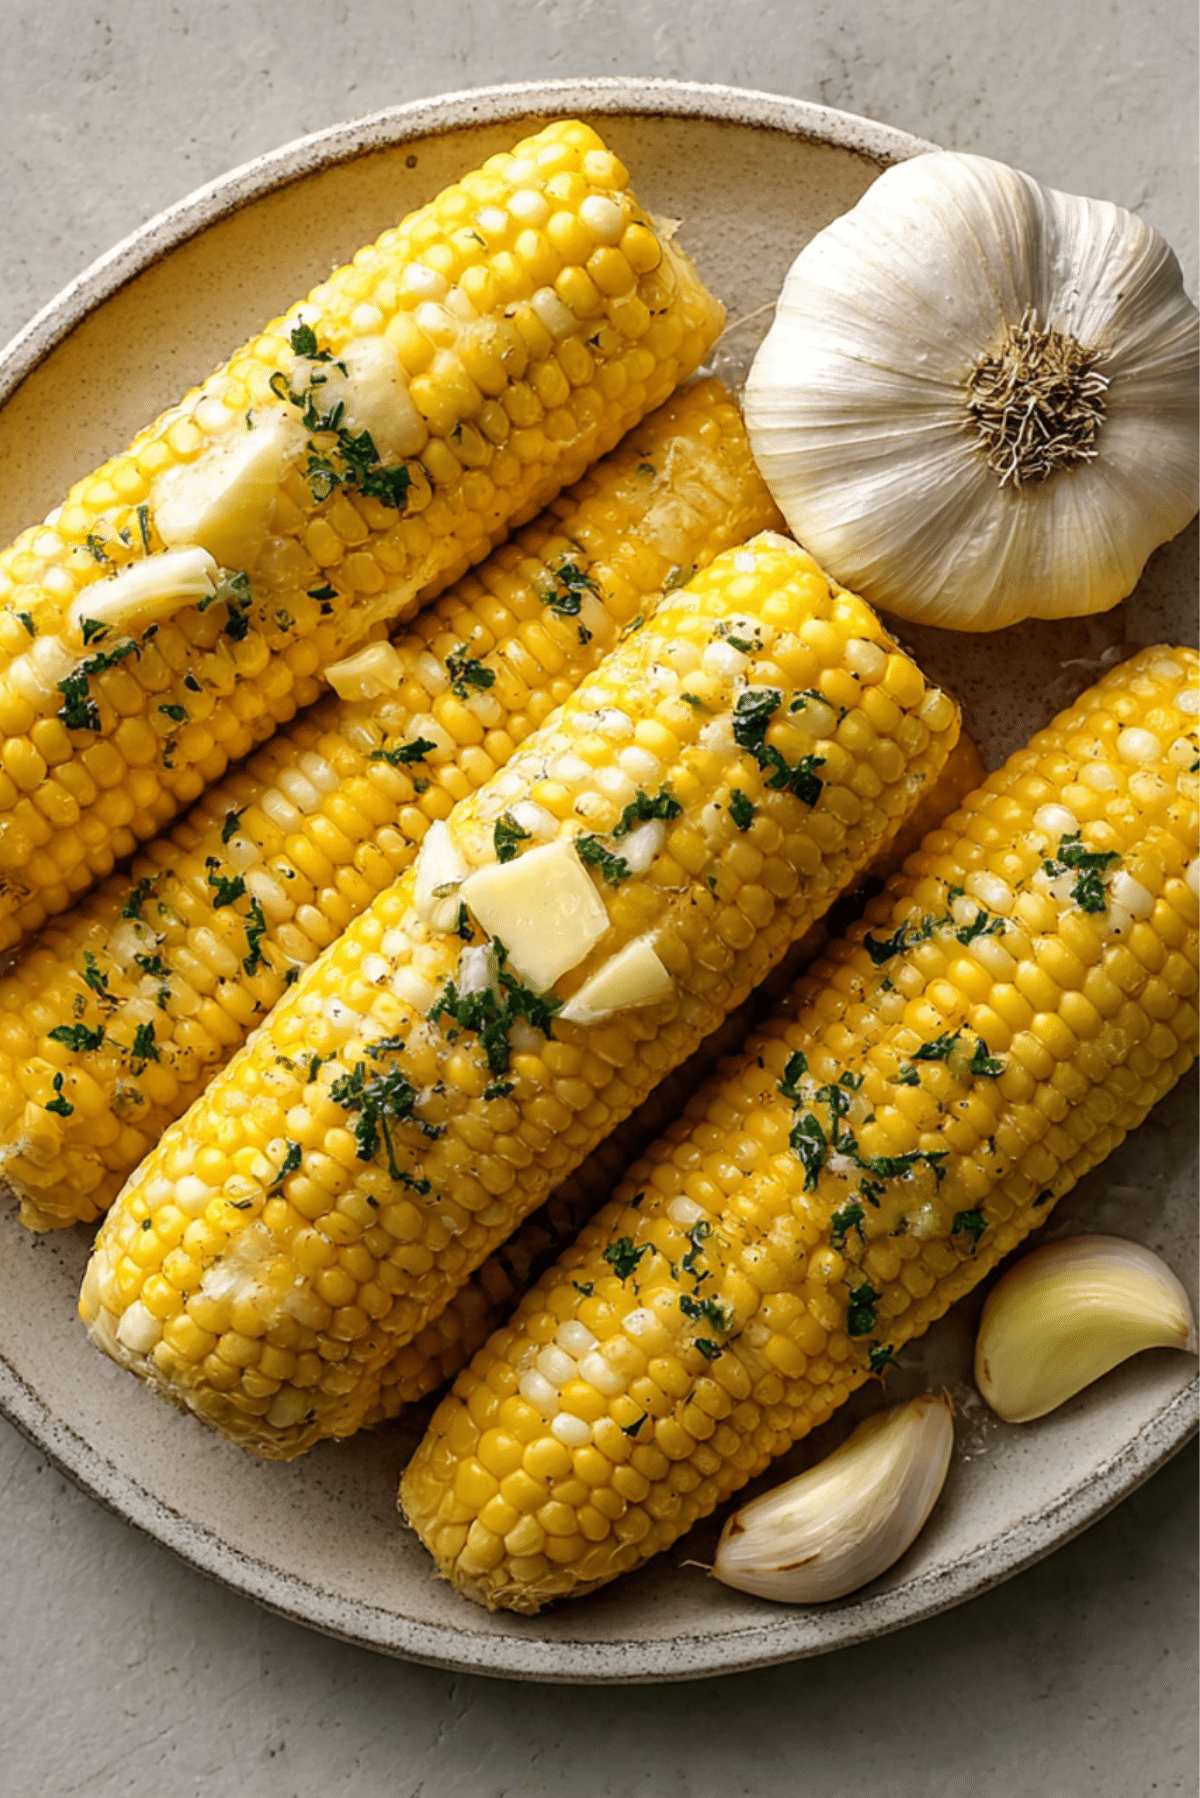
Butter Bath Corn
There’s something undeniably comforting about buttery, tender corn on the cob that melts in your mouth with every bite. Now imagine that same cob, infused with garlic, herbs, and creaminess that seeps into every kernel. That’s what butter bath corn is all about. It’s not just a side dish, it’s a scene-stealer at any summer meal or cozy fall dinner.
Behind the Recipe
It all started on a hot July afternoon, standing barefoot on my porch with fresh ears of corn in hand. The grill was already occupied, and I wanted something indulgent and easy. Inspired by an old Southern trick I’d once heard—bathing corn in butter—I decided to give it a twist. A few cloves of garlic, a splash of milk, and handfuls of fresh herbs later, this butter bath corn recipe was born. Now it’s a staple every time corn is in season.
Recipe Origin or Trivia
Butter bath corn may not be a household name everywhere, but its roots lie in Southern cooking traditions where milk and butter are often used to tenderize and flavor vegetables. Corn, being a cherished summer crop in the South and Midwest, often gets the royal treatment with additions like cream, butter, and herbs. The idea is to gently simmer the corn rather than boil it aggressively, preserving its sweetness and infusing it with extra flavor.
Why You’ll Love Butter Bath Corn
This recipe isn’t just simple, it’s deeply satisfying. Here’s why it’s going to become a favorite:
Versatile: Pairs beautifully with grilled meats, sandwiches, or even a holiday spread.
Budget-Friendly: Corn on the cob is inexpensive and plentiful in season, and the rest are pantry staples.
Quick and Easy: Just simmer and soak—no grilling, no fuss.
Customizable: Use your favorite herbs, swap dairy if needed, and make it your own.
Crowd-Pleasing: This is one of those dishes everyone at the table will rave about.
Make-Ahead Friendly: Keep it warm in the butter bath until serving time.
Great for Leftovers: Cut the kernels off and toss into salads, pasta, or soups.
Chef’s Pro Tips for Perfect Results
Want your butter bath corn to be unforgettable? Here’s what I’ve learned:
- Use the freshest corn you can find—those kernels should feel plump and juicy.
- Don’t skip the milk. It gives a creamy, sweet flavor that water alone can’t.
- Let the corn bathe longer than you think—extra time means more flavor.
- Add whole garlic cloves and herb sprigs rather than minced for a mellow infusion.
- Keep the heat low to avoid curdling the milk and to gently coax out sweetness.
Kitchen Tools You’ll Need
You don’t need much to make this dish shine. Just a few kitchen staples:
Large Pot: Big enough to hold multiple ears of corn comfortably.
Tongs: To safely remove the corn from the hot butter bath.
Knife: For trimming the corn ends if needed.
Cutting Board: To prep garlic and herbs.
Ingredients in Butter Bath Corn
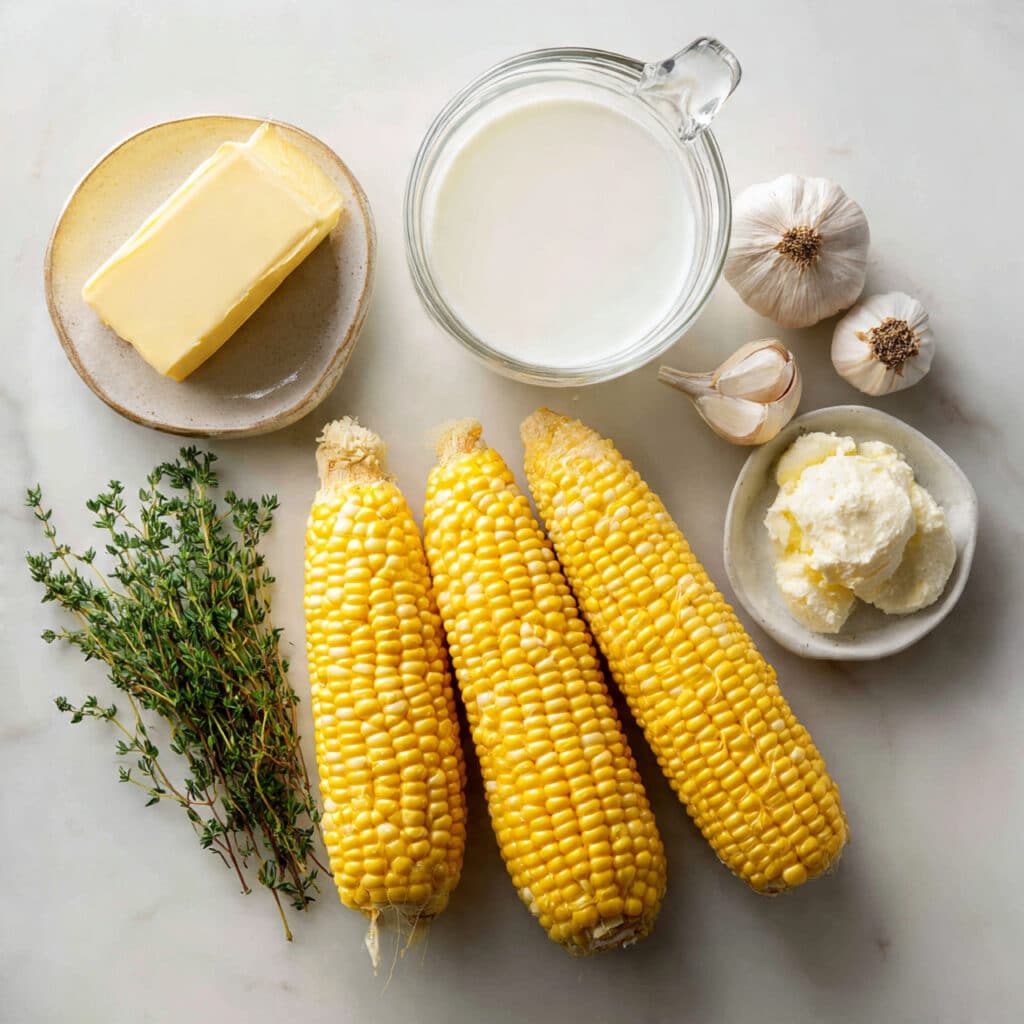
This recipe brings together simple ingredients that work magic when combined:
- Fresh Corn on the Cob: 6 ears, husked and cleaned. The star of the show, naturally sweet and juicy.
- Unsalted Butter: 1 stick (8 tablespoons). Adds richness and that classic buttered corn flavor.
- Whole Milk: 2 cups. Makes the bath creamy and enhances the corn’s sweetness.
- Water: 2 cups. Helps create enough volume for the bath without overpowering the milk.
- Garlic Cloves: 4, peeled and smashed. Infuses the bath with mellow, savory depth.
- Fresh Thyme Sprigs: 4 sprigs. Adds earthy fragrance that pairs beautifully with corn.
- Kosher Salt: 1 tablespoon. Brings out the natural flavor of the corn.
- Freshly Ground Black Pepper: To taste. Adds a hint of heat and balance.
Ingredient Substitutions
Don’t have everything on hand? No problem—try these swaps:
Whole Milk: Use half-and-half or a mix of cream and water. For non-dairy, oat milk works well.
Unsalted Butter: Use salted butter and adjust added salt accordingly.
Thyme: Try rosemary, parsley, or dill for a different flavor profile.
Garlic: Shallots or a dash of garlic powder can stand in.
Ingredient Spotlight
Corn on the Cob: Look for bright green husks, tight rows of kernels, and juicy ends. The fresher the corn, the sweeter and more tender it’ll be.
Butter: Choose a high-quality butter if you can. It melts into the milk and coats each kernel for that lush, creamy texture.
Instructions for Making Butter Bath Corn
This recipe couldn’t be easier, and the results speak for themselves. Here’s how to do it:
- Preheat Your Equipment: Set your large pot on the stovetop over medium heat.
- Combine Ingredients: Add the butter, milk, water, garlic, thyme, salt, and pepper to the pot. Stir gently as the butter melts.
- Prepare Your Cooking Vessel: Once the mixture is steamy and the butter is fully melted, reduce heat to low.
- Assemble the Dish: Add the corn to the pot, making sure it’s mostly submerged. You can gently rotate them if needed.
- Cook to Perfection: Simmer on low for 20–25 minutes. Do not boil. Let the corn slowly soak up all that buttery, herby goodness.
- Finishing Touches: Remove corn with tongs and let any excess drip off. Optionally brush with extra butter and sprinkle with fresh herbs.
- Serve and Enjoy: Plate the corn warm and serve immediately for best flavor.
Texture & Flavor Secrets
The corn becomes incredibly tender without turning mushy. Each kernel holds its shape but bursts with buttery, garlicky sweetness. The milk and butter give it a creamy backdrop, while herbs and garlic offer subtle savory notes. The end result is a juicy, flavorful bite that keeps you coming back.
Cooking Tips & Tricks
Let’s make this even easier with a few extra pointers:
- Keep the heat low and steady to avoid curdling the milk.
- Use fresh herbs for the most vibrant flavor.
- You can leave the corn in the bath on the lowest heat until ready to serve.
- Don’t overfill the pot—give the corn room to move a bit.
What to Avoid
Here’s what to steer clear of for perfect results every time:
- Boiling the bath. This toughens the corn and curdles the milk.
- Using skim milk. It lacks the richness that makes this dish special.
- Overcooking. Too long and the corn loses its pop.
- Skipping salt. It really brings everything together.
Nutrition Facts
Servings: 6
Calories per serving: 215
Note: These are approximate values.
Preparation Time
Prep Time: 10 minutes
Cook Time: 25 minutes
Total Time: 35 minutes
Make-Ahead and Storage Tips
If you’re prepping for a crowd, this dish is a lifesaver. You can keep the corn warm in the butter bath for up to an hour on very low heat. Leftovers store well in an airtight container for up to 3 days. Reheat gently on the stovetop in some of the reserved butter bath or microwave with a pat of butter.
How to Serve Butter Bath Corn
It pairs wonderfully with grilled chicken, burgers, barbecue ribs, or even a veggie-packed summer salad. For a party, serve it with lime wedges and a sprinkle of chili powder or cotija cheese for a street corn vibe.
Creative Leftover Transformations
Chop off the kernels and:
- Toss into a cold pasta salad with cherry tomatoes and feta.
- Stir into cheesy grits or polenta.
- Add to a corn chowder for extra body and sweetness.
Additional Tips
- For an extra boost, drizzle a touch of hot honey over the top before serving.
- Want to make it feel fancy? Sprinkle microgreens or edible flowers before plating.
- Leftover butter bath liquid can be used to simmer green beans or potatoes.
Make It a Showstopper
Presentation matters. Serve the corn in a shallow bowl with a few floating herbs from the bath, and maybe a drizzle of browned butter. A sprinkle of flaky salt just before serving adds sparkle and crunch.
Variations to Try
- Spicy Butter Bath Corn: Add crushed red pepper flakes or a dash of hot sauce to the bath.
- Lemon Herb: Add lemon zest and juice to the mix for a citrusy pop.
- Cheesy Finish: After cooking, sprinkle with grated parmesan or crumbled feta.
- Mexican Style: Top with mayo, lime juice, cotija, and chili powder after cooking.
- Garlic-Lover’s Edition: Double the garlic and mash a few cloves into a paste to spread on top before serving.
FAQ’s
Q1: Can I make this recipe dairy-free?
Yes, use plant-based butter and unsweetened oat milk for a creamy texture.
Q2: Can I grill the corn afterward for char?
Absolutely. Finish on a hot grill for 2–3 minutes per side for a smoky flavor.
Q3: How do I know when the corn is done?
It should be bright yellow and tender when pierced with a fork.
Q4: Can I use frozen corn?
Yes, but fresh corn will always give the best flavor and texture.
Q5: Do I need to cover the pot?
No, just simmer uncovered on low heat.
Q6: Can I reuse the butter bath?
If not scorched, you can use it again within a day for reheating or vegetables.
Q7: What herbs go best with this?
Thyme, rosemary, parsley, and dill all pair beautifully.
Q8: Is this recipe kid-friendly?
Definitely. Kids love the sweetness and soft texture.
Q9: How do I cut the kernels off neatly?
Stand the cob in a bowl and slice downward with a sharp knife.
Q10: Can I make this ahead for a picnic?
Yes. Cook in advance and serve warm or cold. Wrap in foil to keep warm.
Conclusion
Butter bath corn isn’t just corn—it’s a celebration of simplicity, flavor, and comfort in every buttery bite. Whether it’s your backyard barbecue or a weeknight dinner, trust me, this one’s a total game-changer. The kind of dish that turns something ordinary into something unforgettable.
Print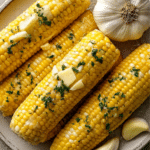
Butter Bath Corn
- Total Time: 35 minutes
- Yield: 6 servings 1x
- Diet: Vegetarian
Description
This butter bath corn is simmered in a creamy mixture of butter, milk, garlic, and herbs for ultimate flavor. Each bite is juicy, tender, and rich with savory goodness.
Ingredients
- 6 ears Fresh Corn on the Cob, husked and cleaned
- 8 tablespoons Unsalted Butter
- 2 cups Whole Milk
- 2 cups Water
- 4 Garlic Cloves, peeled and smashed
- 4 Fresh Thyme Sprigs
- 1 tablespoon Kosher Salt
- Freshly Ground Black Pepper, to taste
Instructions
- Set a large pot on the stovetop over medium heat.
- Add butter, milk, water, garlic, thyme, salt, and pepper to the pot. Stir as butter melts.
- Reduce heat to low once the mixture is hot and steamy.
- Add the corn, ensuring it’s mostly submerged. Rotate if needed.
- Simmer on low for 20–25 minutes. Do not boil.
- Remove corn with tongs, letting excess liquid drip off.
- Brush with extra butter and sprinkle herbs if desired. Serve warm.
Notes
- Use fresh corn for the best flavor and texture.
- Do not boil the mixture to avoid curdling the milk.
- Leftovers can be stored in an airtight container for up to 3 days.
- Prep Time: 10 minutes
- Cook Time: 25 minutes
- Category: Side Dish
- Method: Simmering
- Cuisine: American
Nutrition
- Serving Size: 1 ear
- Calories: 215
- Sugar: 6g
- Sodium: 490mg
- Fat: 13g
- Saturated Fat: 8g
- Unsaturated Fat: 4g
- Trans Fat: 0g
- Carbohydrates: 22g
- Fiber: 2g
- Protein: 4g
- Cholesterol: 35mg
Keywords: butter bath corn, summer side dish, corn on the cob, herbed corn, creamy corn recipe