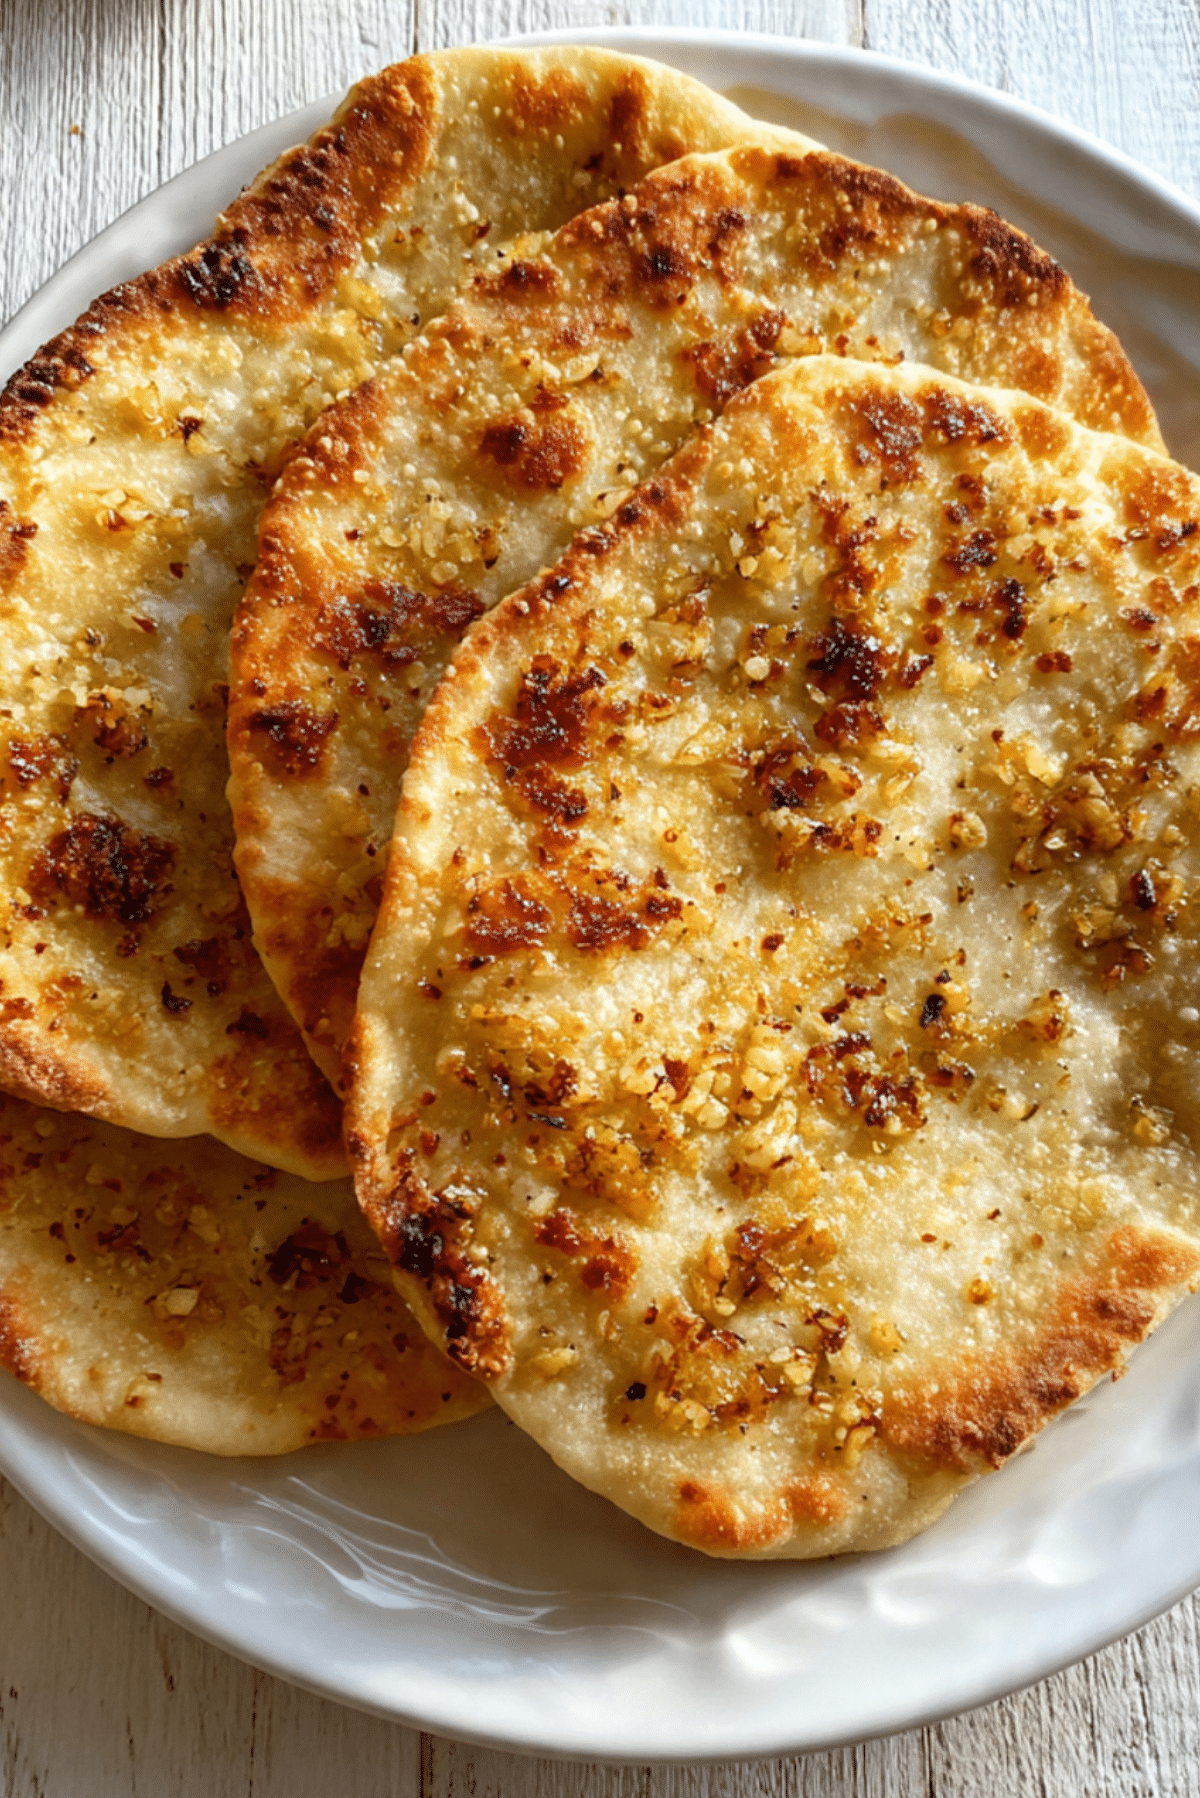
Crispy Garlic Pita Toasts
Picture this: a warm kitchen filled with the irresistible aroma of toasted garlic and golden bread, the kind of smell that makes you instantly hungry. Crispy Garlic Pita Toasts are one of those snackable treasures that never disappoint. Crunchy, fragrant, and just the right amount of salty, they make the perfect companion for dips, soups, or even as a quick nibble when hunger strikes.
Behind the Recipe
This recipe was born out of necessity. It was one of those evenings when I had leftover pita, a knob of butter, and a few cloves of garlic begging to be used. The result? A crisp, garlicky masterpiece that quickly became a staple in my kitchen. These toasts are simple, but their flavor is anything but. Every time I make them, it takes me back to cozy nights with warm bowls of hummus and laughter echoing through the room.
Recipe Origin or Trivia
Pita bread has roots that stretch across the Middle East and the Mediterranean, and has been a staple for centuries. Its pocketed shape makes it perfect for stuffing, dipping, or crisping up like we do here. Toasting pita into chips or crisps is common in dishes like Fattoush, a Levantine salad that uses toasted or fried pita. Turning pita into garlic toast is a modern twist, combining the traditional bread with the universal love for garlic toast.
Why You’ll Love Crispy Garlic Pita Toasts
This little recipe packs a lot of reasons to love it.
Versatile: Enjoy them as chips with dips, serve alongside soups, or crush them into salads for crunch.
Budget-Friendly: Uses simple pantry ingredients and leftover pita. Nothing goes to waste.
Quick and Easy: From prep to plate in under 20 minutes. No fuss, just flavor.
Customizable: Add herbs, spices, or cheese to make it your own.
Crowd-Pleasing: Perfect for parties, game nights, or even as a lunchbox snack.
Make-Ahead Friendly: They stay crispy for days when stored right.
Great for Leftovers: Revive old pita into something amazing.
Chef’s Pro Tips for Perfect Results
Want ultra-crispy, flavorful pita toasts? Here’s how to master them:
- Use day-old pita: Slightly dried-out pita toasts better than fresh.
- Don’t skimp on garlic: Mix fresh minced garlic with the oil for punchy flavor.
- Bake evenly: Spread the pita slices in a single layer, not overlapping.
- Watch the edges: They toast faster than the centers.
- Let them cool: They crisp up more as they sit.
Kitchen Tools You’ll Need
To make these toasty delights, your kitchen doesn’t need to be fancy.
Sharp Knife or Pizza Cutter: To slice the pita into uniform pieces.
Mixing Bowl: For tossing pita with the garlic oil mixture.
Baking Sheet: Large enough to lay the pieces flat for even toasting.
Pastry Brush (Optional): For brushing the oil mixture evenly.
Oven: Set to the right temperature to get that golden crisp.
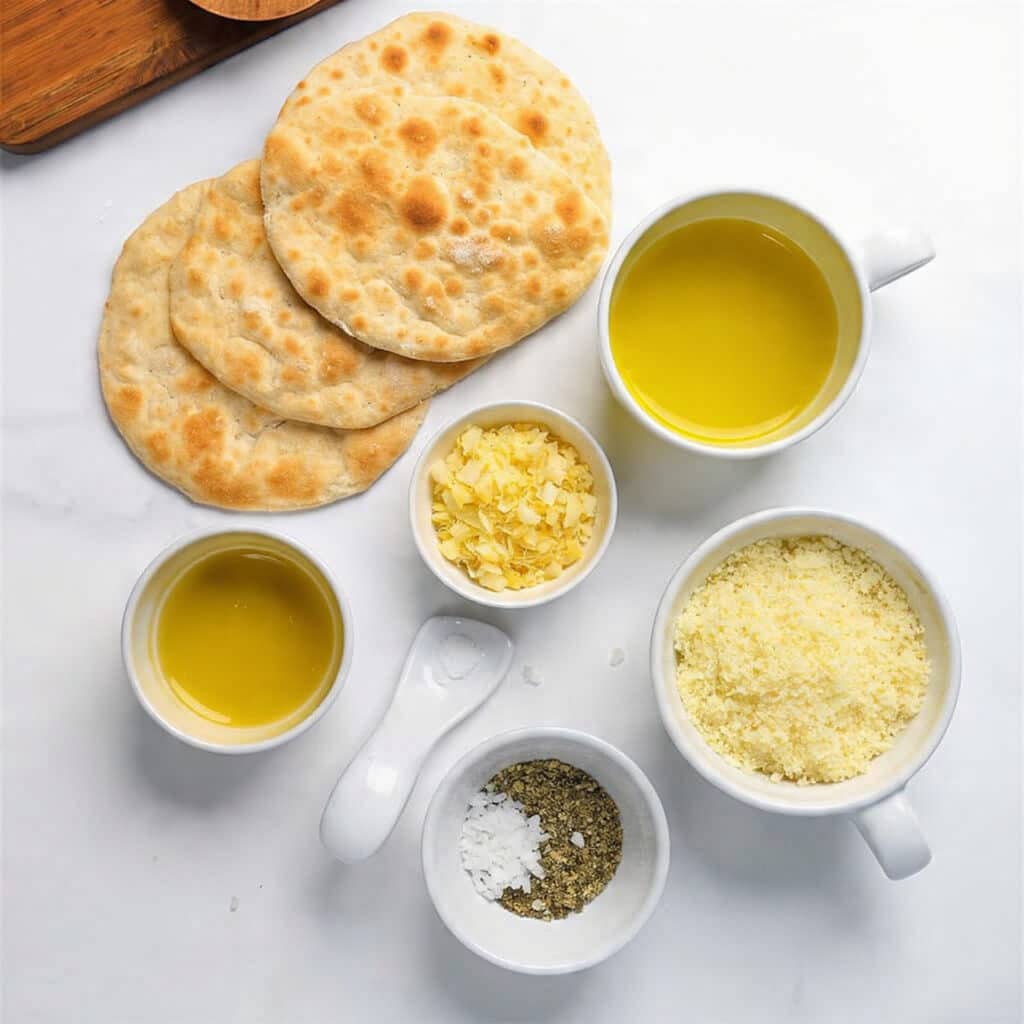
Ingredients in Crispy Garlic Pita Toasts
The beauty of this recipe is how a few simple ingredients come together in the tastiest way.
- Pita Bread: 4 large rounds, cut into triangles. Acts as the base and crisps beautifully in the oven.
- Olive Oil: 4 tablespoons, helps achieve that golden, crunchy texture.
- Fresh Garlic: 3 cloves, minced. Adds bold, savory depth.
- Salt: 1 teaspoon, to balance and enhance the garlic flavor.
- Dried Oregano (Optional): 1 teaspoon, adds a Mediterranean flair.
- Grated Parmesan (Optional): 2 tablespoons, for a cheesy twist.
Ingredient Substitutions
Got a missing item? Here are easy swaps.
Olive Oil: Use melted butter or avocado oil.
Fresh Garlic: Garlic powder in a pinch, about 1 teaspoon.
Pita Bread: Tortilla or flatbread slices work too.
Parmesan: Try Pecorino or nutritional yeast for a dairy-free option.
Oregano: Use thyme, basil, or Italian seasoning instead.
Ingredient Spotlight
Pita Bread: This flatbread is naturally thin and airy, which makes it perfect for crisping. When toasted, it becomes delightfully crunchy while still light.
Fresh Garlic: Nothing beats the aroma and flavor of fresh minced garlic, especially when it infuses into oil and then bakes into bread.
Instructions for Making Crispy Garlic Pita Toasts
Making these is as satisfying as eating them. Here are the steps to get that perfect golden crunch.
- Preheat Your Equipment:
Preheat your oven to 375°F (190°C). Line a baking sheet with parchment paper for easier cleanup. - Combine Ingredients:
In a small bowl, mix olive oil, minced garlic, salt, and any optional herbs or cheese. - Prepare Your Cooking Vessel:
Spread your sliced pita triangles in a large mixing bowl and drizzle the garlic oil mixture over them. Toss gently to coat each piece evenly. - Assemble the Dish:
Arrange the pita pieces in a single layer on the prepared baking sheet. Make sure they don’t overlap. - Cook to Perfection:
Bake for 10 to 12 minutes, flipping halfway through, until edges are golden and crisp. - Finishing Touches:
Remove from oven and let cool for 5 minutes. The toasts will continue to crisp as they cool. - Serve and Enjoy:
Enjoy warm or at room temp. Perfect on their own or dipped in hummus, tzatziki, or soup.
Texture & Flavor Secrets
It’s all about contrast here. You get a shatteringly crisp bite with every piece, while the garlic brings deep, savory notes. The olive oil makes them rich and satisfying, and a hint of salt pulls it all together. If you add Parmesan, expect a nutty, cheesy finish that lingers deliciously.
Cooking Tips & Tricks
Here’s how to make these even better:
- Bake on convection if your oven has it for extra crispiness.
- Double the batch. They vanish fast.
- Add a pinch of chili flakes to the oil for a spicy kick.
What to Avoid
Avoid these common mistakes:
- Overcrowding the pan. They’ll steam instead of crisp.
- Using too much oil. It can make them greasy instead of crunchy.
- Baking at too low a temperature. They need high heat to crisp up properly.
Nutrition Facts
Servings: 6
Calories per serving: 190
Note: These are approximate values.
Preparation Time
Prep Time: 5 minutes
Cook Time: 12 minutes
Total Time: 17 minutes
Make-Ahead and Storage Tips
These are a meal-prepper’s dream. You can toast them ahead of time and store them in an airtight container at room temperature for up to 5 days. To re-crisp, pop them back into a 350°F oven for 2 to 3 minutes. They also freeze well in a zip bag for up to a month.
How to Serve Crispy Garlic Pita Toasts
They’re excellent paired with dips like hummus, baba ganoush, or creamy feta. You can also crumble them into soups, break them over salads like croutons, or enjoy them solo with a glass of something bubbly.
Creative Leftover Transformations
If you have some left (doubtful!), here’s how to reinvent them:
- Crush and use as a topping on mac and cheese.
- Turn them into breadcrumbs in a food processor.
- Layer in a savory yogurt parfait with herbs and tomatoes.
Additional Tips
- Add a sprinkle of za’atar or smoked paprika before baking for flavor boosts.
- Use flavored oil like garlic-infused or chili oil for fun variations.
- Let kids brush the pita with oil before baking to get them involved.
Make It a Showstopper
Serve the toasts in a rustic basket lined with parchment and a tiny bowl of herbed oil or dip. Garnish with a few sprigs of fresh thyme or parsley for color contrast. It turns snack into spectacle.
Variations to Try
- Cheesy Pita Chips: Sprinkle shredded mozzarella or cheddar before baking.
- Spicy Garlic Toasts: Add cayenne or chili powder to the oil mix.
- Herb-Lovers Version: Add fresh chopped rosemary or thyme.
- Lemon Zest Infused: Add zest to the oil for a citrusy pop.
- Everything Bagel Style: Sprinkle with everything seasoning pre-bake.
FAQ’s
Q1: Can I use whole wheat pita?
A1: Yes, and it adds a nutty flavor plus extra fiber.
Q2: How do I keep them crispy?
A2: Store in an airtight container with a paper towel inside to absorb moisture.
Q3: Can I make these in an air fryer?
A3: Absolutely. Air fry at 350°F for 5 to 7 minutes, shaking halfway through.
Q4: What dips go best with these?
A4: Hummus, tzatziki, baba ganoush, or whipped feta are all fantastic.
Q5: Can I make these gluten-free?
A5: Yes, just use gluten-free pita or flatbread.
Q6: What if I don’t like garlic?
A6: You can use just olive oil and herbs or try roasted shallots instead.
Q7: Can I toast them without oil?
A7: You can, but they won’t be as flavorful or evenly crisped.
Q8: Are they freezer friendly?
A8: Yes, freeze after baking and re-crisp in the oven when ready.
Q9: How thin should I slice the pita?
A9: Cut into wedges about 1 to 2 inches wide for best texture.
Q10: Can I add toppings after baking?
A10: Yes, try a dusting of Parmesan or flaky salt right out of the oven.
Conclusion
There’s something incredibly satisfying about turning humble pita bread into something this delicious. Crispy Garlic Pita Toasts are proof that the simplest ingredients often make the best bites. So next time you find yourself with a few extra pitas, trust me, this one’s worth every bite.
Print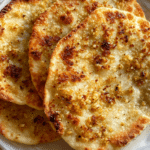
Crispy Garlic Pita Toasts
- Total Time: 17 minutes
- Yield: 6 servings 1x
- Diet: Vegetarian
Description
Crispy Garlic Pita Toasts are golden, crunchy triangles of pita bread brushed with a savory garlic oil blend. Perfect for dipping, snacking, or adding crunch to salads and soups.
Ingredients
- 4 large pita breads, cut into triangles
- 4 tablespoons olive oil
- 3 cloves fresh garlic, minced
- 1 teaspoon salt
- 1 teaspoon dried oregano (optional)
- 2 tablespoons grated Parmesan cheese (optional)
Instructions
- Preheat your oven to 375°F (190°C) and line a baking sheet with parchment paper.
- In a small bowl, mix the olive oil, minced garlic, salt, and any optional oregano or Parmesan.
- Place the pita triangles in a large bowl and drizzle the garlic oil mixture over them. Toss to coat evenly.
- Arrange the coated pita pieces in a single layer on the baking sheet, without overlapping.
- Bake for 10 to 12 minutes, flipping halfway, until golden and crisp.
- Let cool for 5 minutes to finish crisping before serving.
Notes
- Use day-old pita for best crispiness.
- For a spicy twist, add chili flakes to the oil mixture.
- Store in an airtight container to keep them crunchy for days.
- Prep Time: 5 minutes
- Cook Time: 12 minutes
- Category: Snack
- Method: Baking
- Cuisine: Mediterranean
Nutrition
- Serving Size: 1 serving
- Calories: 190
- Sugar: 0g
- Sodium: 330mg
- Fat: 9g
- Saturated Fat: 2g
- Unsaturated Fat: 6g
- Trans Fat: 0g
- Carbohydrates: 22g
- Fiber: 2g
- Protein: 4g
- Cholesterol: 2mg
Keywords: crispy pita toasts, garlic pita chips, baked pita snacks, Mediterranean appetizer