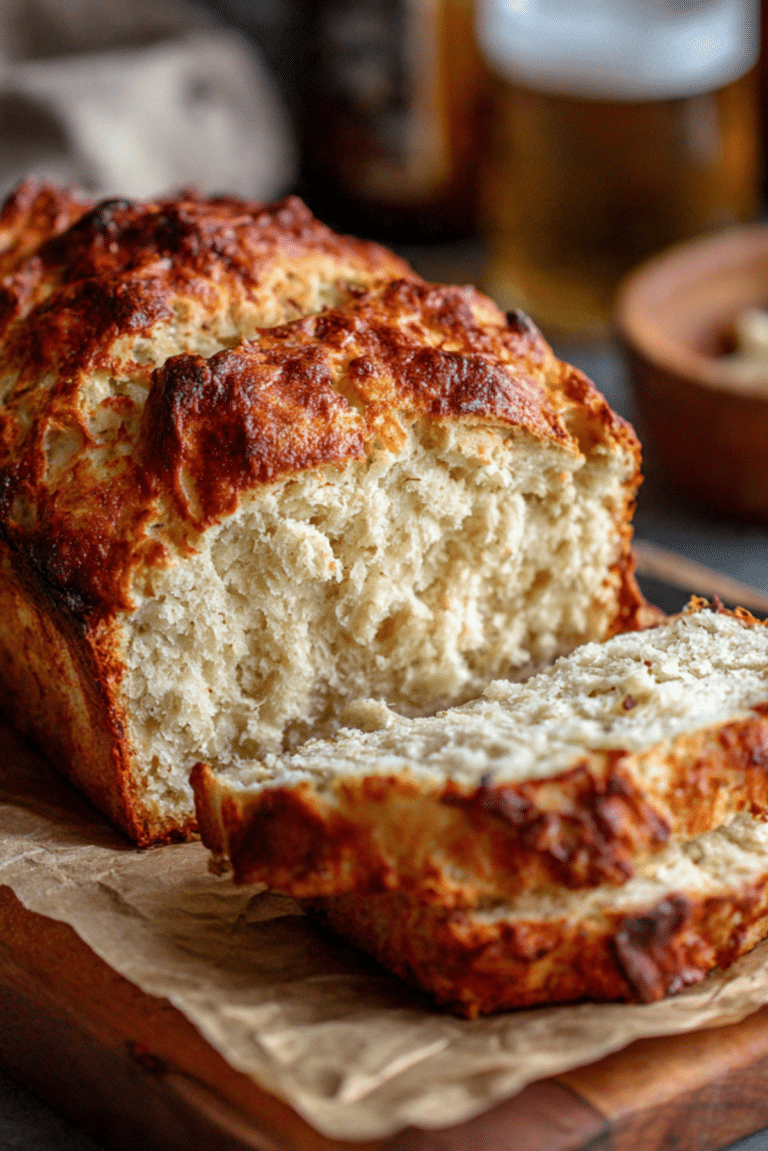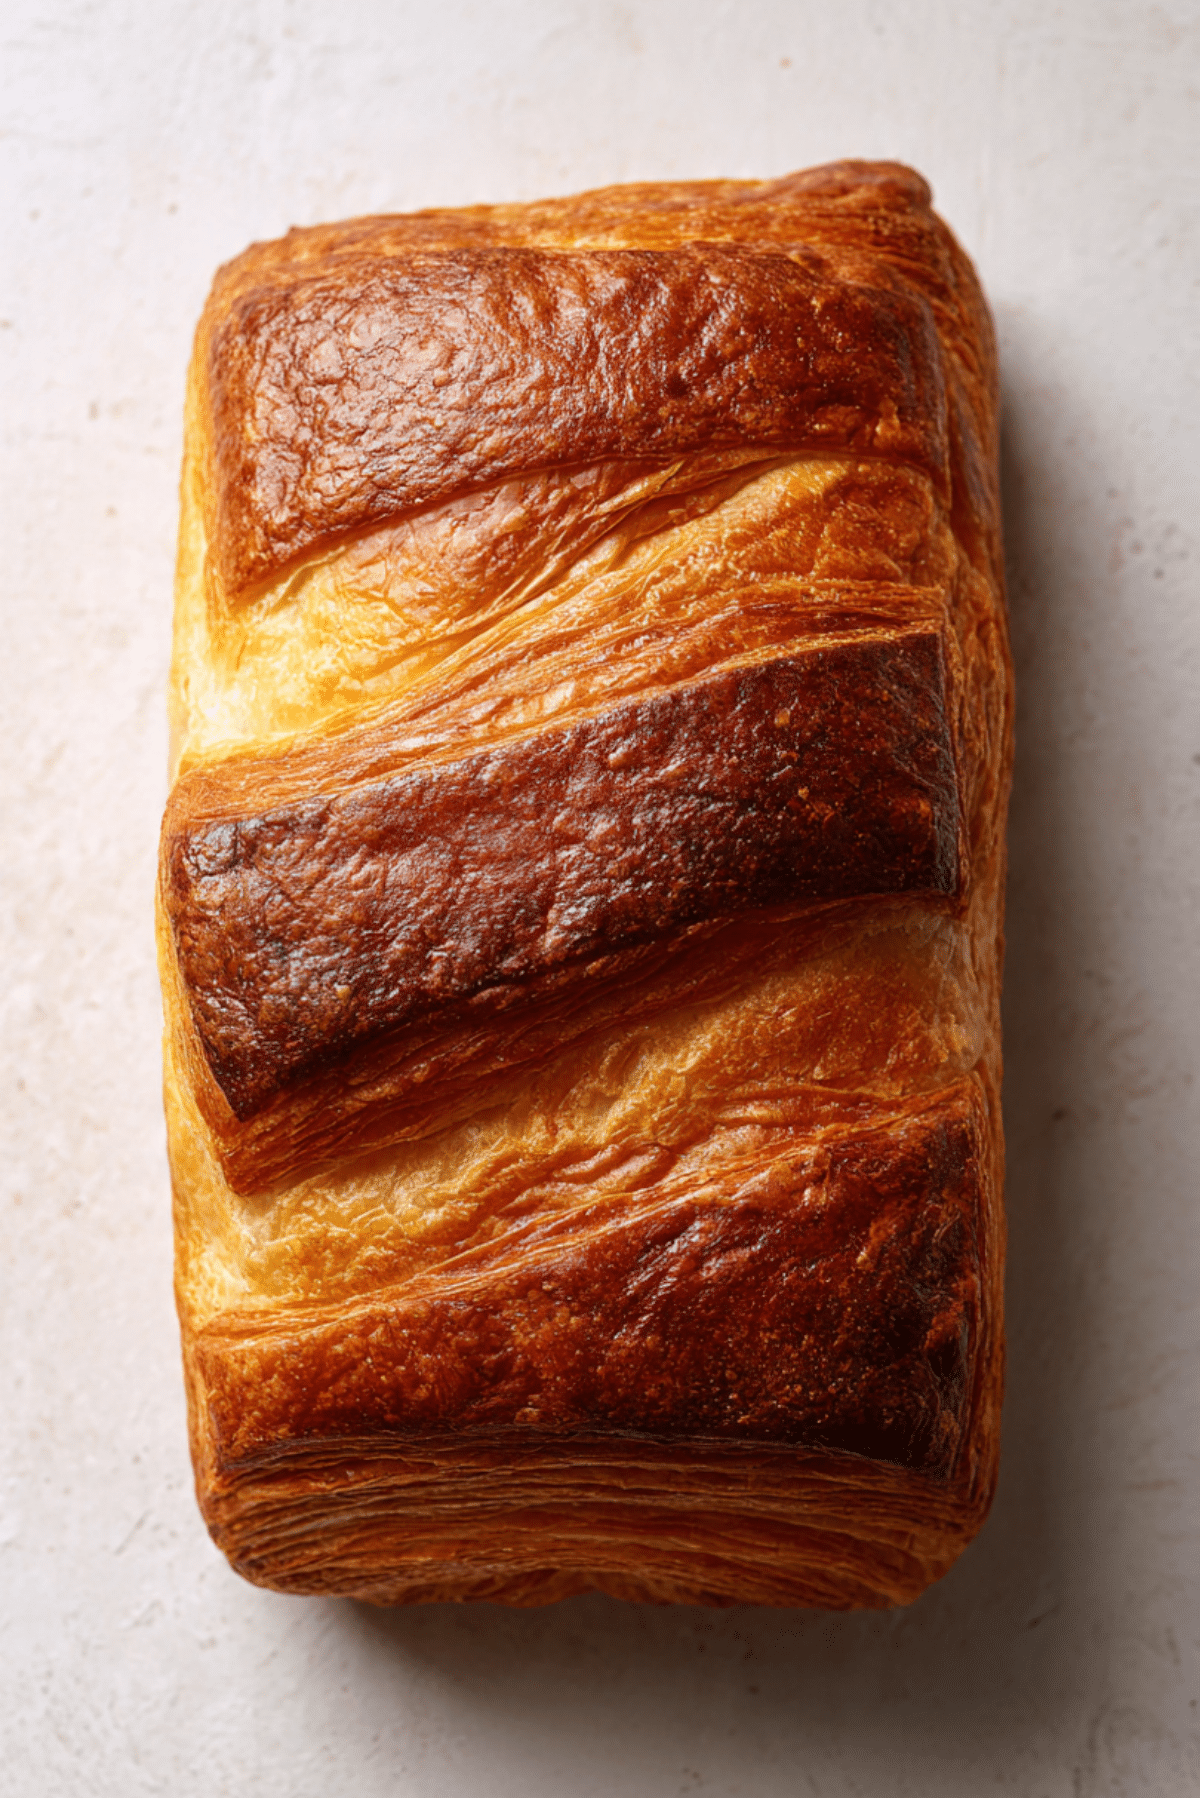
Croissant Bread (Loaf)
There is something quietly magical about pulling a loaf like this from the oven. The kitchen fills with that unmistakable buttery aroma, warm and comforting, and suddenly everything feels a little slower and nicer. This croissant bread loaf brings together the flakiness you love in a pastry with the cozy sliceable comfort of homemade bread. Trust me, you’re going to love this from the very first tear.
Why This Loaf Feels Like a Bakery Treat at Home
What makes this bread so special is how it bridges two worlds. It has the soul of a classic croissant but the ease and familiarity of a loaf you can slice and share. Each layer bakes up golden and crisp on the outside, while the inside stays soft, airy, and rich. It feels indulgent without being fussy, which makes it perfect for both slow weekends and special occasions.
A Little Background Behind This Style of Bread
This loaf takes inspiration from traditional French laminated doughs, where butter and dough are folded together to create layers. Bakers have been working with these techniques for centuries, originally crafting croissants as individual pastries. Turning that same idea into a loaf is a modern twist that makes the process more practical for home kitchens, while still honoring the classic method and flavor.
What Makes This Recipe a Keeper
This loaf is the kind of recipe you come back to again and again, and here’s why it earns that spot.
Versatile: It works beautifully for breakfast with jam, as a sandwich base, or toasted alongside dinner.
Budget-Friendly: Simple pantry ingredients create a bakery style result without extra cost.
Quick and Easy: The steps are straightforward, even if the result looks impressive.
Customizable: You can keep it classic or add sweet or savory touches later.
Crowd-Pleasing: The flaky layers and buttery aroma win everyone over.
Make-Ahead Friendly: You can prep parts of it in advance to save time.
Great for Leftovers: Toasted slices the next day are honestly even better.
Pro Baker Tips for Perfect Layers
Before we roll up our sleeves, let me share a few insider tricks that make a real difference.
- Keep your butter cool but pliable so it layers smoothly without melting.
- Work on a lightly floured surface to prevent sticking without drying the dough.
- Take your time during folding, patience creates better layers.
- Let the dough rest when needed so it stays easy to shape.
Tools You Will Want Nearby
Having the right tools makes this process feel calm and enjoyable.
Mixing Bowl: A large bowl gives you room to work the dough comfortably.
Rolling Pin: Essential for rolling and folding even layers.
Loaf Pan: Helps the bread bake evenly and hold its shape.
Pastry Brush: Useful for butter and finishing touches.
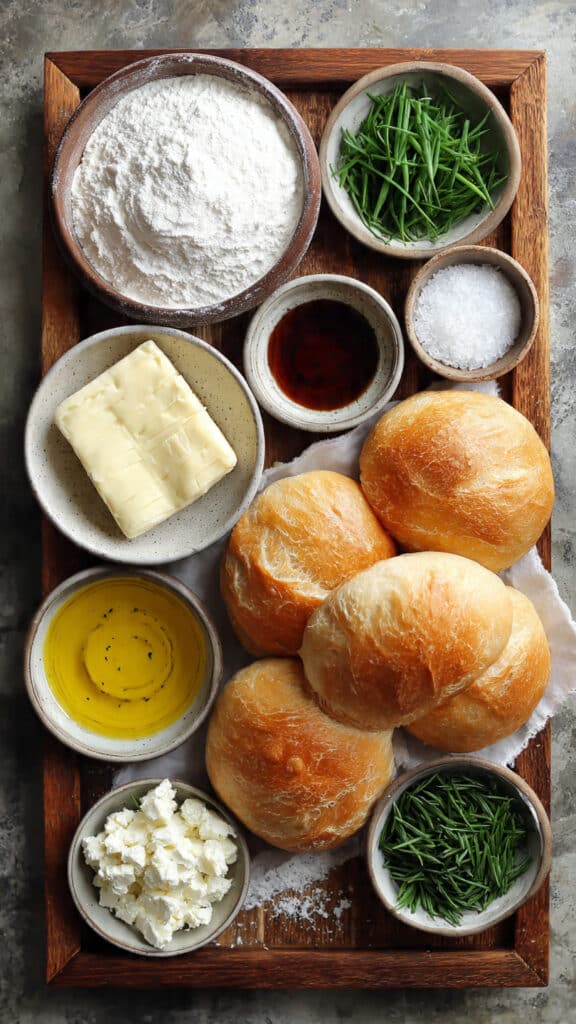
Ingredients You Will Need
This is where everything starts to come together. Each ingredient plays a role in creating that flaky, tender texture.
- All-Purpose Flour: 3 and 1/2 cups, forms the structure of the dough while staying soft.
- Granulated Sugar: 1/4 cup, adds a gentle sweetness and helps with browning.
- Instant Yeast: 2 and 1/4 teaspoons, gives the loaf its light, airy rise.
- Salt: 1 and 1/2 teaspoons, balances the richness of the butter.
- Whole Milk: 1 cup, warm, adds tenderness and moisture.
- Unsalted Butter: 1 cup, cold and sliced, creates those beautiful flaky layers.
Ingredient Swaps That Still Work
If you need to adjust, here are a few easy swaps.
Whole Milk: You can use 2 percent milk if needed.
Granulated Sugar: Light brown sugar works for a slightly deeper flavor.
Spotlight on the Stars of the Recipe
A couple of ingredients truly make this loaf shine.
Unsalted Butter: This is where the magic happens, creating rich flavor and visible layers.
Instant Yeast: Reliable and easy to use, it ensures a consistent rise.
Let’s Get Baking Together
Now let’s dive into the process, step by step, so it feels relaxed and enjoyable.
- Preheat Your Equipment: Preheat your oven to 375°F and lightly grease a loaf pan.
- Combine Ingredients: In a large bowl, mix flour, sugar, yeast, and salt. Stir in warm milk until a soft dough forms.
- Prepare Your Cooking Vessel: Turn the dough onto a floured surface and gently shape it into a rectangle.
- Assemble the Dish: Layer the cold butter slices over the dough, then fold and roll several times to create layers.
- Cook to Perfection: Shape the dough into a loaf, place it in the pan, and bake until deeply golden and fragrant.
- Finishing Touches: Brush the top lightly with butter if desired.
- Serve and Enjoy: Let it cool slightly, then slice and enjoy those flaky layers.
How Texture and Flavor Come Together
As the loaf bakes, the butter melts between layers, creating steam that lifts the dough and forms pockets of air. The outside turns crisp and golden, while the inside stays soft and rich. The flavor deepens as the sugar caramelizes, giving each bite a subtle sweetness and buttery finish.
Helpful Tips for Best Results
A few extra pointers can make this even better.
- Let the loaf cool before slicing to keep layers intact.
- Use a sharp serrated knife for clean slices.
- Store leftovers tightly wrapped to maintain freshness.
Common Mistakes and How to Avoid Them
Even good bakers run into issues, so here’s what to watch for.
- Overworking the dough, which can make it tough.
- Letting butter melt too much before baking.
- Cutting the loaf while it is too hot.
Nutrition Snapshot
Servings: 10
Calories per serving: 280
Note: These are approximate values.
Time Breakdown
Prep Time: 25 minutes
Cook Time: 40 minutes
Total Time: 1 hour and 5 minutes
Make-Ahead and Storage Tips
You can prepare the dough and shape the loaf ahead of time, then refrigerate it overnight. Bake it fresh the next day for best results. Store baked slices in an airtight container at room temperature for two days, or freeze for longer storage. Reheat gently to bring back the flaky texture.
Serving Ideas to Love
This loaf is wonderful with butter and jam, but it also shines as French toast or alongside a cozy soup. Toasted slices with honey are a total game-changer.
Creative Ways to Use Leftovers
Leftover slices make incredible bread pudding, croutons, or even a savory breakfast sandwich base.
Extra Tips for Success
Always measure flour accurately and keep your workspace cool. Little details like this go a long way.
Make It Look Bakery-Worthy
Brush the top with melted butter and let it cool on a rack so the crust stays crisp and shiny.
Fun Variations to Try
- Add a cinnamon sugar swirl for a sweet twist.
- Sprinkle herbs and cheese between layers for a savory version.
- Shape into mini loaves for gifting.
- Use chocolate chips for a dessert style loaf.
FAQ’s
1. Can I use active dry yeast instead of instant yeast?
Yes, just activate it in warm milk before mixing.
2. Why is my loaf not flaky enough?
The butter may have been too warm or the dough overworked.
3. Can I freeze the baked loaf?
Yes, wrap it tightly and freeze for up to two months.
4. Should I slice it warm?
It is better to wait so the layers set properly.
5. Can I make this dough by hand?
Absolutely, just be gentle and patient.
6. Does this loaf need glaze?
No, it is rich and flavorful on its own.
7. How do I reheat slices?
Toast lightly or warm in the oven.
8. Can I add fillings?
Yes, but keep them light so layers stay defined.
9. What pan size works best?
A standard loaf pan is ideal.
10. Is this good for sandwiches?
Yes, especially when lightly toasted.
Conclusion
This croissant bread loaf brings bakery comfort right into your kitchen. It feels special, tastes incredible, and honestly, it is worth every bite. Give it a try and enjoy the process as much as the final slice.
Print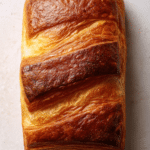
Croissant Bread (Loaf)
- Total Time: 1 hour 5 minutes
- Yield: 1 loaf (10 slices) 1x
- Diet: Vegetarian
Description
A buttery, flaky croissant-style bread baked into a soft, sliceable loaf with golden layers and a tender interior.
Ingredients
- 3 1/2 cups all-purpose flour
- 1/4 cup granulated sugar
- 2 1/4 teaspoons instant yeast
- 1 1/2 teaspoons salt
- 1 cup whole milk, warm
- 1 cup unsalted butter, cold and sliced
Instructions
- Preheat the oven to 375°F and lightly grease a standard loaf pan.
- In a large bowl, combine the flour, sugar, instant yeast, and salt.
- Pour in the warm milk and mix until a soft dough forms.
- Transfer the dough to a lightly floured surface and shape it into a rectangle.
- Arrange the cold butter slices evenly over the dough.
- Fold and roll the dough several times to create visible layers.
- Shape the dough into a loaf and place it into the prepared pan.
- Bake for about 40 minutes, until deeply golden and baked through.
- Remove from the oven and brush lightly with butter if desired.
- Let cool slightly before slicing and serving.
Notes
- Keep the butter cold to ensure flaky layers.
- Allow the loaf to cool before slicing for cleaner layers.
- Store leftovers tightly wrapped to maintain freshness.
- Prep Time: 25 minutes
- Cook Time: 40 minutes
- Category: Bread
- Method: Baking
- Cuisine: French-inspired
Nutrition
- Serving Size: 1 slice
- Calories: 280
- Sugar: 6g
- Sodium: 290mg
- Fat: 15g
- Saturated Fat: 9g
- Unsaturated Fat: 5g
- Trans Fat: 0g
- Carbohydrates: 32g
- Fiber: 1g
- Protein: 6g
- Cholesterol: 40mg
Keywords: croissant bread loaf, buttery bread, flaky bread loaf, homemade bread