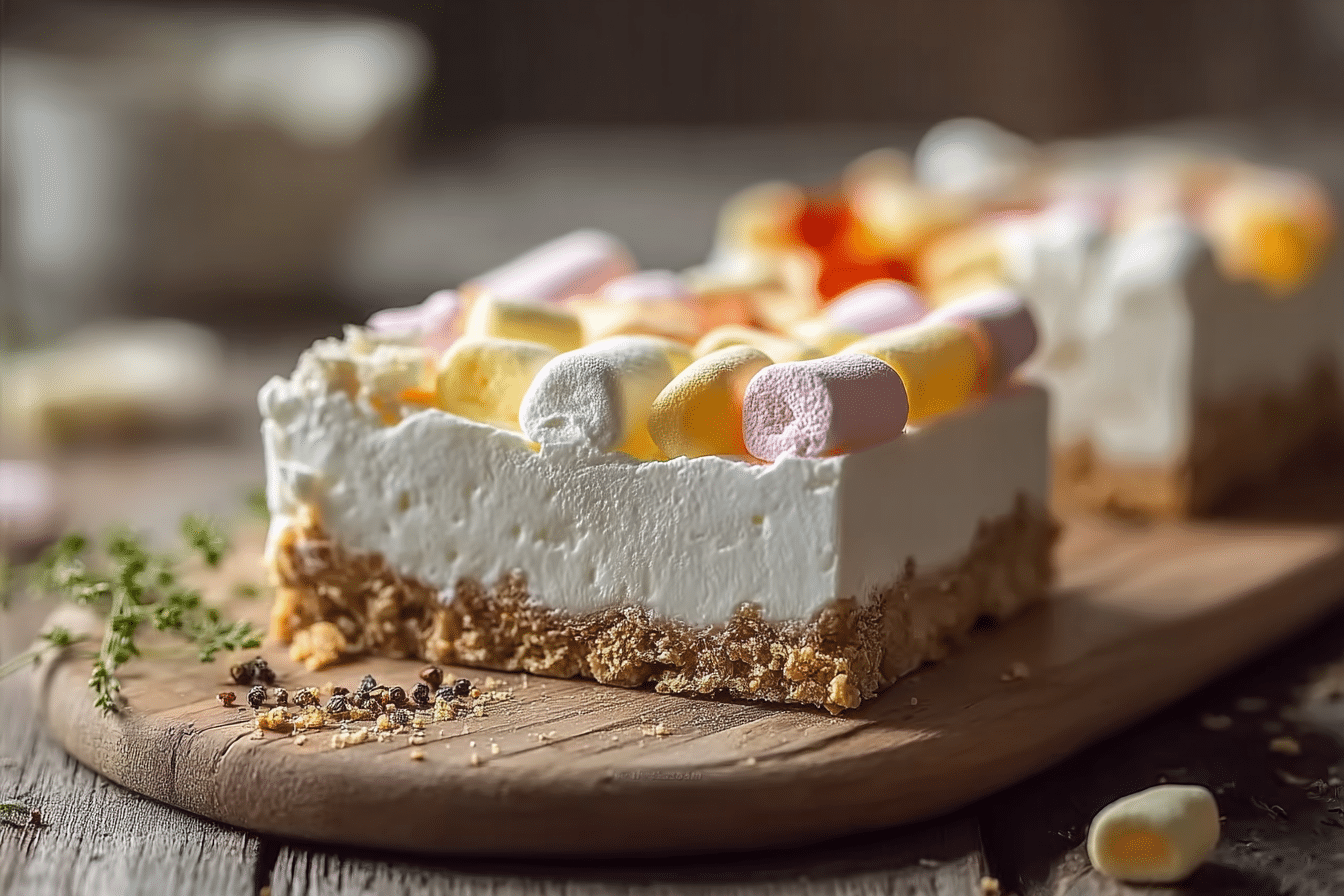
No-Bake Marshmallow Slice
There’s something beautifully nostalgic about the first bite of a No-Bake Marshmallow Slice — that sweet, chewy mix of fluffy marshmallows and crunchy biscuits wrapped in creamy chocolate always brings a smile. It’s the kind of treat that feels like a warm hug from your childhood, yet it’s elegant enough to serve at a grown-up get-together. The best part? No oven needed — just a little patience as it sets in the fridge.
Behind the Recipe
This recipe was born from the kind of lazy afternoons when you crave something sweet but don’t want to turn on the oven. Growing up, I remember my grandmother making a version of this slice for family picnics. The sound of biscuits breaking, the smell of melted chocolate, and that first chewy bite — those are memories that stick. This modern twist keeps the spirit alive with a smoother texture and an even richer flavor balance.
Recipe Origin or Trivia
The No-Bake Marshmallow Slice is a staple in Australian and New Zealand kitchens, often popping up at bake sales, birthday parties, and holiday tables. It’s believed to have evolved from traditional “lolly cake” recipes that used leftover candies and biscuits to create quick, no-fuss desserts. Over time, it became a favorite comfort treat across generations.
Why You’ll Love No-Bake Marshmallow Slice
There’s a lot to adore about this simple yet irresistible treat.
Versatile: You can dress it up with colorful candies or keep it classic for a cozy family dessert.
Budget-Friendly: Uses affordable pantry staples like biscuits, marshmallows, and chocolate.
Quick and Easy: No baking, no fuss, and ready to chill in under 15 minutes of prep time.
Customizable: Try swapping white chocolate for milk or adding a handful of dried fruit for a tangy twist.
Crowd-Pleasing: Everyone from kids to adults falls in love with its soft, chewy texture.
Make-Ahead Friendly: Prepare it a day before — it tastes even better once set overnight.
Great for Leftovers: Slice it into small squares and store for lunchbox treats or a quick coffee companion.
Chef’s Pro Tips for Perfect Results
Getting the perfect balance of chewiness and crunch takes a little care.
- Use fresh marshmallows so they melt smoothly without turning sticky.
- Crush biscuits evenly — aim for a mix of small chunks and fine crumbs for the ideal texture.
- Don’t overheat the chocolate; melt it gently to avoid seizing.
- Line your tin well with parchment paper for easy removal and clean edges.
- Let it set fully in the fridge for at least 2 hours before slicing for neat, firm pieces.
Kitchen Tools You’ll Need
Before we begin, gather your kitchen essentials for a smooth process.
Mixing Bowl: Large enough to combine all ingredients evenly.
Saucepan: To gently melt butter and chocolate together.
Wooden Spoon: For stirring and folding ingredients smoothly.
Spatula: Helps spread and press the mixture evenly into the pan.
Square Baking Tin (8-inch): The ideal size for a nice, thick slice.
Parchment Paper: Keeps the slice from sticking to the tin.
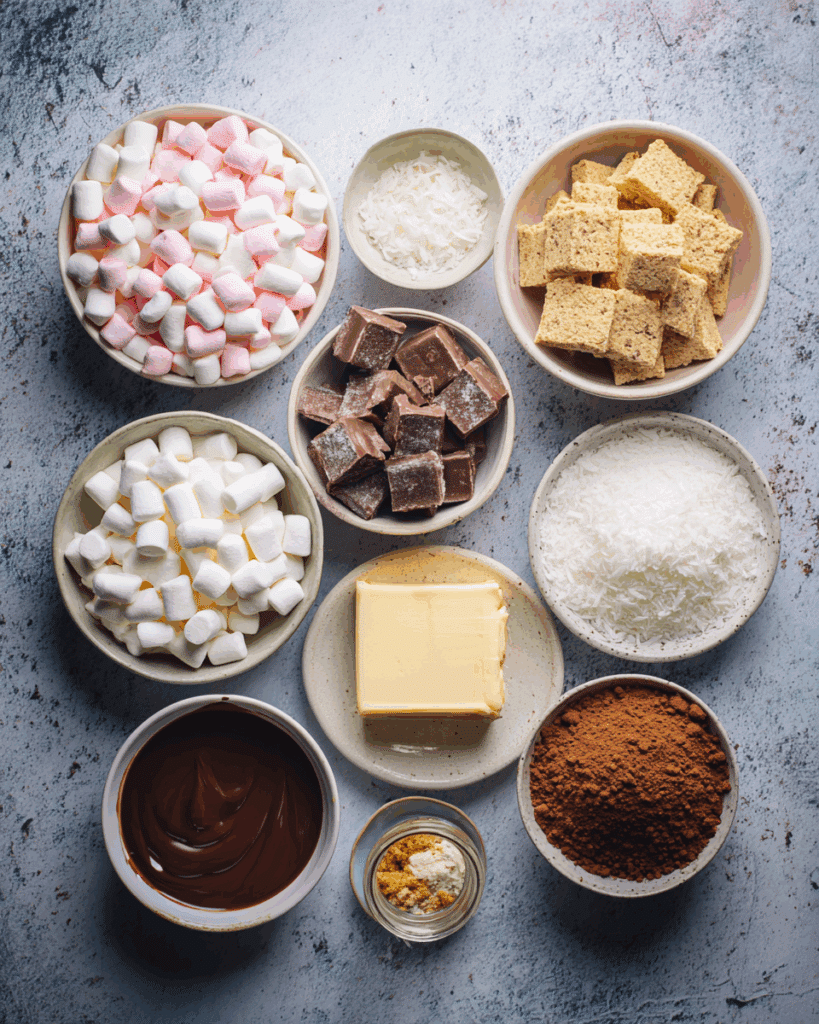
Ingredients in No-Bake Marshmallow Slice
Every ingredient plays its part in creating that perfect balance of sweetness, crunch, and creaminess.
- Plain Biscuits: 250 g, crushed into small pieces to form the base and add texture.
- Mini Marshmallows: 150 g, provide the chewy, colorful sweetness that defines this slice.
- Sweetened Condensed Milk: 200 g, binds everything together with creamy richness.
- Unsalted Butter: 125 g, adds smoothness and helps the chocolate set firmly.
- Milk Chocolate: 250 g, melted for a luscious, glossy topping.
- Desiccated Coconut: 50 g, for subtle nuttiness and a light tropical note.
- Cocoa Powder: 2 tablespoons, enhances the chocolate flavor depth.
- Vanilla Extract: 1 teaspoon, ties all the flavors together beautifully.
Ingredient Substitutions
Want to make it your own? Here are a few easy swaps.
Plain Biscuits: Use graham crackers or digestive biscuits.
Milk Chocolate: Replace with dark or white chocolate depending on your preference.
Unsalted Butter: Substitute with coconut oil for a dairy-free version.
Sweetened Condensed Milk: Try sweetened coconut condensed milk for a vegan twist.
Ingredient Spotlight
Mini Marshmallows: These little pillows of sweetness give the slice its signature chew and colorful charm, making every bite a playful surprise.
Plain Biscuits: Their mild flavor and crumbly texture balance the sweetness perfectly and provide a satisfying crunch.

Instructions for Making No-Bake Marshmallow Slice
Now let’s dive into the fun part — making this irresistible slice from start to finish.
- Preheat Your Equipment: Since this is a no-bake recipe, no oven is needed! Simply line an 8-inch square tin with parchment paper and set aside.
- Combine Ingredients: In a large bowl, mix the crushed biscuits, desiccated coconut, and marshmallows.
- Prepare Your Cooking Vessel: In a saucepan, melt butter, condensed milk, cocoa powder, and vanilla extract over low heat until smooth and glossy.
- Assemble the Dish: Pour the warm mixture over the dry ingredients and stir until everything is well coated.
- Cook to Perfection: Press the mixture firmly into the prepared tin using a spatula to create an even layer.
- Finishing Touches: Melt the milk chocolate separately and pour it over the top, spreading evenly.
- Serve and Enjoy: Refrigerate for at least 2 hours or until set. Slice into squares and serve chilled.
Texture & Flavor Secrets
This slice has it all — creamy, chewy, and crunchy textures in one bite. The buttery chocolate melts gently in your mouth while the marshmallows provide a soft, fluffy contrast. The coconut adds a light crispness, and the cocoa brings a subtle bitterness that balances the sweetness beautifully.
Cooking Tips & Tricks
Here are a few extra tricks to make it even better:
- Store in the fridge to keep it firm and fresh for longer.
- For a layered look, swirl in some white chocolate with the milk chocolate topping.
- Add crushed nuts for extra crunch and a richer flavor.
What to Avoid
A few small missteps can affect the texture — here’s what to steer clear of.
- Avoid overheating the chocolate, or it may seize and lose its shine.
- Don’t skip lining the tin, or removing the slice cleanly will be tricky.
- Resist cutting before it’s fully set, or the pieces may crumble.
Nutrition Facts
Servings: 12
Calories per serving: Approximately 280
Note: These are approximate values.
Preparation Time
Prep Time: 15 minutes
Cook Time: 5 minutes
Total Time: 2 hours 20 minutes (including chilling)
Make-Ahead and Storage Tips
You can easily prepare this recipe a day in advance. Store slices in an airtight container in the refrigerator for up to 7 days. For longer storage, freeze for up to a month. To serve, let thaw slightly at room temperature for the best texture.
How to Serve No-Bake Marshmallow Slice
This slice shines on its own, but you can elevate it by serving with a drizzle of warm chocolate sauce or a scoop of vanilla ice cream. For a festive touch, sprinkle crushed candy canes or edible glitter on top before the chocolate sets.
Creative Leftover Transformations
Leftovers can be even more fun!
- Crumble over ice cream for a chewy topping.
- Layer into parfaits with whipped cream and berries.
- Blend into milkshakes for a marshmallow-chocolate dream.
Additional Tips
To keep your slice glossy and smooth, melt chocolate using a double boiler or microwave in short bursts. For extra chewiness, fold in more marshmallows just before pressing into the tin.
Make It a Showstopper
Presentation matters! Cut into even squares and serve on a wooden board lined with parchment. Dust lightly with cocoa powder or drizzle contrasting white chocolate for a professional touch.
Variations to Try
- Rocky Road Style: Add chopped nuts and glace cherries.
- Mint Twist: Mix peppermint extract into the chocolate layer.
- Cookies & Cream: Stir in crushed chocolate sandwich cookies.
- Peanut Crunch: Swap part of the chocolate for peanut butter chips.
- Tropical Bliss: Add dried pineapple and more coconut.
FAQ’s
Q1. Can I use large marshmallows instead of mini ones?
Yes, just cut them into smaller pieces so they distribute evenly.
Q2. How long does the slice last in the fridge?
Up to 7 days in an airtight container.
Q3. Can I freeze No-Bake Marshmallow Slice?
Absolutely, it freezes beautifully for up to 1 month.
Q4. What’s the best way to cut it cleanly?
Use a warm knife and wipe between cuts for sharp edges.
Q5. Can I make this gluten-free?
Yes, just use gluten-free biscuits.
Q6. Is it possible to make it dairy-free?
Replace butter with coconut oil and use vegan condensed milk and chocolate.
Q7. How do I prevent the chocolate topping from cracking?
Let it sit at room temperature for 5 minutes before slicing.
Q8. Can I skip the coconut?
Yes, but you might want to add a few more biscuits for texture.
Q9. What’s a good drink pairing?
A hot cup of coffee or a cold glass of milk complements it perfectly.
Q10. Can I make this for a bake sale?
Definitely! It travels well and stays fresh even after a few hours out of the fridge.
Conclusion
This No-Bake Marshmallow Slice is pure comfort in every bite — chewy, chocolatey, and delightfully nostalgic. Whether you’re making it for a family gathering or just because you’re craving something sweet, it’s a recipe that never fails to please. Trust me, you’re going to love this one, and once you share it, everyone will be asking for your secret
Print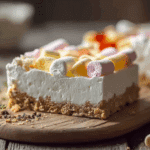
No-Bake Marshmallow Slice
- Total Time: 2 hours 20 minutes (including chilling)
- Yield: 12 servings
- Diet: Vegetarian
Description
A nostalgic, chewy, and chocolatey treat that’s quick to make and doesn’t require baking. This No-Bake Marshmallow Slice blends crushed biscuits, fluffy marshmallows, and rich chocolate for an irresistible dessert that’s perfect for any occasion.
Ingredients
- Plain Biscuits: 250 g, crushed into small pieces to form the base and add texture.
- Mini Marshmallows: 150 g, provide chewy sweetness and colorful bites.
- Sweetened Condensed Milk: 200 g, binds everything together with creamy richness.
- Unsalted Butter: 125 g, adds smoothness and helps the chocolate set firmly.
- Milk Chocolate: 250 g, melted for a luscious, glossy topping.
- Desiccated Coconut: 50 g, gives subtle nuttiness and a light tropical flavor.
- Cocoa Powder: 2 tablespoons, enhances chocolate flavor depth.
- Vanilla Extract: 1 teaspoon, ties all the flavors together beautifully.
Instructions
- Preheat Your Equipment: Line an 8-inch square tin with parchment paper and set aside.
- Combine Ingredients: In a large bowl, mix crushed biscuits, desiccated coconut, and marshmallows.
- Prepare Your Cooking Vessel: Melt butter, condensed milk, cocoa powder, and vanilla extract in a saucepan over low heat until smooth.
- Assemble the Dish: Pour the warm mixture over the dry ingredients and stir until everything is well coated.
- Cook to Perfection: Press the mixture firmly into the prepared tin using a spatula.
- Finishing Touches: Melt milk chocolate separately, pour it over the top, and spread evenly.
- Serve and Enjoy: Refrigerate for at least 2 hours or until set. Slice into squares and serve chilled.
Notes
- Store slices in the fridge for up to 7 days.
- Freeze for up to 1 month in an airtight container.
- For neat cuts, use a warm knife and wipe between slices.
- Add crushed nuts or dried fruit for an extra flavor twist.
- Prep Time: 15 minutes
- Cook Time: 5 minutes
- Category: Dessert
- Method: No-Bake
- Cuisine: Australian / New Zealand
Nutrition
- Serving Size: 1 slice
- Calories: 280
- Sugar: 25 g
- Sodium: 90 mg
- Fat: 14 g
- Saturated Fat: 8 g
- Unsaturated Fat: 5 g
- Trans Fat: 0 g
- Carbohydrates: 36 g
- Fiber: 1 g
- Protein: 3 g
- Cholesterol: 15 mg
Keywords: No-Bake Marshmallow Slice, no bake dessert, marshmallow recipe, chocolate slice, easy sweet treats