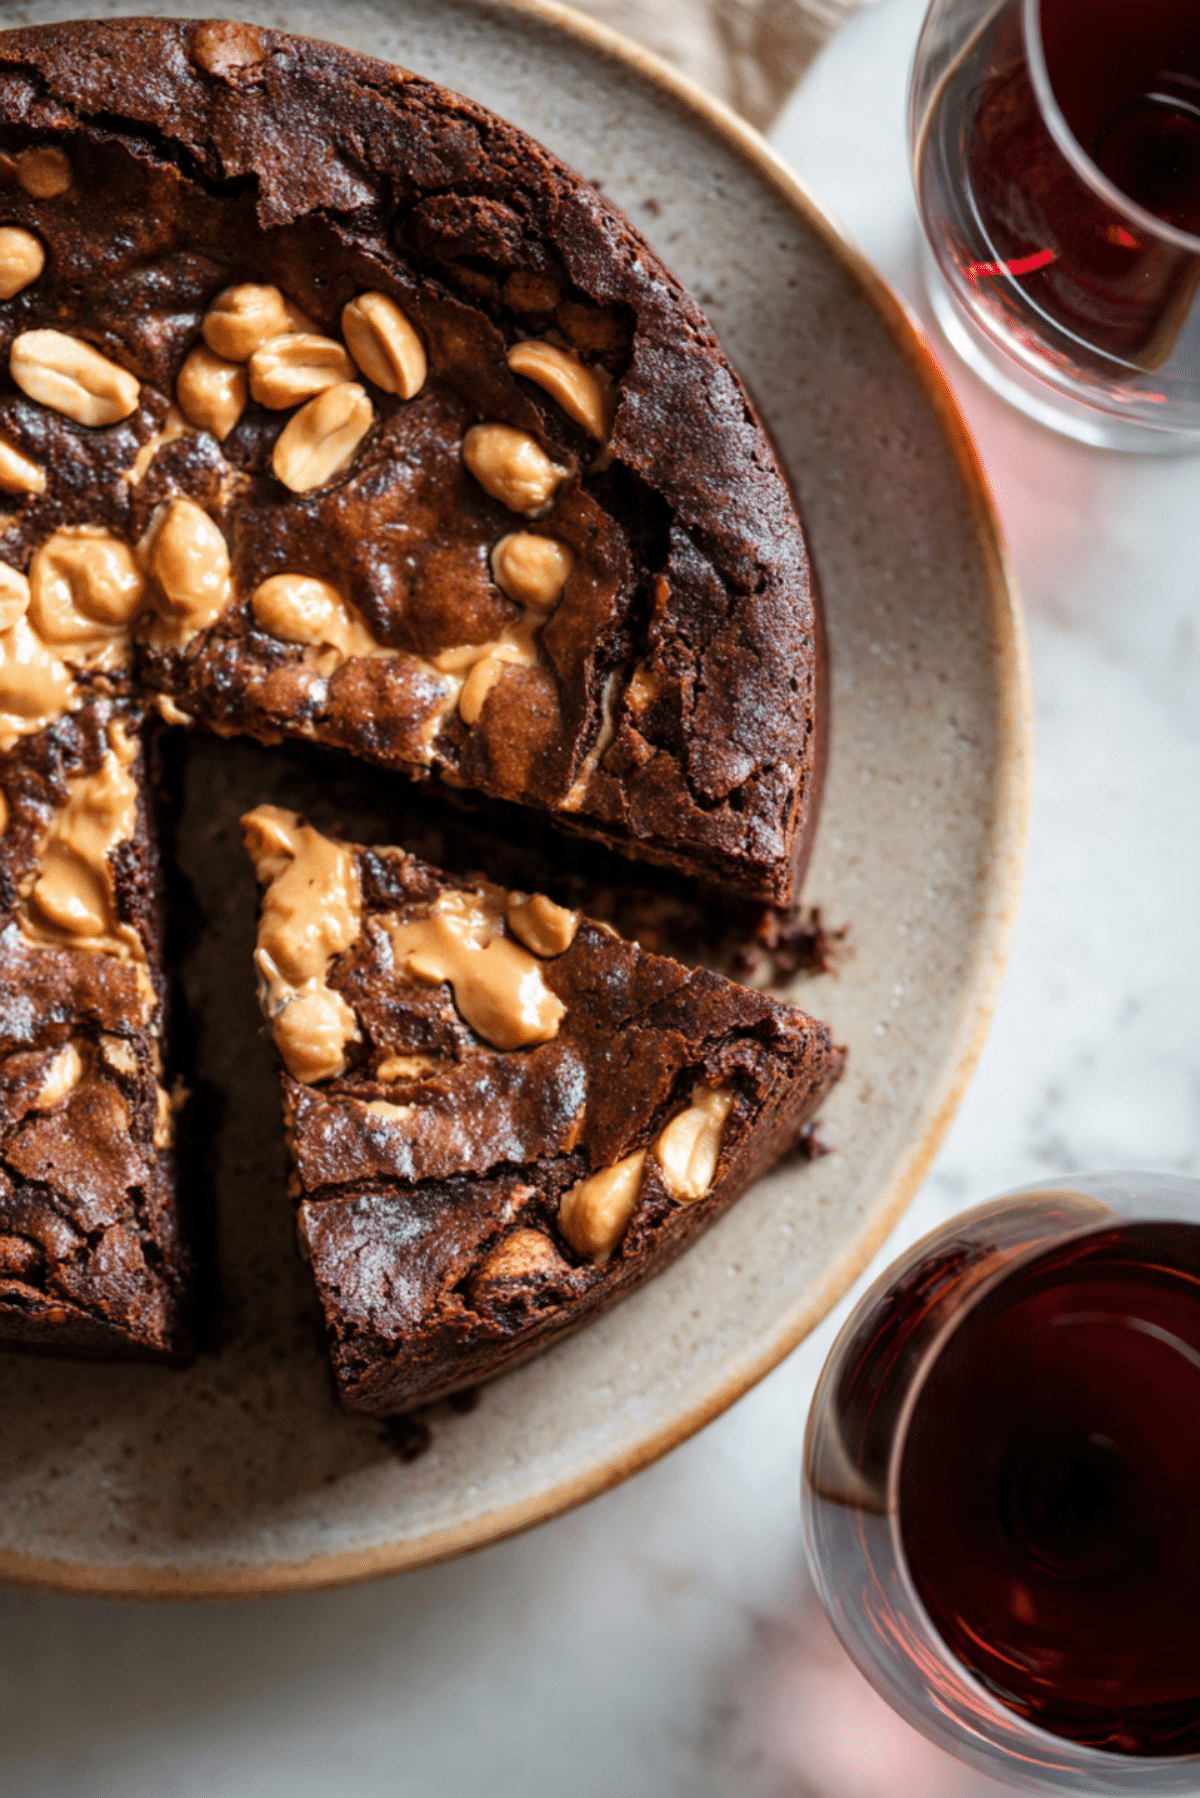
Peanut Butter Chocolate Lava Cakes
There is something almost magical about breaking into a warm chocolate cake and watching that silky center slowly spill onto the plate. The first time I made Peanut Butter Chocolate Lava Cakes, I remember standing by the oven, a little impatient, a little excited, just waiting for that moment. The smell of deep cocoa drifting through the kitchen, the promise of creamy peanut butter tucked inside, it felt like a secret about to be revealed. Trust me, you’re going to love this. This one’s a total game-changer, especially when you want a dessert that feels fancy but comes together without stress.
Why This Decadent Dessert Steals the Show Every Single Time
There is a reason these little cakes have such a loyal following. The contrast between the tender outer layer and the molten center is pure drama on a plate. When you press your spoon through the top and that glossy chocolate filling flows out, it feels like a restaurant moment right at your own table. And then there is the peanut butter, warm and creamy, blending with dark chocolate in a way that feels indulgent yet comforting.
It is rich without being overwhelming, sweet but balanced, and honestly, it feels like a hug in dessert form.
A Little Story Behind Those Molten Centers
Chocolate lava cakes became popular in American restaurants in the late twentieth century, known for their soft centers and elegant presentation. They were the kind of dessert you ordered on a special night out. Over time, home bakers realized that this impressive treat could actually be made with simple pantry staples.
Adding peanut butter brings a familiar, nostalgic twist. It turns a classic chocolate dessert into something that feels both luxurious and cozy. It is the kind of flavor pairing that reminds you of childhood sandwiches, but elevated into something dinner party worthy.
Why You Can Count On This Recipe Every Time
Before we dive into the mixing bowls, let me tell you why this recipe deserves a permanent spot in your dessert rotation.
Versatile: These cakes are perfect for date nights, birthdays, or when you just want to treat yourself after a long day. Dress them up with ice cream or keep them simple with powdered sugar.
Budget-Friendly: Most ingredients are pantry basics like flour, sugar, butter, and cocoa. You do not need anything fancy to create something that feels special.
Quick and Easy: The batter comes together in one bowl, and the baking time is short. You can have warm cakes on the table in under 30 minutes.
Customizable: You can adjust the chocolate intensity or even swap in different nut butters if you like.
Crowd-Pleasing: Chocolate and peanut butter is a combination almost everyone adores. Let me tell you, it’s worth every bite.
Make-Ahead Friendly: You can prepare the batter ahead of time and bake just before serving.
Great for Leftovers: If you somehow have leftovers, they reheat beautifully and still keep that soft center.
Pro Tips for That Perfect Molten Center
Getting that gooey middle just right is all about a few small details.
- Do not overbake. The centers should still jiggle slightly when you take them out.
- Grease your ramekins generously so the cakes release easily.
- Use good quality dark chocolate for a deep, rich flavor.
- Let the cakes rest for one minute before inverting, which helps them hold their shape.
Kitchen Tools That Make It Effortless
Before we get into the ingredients, here are the tools that make everything smooth and simple.
Ramekins: Essential for creating that classic individual cake shape and molten center.
Mixing Bowl: A medium heatproof bowl works best for melting chocolate and mixing the batter.
Whisk: Helps create a smooth, lump-free batter.
Baking Sheet: Place the ramekins on it for easy transfer in and out of the oven.
Ingredients That Create Chocolate and Peanut Butter Harmony
The beauty of these cakes is how simple ingredients transform into something so luxurious. Each one plays an important role in texture and flavor.
- Dark Chocolate: 170 grams, about 6 ounces, chopped. This creates the rich base and molten center.
- Unsalted Butter: 113 grams, 1 half cup. Adds moisture and helps create a tender crumb.
- Granulated Sugar: 100 grams, 1 half cup. Sweetens and balances the bitterness of the chocolate.
- Large Eggs: 2 whole eggs plus 2 egg yolks. Provide structure while keeping the center soft.
- All Purpose Flour: 30 grams, 1 quarter cup. Gives just enough structure without making the cakes dense.
- Creamy Peanut Butter: 4 tablespoons. Spoon a dollop into the center for that creamy surprise.
- Vanilla Extract: 1 teaspoon. Enhances the chocolate flavor.
- Salt: 1 quarter teaspoon. Sharpens and deepens the overall taste.
Simple Swaps If You Need Them
Sometimes you work with what you have, and that is perfectly fine.
Dark Chocolate: Semi sweet chocolate works if you prefer a slightly sweeter cake.
All Purpose Flour: A gluten free flour blend can be used in the same amount.
Creamy Peanut Butter: Almond butter or cashew butter can be substituted for a different nutty note.
Granulated Sugar: Coconut sugar can be used, though it will deepen the color and flavor slightly.
Spotlight on the Stars of the Show
Dark Chocolate: This is the backbone of the dessert. Choose one with around 60 percent cocoa for a balance of sweetness and intensity.
Creamy Peanut Butter: It melts gently in the center, creating that creamy core that blends with the chocolate. The contrast is simply irresistible.
Let’s Bake Something Incredible Together
Now comes the fun part. Here are the steps you are going to follow, and each one brings us closer to that molten magic.
- Preheat Your Equipment: Preheat your oven to 220 degrees Celsius, which is 425 degrees Fahrenheit. Place four greased ramekins on a baking sheet.
- Combine Ingredients: Melt the dark chocolate and butter together in a heatproof bowl over gentle heat, stirring until smooth. Remove from heat and whisk in the sugar. Add the eggs and egg yolks one at a time, whisking well after each addition. Stir in the vanilla extract and salt. Gently fold in the flour until just combined.
- Prepare Your Cooking Vessel: Make sure each ramekin is well greased so the cakes release easily after baking.
- Assemble the Dish: Spoon batter into each ramekin, filling halfway. Add one tablespoon of creamy peanut butter to the center of each, then cover with the remaining batter.
- Cook to Perfection: Bake for 10 to 12 minutes. The edges should look set, while the centers remain soft.
- Finishing Touches: Let the cakes rest for one minute. Carefully run a knife around the edges and invert onto plates.
- Serve and Enjoy: Dust with powdered sugar if desired and serve immediately while warm and molten.
The Magic of Texture and Flavor
The outer layer forms a delicate crust, slightly firm yet tender. Inside, the chocolate stays soft and almost pudding-like. When you cut into it, the peanut butter blends into the warm chocolate, creating a creamy swirl that feels rich and silky on the tongue. The sweetness is balanced by the hint of salt, and every bite melts away slowly.
Smart Tips to Elevate Your Baking Game
A few extra touches can take these cakes from great to unforgettable.
- Use room temperature eggs for a smoother batter.
- Chill the filled ramekins for 10 minutes before baking for an even gooier center.
- Serve with a scoop of vanilla ice cream for a hot and cold contrast.
- Sprinkle a tiny pinch of flaky salt on top for a flavor boost.
Common Mistakes and How to Avoid Them
Even simple recipes have small pitfalls, but they are easy to fix.
- Overbaking can turn the center fully solid, so keep a close eye on the timer.
- Skipping the greasing step may cause sticking, so be generous with butter.
- Using too much flour can make the cakes dense, so measure carefully.
- Letting the cakes sit too long before serving can reduce the molten effect.
A Quick Look at the Nutrition
Servings: 4
Calories per serving: 420
Note: These are approximate values.
Time Breakdown at a Glance
Prep Time: 15 minutes
Cook Time: 12 minutes
Total Time: 27 minutes
Plan Ahead and Store with Confidence
You can prepare the batter and fill the ramekins a few hours ahead, then refrigerate until ready to bake. If you have leftovers, store them covered in the refrigerator for up to two days. Reheat in the microwave for about 20 seconds to bring back that soft center. Freezing is also possible, just wrap tightly and thaw before reheating.
Serving Ideas That Make It Extra Special
Serve these warm cakes with fresh berries for a bright contrast. A scoop of vanilla or peanut butter ice cream makes the dessert feel restaurant worthy. A drizzle of warm chocolate sauce or a light dusting of powdered sugar adds a simple but elegant touch.
Turn Leftovers Into Something New
If you have extra cakes, crumble them over ice cream for a decadent sundae. You can also warm and slice them, then layer with whipped cream and fruit in a small glass for an easy trifle.
Extra Little Touches for Big Flavor
Use high quality chocolate for the best taste. Always taste your peanut butter before using it to ensure it is fresh. A tiny splash of espresso powder in the batter can deepen the chocolate flavor without making it taste like coffee.
Make It Look Like a Bakery Masterpiece
Dust the plate lightly with cocoa powder before placing the cake in the center. Add a few berries on the side for color contrast. Serve on white plates so the dark chocolate stands out beautifully.
Fun Variations to Explore
Try adding chocolate chips to the batter for extra bursts of chocolate. Swap peanut butter with hazelnut spread for a different flavor twist. Stir a teaspoon of espresso powder into the batter for deeper richness. Add a pinch of cinnamon for a warm, subtle spice note.
FAQ’s
Q1: Can I make the batter ahead of time?
Yes, you can prepare the batter and fill the ramekins, then refrigerate for a few hours before baking.
Q2: How do I know when they are done?
The edges should look firm while the center still appears soft and slightly jiggly.
Q3: Can I use milk chocolate?
You can, but the result will be sweeter and less intense.
Q4: What if I do not have ramekins?
You can use a muffin tin, just grease it well and adjust baking time slightly.
Q5: Can I freeze them?
Yes, wrap tightly and freeze. Thaw and reheat gently before serving.
Q6: Why did my center not stay molten?
They were likely baked too long. Reduce the baking time slightly next round.
Q7: Can I double the recipe?
Absolutely, just be sure not to overcrowd the oven.
Q8: Is natural peanut butter okay?
Yes, just stir it well so the oils are fully incorporated.
Q9: Can I add nuts?
Chopped roasted peanuts can add a nice crunch if folded into the batter.
Q10: Should I serve them immediately?
Yes, they are best enjoyed warm right after baking.
Conclusion
There is something unforgettable about cutting into a warm cake and watching that chocolate and peanut butter center flow onto the plate. It feels indulgent, comforting, and just a little bit dramatic in the best way. Peanut Butter Chocolate Lava Cakes bring together rich cocoa and creamy peanut butter in a way that feels both elegant and nostalgic. Give them a try the next time you want to impress someone, or simply treat yourself. Trust me, once you taste that molten center, you will be hooked.
Print
Peanut Butter Chocolate Lava Cakes
- Total Time: 27 minutes
- Yield: 4 servings 1x
- Diet: Vegetarian
Description
Warm, rich chocolate cakes with a molten peanut butter center that flows beautifully when cut. This indulgent dessert combines deep cocoa flavor with creamy peanut butter for a restaurant-style treat made easily at home.
Ingredients
- 170 grams dark chocolate, chopped
- 113 grams unsalted butter
- 100 grams granulated sugar
- 2 large whole eggs
- 2 large egg yolks
- 30 grams all purpose flour
- 4 tablespoons creamy peanut butter
- 1 teaspoon vanilla extract
- 1/4 teaspoon salt
Instructions
- Preheat oven to 220 degrees Celsius, 425 degrees Fahrenheit. Grease four ramekins generously and place them on a baking sheet.
- Melt the dark chocolate and butter together in a heatproof bowl over gentle heat, stirring until smooth. Remove from heat and whisk in the sugar.
- Add the whole eggs and egg yolks one at a time, whisking well after each addition. Stir in the vanilla extract and salt.
- Gently fold in the flour until just combined and smooth.
- Spoon batter into each ramekin halfway. Add one tablespoon of creamy peanut butter into the center of each ramekin, then cover with the remaining batter.
- Bake for 10 to 12 minutes until the edges are set but the centers remain soft and slightly jiggly.
- Let the cakes rest for 1 minute. Carefully run a knife around the edges and invert onto plates. Serve immediately while warm and molten.
Notes
- Do not overbake to maintain the molten center.
- Use good quality dark chocolate for deeper flavor.
- Chill filled ramekins for 10 minutes before baking for an even softer center.
- Serve with vanilla ice cream or fresh berries for contrast.
- Prep Time: 15 minutes
- Cook Time: 12 minutes
- Category: Dessert
- Method: Baking
- Cuisine: American
Nutrition
- Serving Size: 1 cake
- Calories: 420
- Sugar: 28g
- Sodium: 180mg
- Fat: 30g
- Saturated Fat: 15g
- Unsaturated Fat: 13g
- Trans Fat: 0g
- Carbohydrates: 34g
- Fiber: 2g
- Protein: 8g
- Cholesterol: 155mg
Keywords: peanut butter chocolate lava cakes, molten chocolate cake, chocolate peanut butter dessert, easy lava cake, individual chocolate cakes