Traditional Checkerboard Cookies
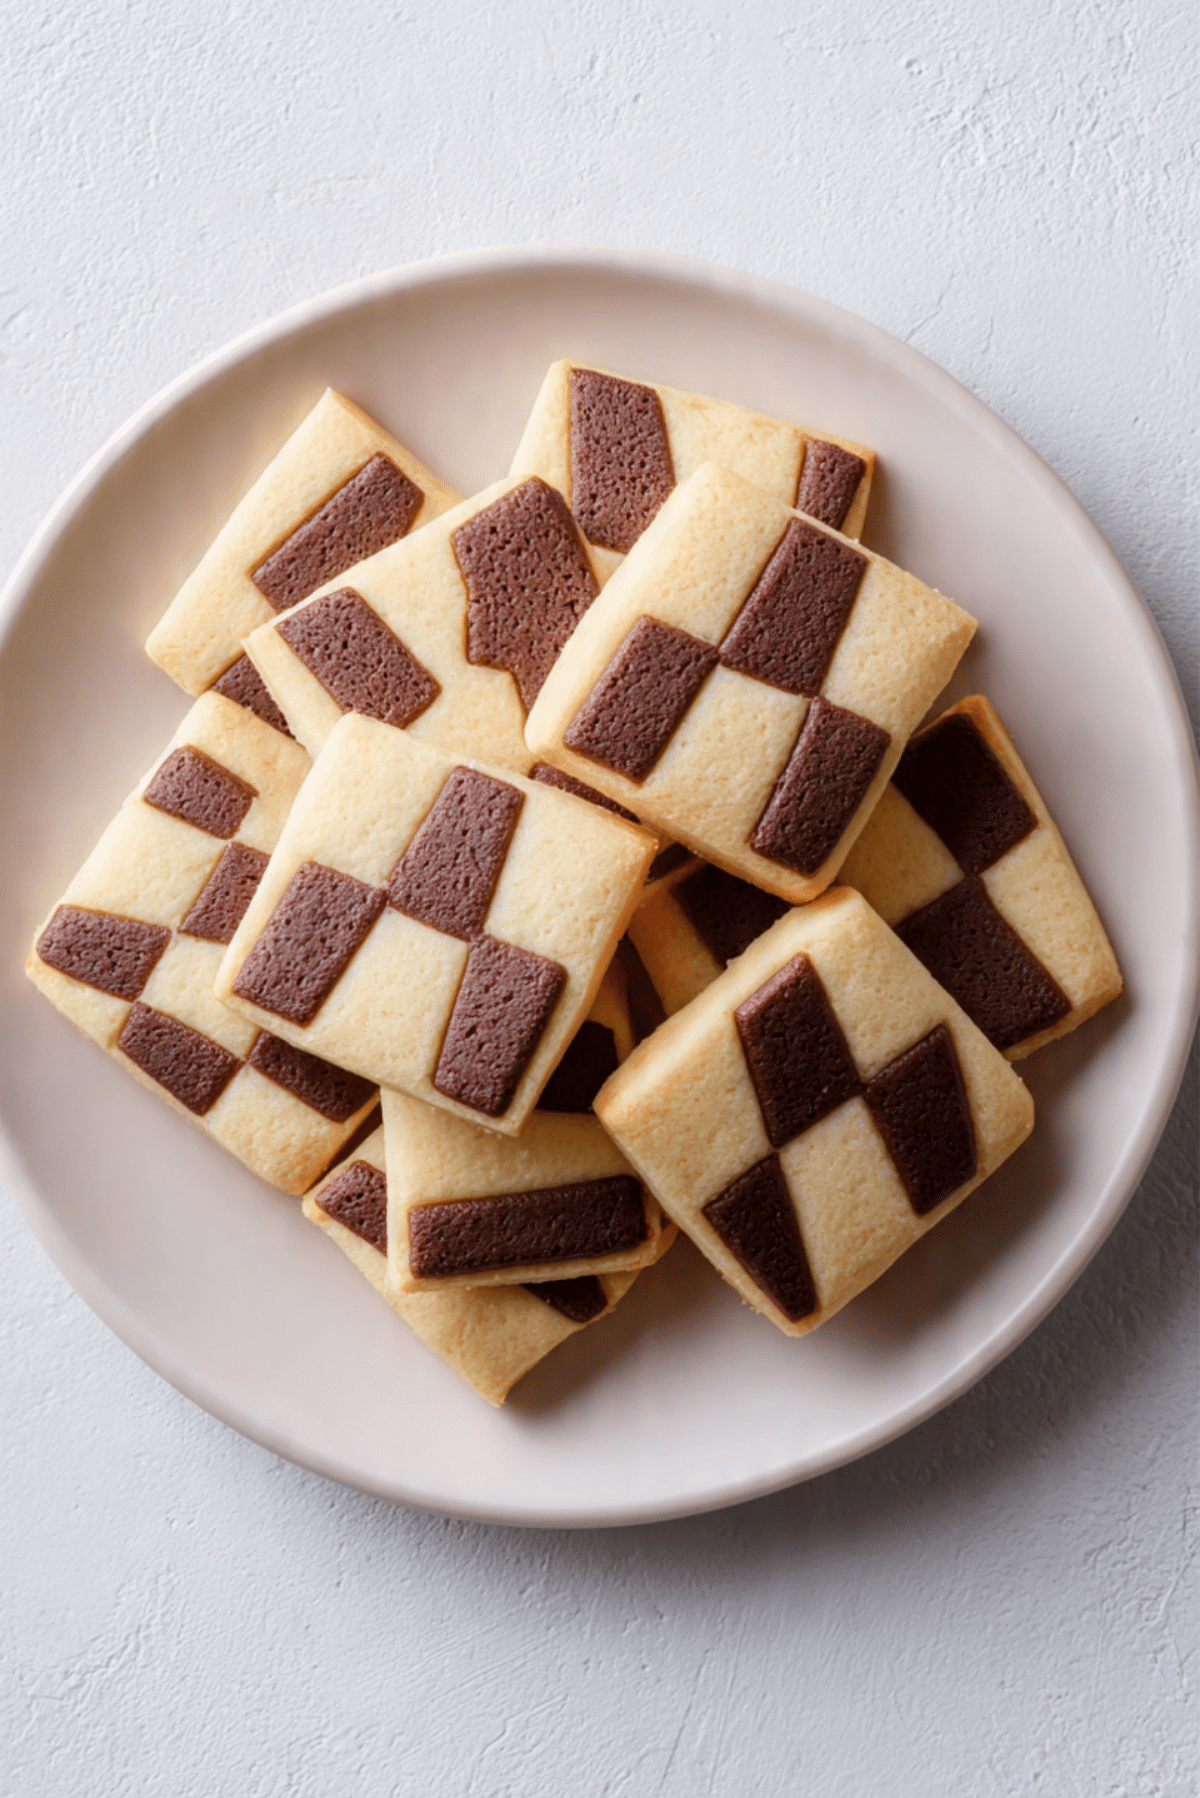
There is something almost magical about slicing into a log of dough and discovering a perfect little pattern waiting inside. These Traditional Checkerboard Cookies are one of those treats that feel nostalgic and impressive at the same time. Buttery, tender, and lightly crisp at the edges, they melt gently on your tongue while offering that playful contrast of vanilla and chocolate in every bite. Trust me, you are going to love this.
A Cookie That Looks Fancy but Feels Like Home
You know those cookies that make people stop and stare before they even take a bite? This is one of them. The neat squares of chocolate and vanilla look almost too pretty to eat, yet the flavor is pure comfort. The texture is delicate but sturdy enough to hold its shape, and the buttery aroma fills the kitchen as they bake. This one is a total game changer for holiday trays or afternoon coffee.
A Sweet Little Piece of Baking Tradition
Checkerboard cookies have roots in classic European baking, especially in German and Austrian kitchens where precision and patience are part of the craft. Bakers would carefully layer light and dark doughs to create geometric designs, turning simple ingredients into edible art. Over time, these cookies became a symbol of celebration, often appearing during festive seasons and family gatherings. And now let us dive into why they still win hearts today.
Why These Cookies Always Deliver
Before we step into the kitchen, let me tell you why this recipe never fails.
Versatile: Perfect for holidays, tea time, or gifting, they fit beautifully into any occasion.
Budget-Friendly: Made with pantry staples like flour, butter, sugar, and cocoa powder.
Quick and Easy: The dough comes together simply, and the pattern is easier than it looks.
Customizable: You can flavor the dough with citrus zest or almond extract for a twist.
Crowd-Pleasing: Kids love the fun design, adults appreciate the buttery flavor.
Make-Ahead Friendly: The dough logs can be chilled in advance and sliced later.
Great for Leftovers: They store well and taste just as lovely the next day.
Baker’s Secrets for Picture Perfect Squares
A little precision goes a long way here.
- Chill the dough thoroughly before slicing, it keeps the squares sharp.
- Use a ruler if needed when shaping the dough strips, even sizes matter.
- Wrap the assembled log tightly in plastic wrap to keep its shape.
- Slice with a sharp knife and wipe it clean between cuts for crisp edges.
Essential Tools for Success
You do not need anything fancy, just a few reliable basics.
Mixing Bowls: For preparing the vanilla and chocolate doughs separately.
Hand Mixer or Stand Mixer: To cream the butter and sugar smoothly.
Rolling Pin: Helps shape the dough evenly.
Sharp Knife: Ensures clean slices without smudging the pattern.
Plastic Wrap: Keeps the log tight and firm while chilling.
Baking Sheet: Provides even heat distribution for consistent baking.
Ingredients That Create the Magic
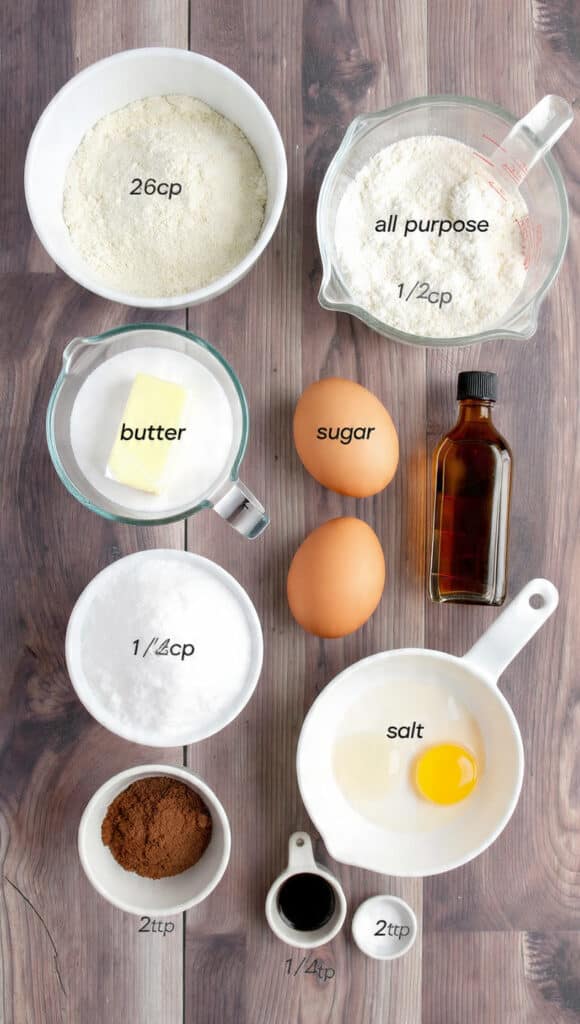
Now let us talk about what brings these cookies to life.
- All Purpose Flour: 2 1/2 cups, about 315 grams. Provides structure and stability.
- Unsalted Butter: 1 cup, about 226 grams, softened. Adds richness and tenderness.
- Granulated Sugar: 3/4 cup, about 150 grams. Sweetens and helps create a delicate crumb.
- Large Egg: 1, room temperature. Binds everything together.
- Vanilla Extract: 1 teaspoon. Brings warmth and aroma.
- Unsweetened Cocoa Powder: 2 tablespoons, about 15 grams. Creates the chocolate dough.
- Salt: 1/4 teaspoon. Balances sweetness and enhances flavor.
Easy Ingredient Swaps If Needed
Sometimes you work with what you have.
Unsalted Butter: Salted butter, just reduce the added salt slightly.
Vanilla Extract: Almond extract for a subtle nutty flavor.
Cocoa Powder: Dutch processed cocoa for a deeper color and smoother taste.
Spotlight on the Stars of the Dough
Unsalted Butter: This is the heart of the cookie, giving it that soft, melt in your mouth texture and rich aroma.
Cocoa Powder: A small amount goes a long way, adding contrast in both flavor and visual appeal.
Let’s Create Those Beautiful Squares
This is the fun part, so roll up your sleeves.
- Preheat Your Equipment: Preheat your oven to 350 degrees Fahrenheit, which is 175 degrees Celsius, and line a baking sheet with parchment paper.
- Combine Ingredients: Cream the softened butter and sugar until light and fluffy. Add the egg and vanilla extract, then mix until smooth. Gradually add the flour and salt, mixing until a soft dough forms. Divide the dough in half and mix cocoa powder into one portion until evenly incorporated.
- Prepare Your Cooking Vessel: Lightly flour your surface and roll each dough portion into a rectangle. Trim edges to create straight lines for even strips.
- Assemble the Dish: Cut each rectangle into equal strips. Alternate vanilla and chocolate strips side by side, then stack another layer on top with reversed colors to form the checker pattern. Press gently to secure, wrap tightly, and chill for at least 1 hour.
- Cook to Perfection: Slice the chilled log into 1/4 inch thick cookies and place them on the prepared baking sheet. Bake for 10 to 12 minutes until edges are lightly golden.
- Finishing Touches: Let the cookies cool on the baking sheet for a few minutes before transferring to a wire rack.
- Serve and Enjoy: Serve once completely cooled, perhaps with a warm cup of tea or coffee. Let me tell you, it is worth every bite.
Texture and Flavor in Every Square
The contrast between the buttery vanilla dough and the subtle cocoa layer creates balance in every bite. The edges are lightly crisp, while the center stays tender and delicate. As they bake, the aroma of butter and vanilla fills the kitchen, and the cocoa adds just enough depth without overpowering.
Helpful Tips for Best Results
A few small adjustments make all the difference.
- Keep the dough chilled at every stage to maintain sharp lines.
- Measure strips carefully to keep the checker pattern even.
- Avoid overbaking, they should stay pale with just golden edges.
- Rotate the baking sheet halfway through for even browning.
Common Mistakes and How to Fix Them
Even experienced bakers slip up sometimes, and that is okay.
- Dough too soft, chill it longer before slicing.
- Uneven pattern, trim edges carefully before assembling.
- Overbrowned bottoms, check oven temperature with a thermometer.
- Cracked slices, use a sharper knife and gentle pressure.
A Quick Look at Nutrition
Servings: 24 cookies
Calories per serving: 110
Note: These are approximate values.
Time Breakdown for Planning
Prep Time: 25 minutes
Cook Time: 12 minutes
Total Time: 37 minutes plus chilling time
Make Ahead and Store with Ease
You can prepare the dough logs up to two days in advance and keep them refrigerated. They also freeze beautifully, just wrap tightly and freeze for up to one month. Baked cookies can be stored in an airtight container at room temperature for up to one week. If you freeze baked cookies, let them thaw at room temperature before serving.
Serving Ideas That Feel Special
Arrange them in neat rows on a white platter to show off the pattern. Pair with coffee, tea, or even a scoop of vanilla ice cream for a playful dessert. They also look stunning in clear gift bags tied with ribbon.
Turning Leftovers into Something New
Crush a few cookies and sprinkle them over yogurt. Use them as a base for mini ice cream sandwiches. Or crumble them into a cheesecake crust for a creative twist.
Extra Tips for Extra Joy
Store them with a slice of bread in the container to keep them soft. If you like a deeper chocolate flavor, increase the cocoa slightly, but keep proportions balanced.
Make Them Shine on the Table
Use a sharp knife for clean slices, and wipe it between cuts. A perfectly aligned pattern makes these cookies look bakery worthy, even if you made them in your own cozy kitchen.
Fun Variations to Try
Add a touch of orange zest to the vanilla dough.
Swap cocoa for matcha powder in half the dough for a green and white pattern.
Dip half of each cookie in melted chocolate for extra indulgence.
Add finely chopped nuts for subtle crunch.
FAQ’s
Q1: Can I freeze the dough?
Yes, wrap it tightly and freeze for up to one month.
Q2: Why did my pattern blur?
The dough was likely too soft. Chill it longer before slicing.
Q3: Can I make them gluten free?
Yes, use a 1 to 1 gluten free flour blend.
Q4: How thin should I slice them?
About 1/4 inch thick for even baking.
Q5: Can I use salted butter?
Yes, just reduce the added salt slightly.
Q6: Do they spread while baking?
Very little, especially if well chilled.
Q7: Can I double the recipe?
Absolutely, just shape into two logs.
Q8: How do I keep edges sharp?
Use a ruler and trim the dough strips neatly.
Q9: Can I add chocolate chips?
You can, but it will change the clean checker look.
Q10: How long do they stay fresh?
Up to one week in an airtight container.
Conclusion
Traditional Checkerboard Cookies bring together beauty and comfort in one simple bite. They may look intricate, but once you try them, you will see how approachable they really are. Bake a batch, share them with someone you love, and enjoy that moment when someone says, wow, you made these. Trust me, it feels pretty wonderful.
Print
Traditional Checkerboard Cookies
- Total Time: 37 minutes plus 1 hour chilling
- Yield: 24 cookies 1x
- Diet: Vegetarian
Description
Buttery vanilla and chocolate cookies arranged in a beautiful checkerboard pattern, lightly crisp on the edges and tender in the center. These classic slice and bake cookies are perfect for holidays, gifting, or enjoying with a warm cup of coffee.
Ingredients
- 2 1/2 cups (315 g) all purpose flour
- 1 cup (226 g) unsalted butter, softened
- 3/4 cup (150 g) granulated sugar
- 1 large egg, room temperature
- 1 teaspoon vanilla extract
- 2 tablespoons (15 g) unsweetened cocoa powder
- 1/4 teaspoon salt
Instructions
- Preheat oven to 350°F (175°C) and line a baking sheet with parchment paper.
- Cream softened butter and sugar until light and fluffy. Add egg and vanilla extract, mixing until smooth.
- Gradually add flour and salt, mixing until a soft dough forms.
- Divide dough evenly into two portions. Mix cocoa powder into one half until fully incorporated.
- Roll each dough portion into a rectangle on a lightly floured surface. Trim edges to create straight sides.
- Cut each rectangle into equal strips. Alternate vanilla and chocolate strips side by side, then stack another layer on top with reversed colors to create the checkerboard pattern.
- Press gently to secure, wrap tightly in plastic wrap, and chill for at least 1 hour.
- Slice chilled dough into 1/4 inch thick cookies and place on prepared baking sheet.
- Bake for 10 to 12 minutes, until edges are lightly golden.
- Cool on baking sheet for a few minutes before transferring to a wire rack to cool completely.
Notes
- Chill the dough thoroughly before slicing to keep sharp checker lines.
- Use a sharp knife and wipe it clean between cuts for neat slices.
- Avoid overbaking to maintain a tender texture.
- The dough logs can be frozen for up to one month before slicing.
- Prep Time: 25 minutes
- Cook Time: 12 minutes
- Category: Dessert
- Method: Baking
- Cuisine: European
Nutrition
- Serving Size: 1 cookie
- Calories: 110
- Sugar: 6 g
- Sodium: 35 mg
- Fat: 6 g
- Saturated Fat: 4 g
- Unsaturated Fat: 2 g
- Trans Fat: 0 g
- Carbohydrates: 13 g
- Fiber: 0.5 g
- Protein: 1 g
- Cholesterol: 20 mg
Keywords: Traditional Checkerboard Cookies, vanilla chocolate cookies, slice and bake cookies, holiday cookies, butter cookies