PEANUT BUTTER DREAM BARS
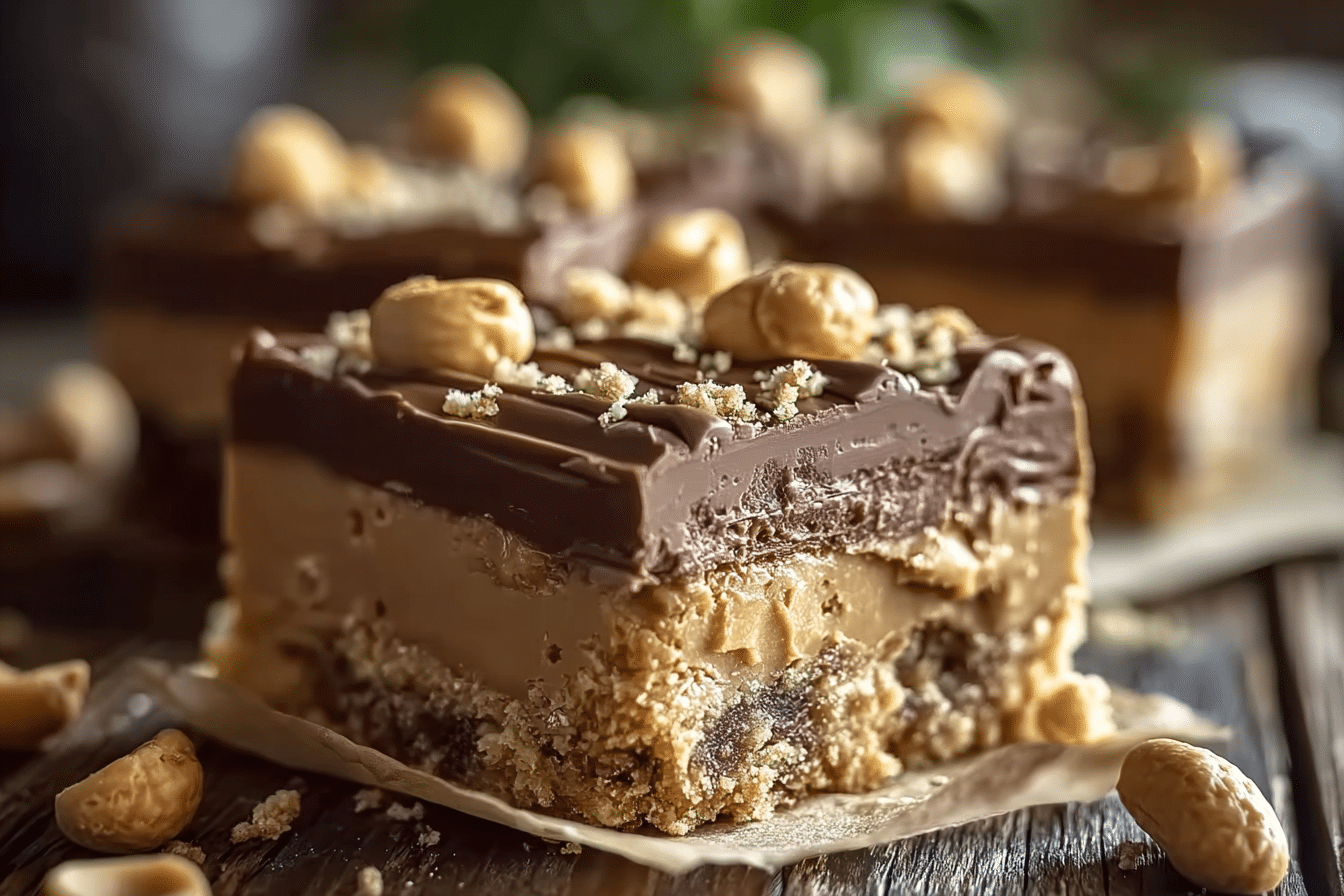
There are desserts that instantly win your heart with the very first bite, and Peanut Butter Dream Bars belong to that league. Imagine a buttery cookie crust layered with a creamy peanut butter filling, topped with silky chocolate that snaps just right when chilled. The blend of nutty, sweet, and chocolatey richness makes each bite melt into pure indulgence. Trust me, you’re going to love this, because it’s worth every bite.
Behind the Recipe
This recipe comes straight out of those cozy family kitchens where dessert always meant something special. It carries that nostalgic charm of after-school treats and bake sale favorites. Growing up, these bars were the first dessert many of us helped make, because they require so little fuss yet deliver so much joy. They are a memory tucked between layers of cookie crust, peanut butter, and chocolate.
Recipe Origin or Trivia
Peanut butter desserts are a classic in American kitchens, dating back to the early 20th century when peanut butter became a household staple. These dream bars echo the popularity of layered dessert bars that grew in the mid-1900s, combining pantry staples into sweet creations perfect for potlucks, family gatherings, and celebrations. Think of them as the cousin of brownies and cookie bars, but with a peanut butter twist that feels both nostalgic and timeless.
Print
PEANUT BUTTER DREAM BARS
- Total Time: 2 hours 20 minutes
- Yield: 16 servings 1x
- Diet: Vegetarian
Description
Peanut Butter Dream Bars are a no-bake dessert with a buttery graham cracker crust, creamy peanut butter filling, and rich chocolate topping. Perfect for parties, potlucks, or a cozy family treat.
Ingredients
- 2 cups graham cracker crumbs
- 1 cup unsalted butter, melted
- 2 cups powdered sugar
- 1 1/2 cups creamy peanut butter
- 2 cups semi-sweet chocolate chips
- 1/2 cup heavy cream
- 1 teaspoon vanilla extract
- Pinch of salt
Instructions
- Line a 9×13 inch pan with parchment paper.
- Mix graham cracker crumbs and melted butter. Press firmly into the pan for the crust.
- Refrigerate crust while preparing the filling.
- Beat peanut butter, powdered sugar, vanilla, and salt until smooth. Spread evenly over crust.
- Melt chocolate chips with heavy cream until smooth. Pour over peanut butter layer and spread evenly.
- Chill for at least 2 hours until firm.
- Slice into squares and serve chilled.
Notes
- Use room temperature peanut butter for easier mixing.
- Slice bars with a hot knife for neat edges.
- Store in the fridge or freezer for longer freshness.
- Prep Time: 20 minutes
- Cook Time: 0 minutes (chilling required)
- Category: Dessert
- Method: No-Bake
- Cuisine: American
Nutrition
- Serving Size: 1 bar
- Calories: 350
- Sugar: 24g
- Sodium: 160mg
- Fat: 22g
- Saturated Fat: 10g
- Unsaturated Fat: 10g
- Trans Fat: 0g
- Carbohydrates: 34g
- Fiber: 2g
- Protein: 6g
- Cholesterol: 20mg
Keywords: peanut butter dream bars, no bake peanut butter bars, chocolate peanut butter bars, easy dessert, party dessert
Why You’ll Love Peanut Butter Dream Bars
The magic of these bars is that they fit into almost any occasion, and here’s why:
Versatile: Perfect for lunchbox treats, bake sales, or after-dinner indulgence.
Budget-Friendly: Made with common pantry ingredients, they won’t break the bank.
Quick and Easy: No complicated steps, just simple layering and chilling.
Customizable: Add nuts, switch the crust, or drizzle caramel on top.
Crowd-Pleasing: The combo of peanut butter and chocolate is always a hit.
Make-Ahead Friendly: You can prepare them in advance and refrigerate until needed.
Great for Leftovers: They stay fresh in the fridge and taste even better the next day.
Chef’s Pro Tips for Perfect Results
Every good dessert has its secrets, and these tips will help yours shine:
- Room Temperature Butter: Use softened butter for the crust so it mixes smoothly.
- Smooth Peanut Butter: For the creamiest filling, opt for no-stir peanut butter.
- Chill Before Cutting: Let the bars set in the fridge for clean, sharp edges.
- Use Quality Chocolate: A rich chocolate topping elevates the entire dessert.
- Line the Pan: Parchment paper makes lifting and slicing the bars effortless.
Kitchen Tools You’ll Need
Before diving in, let’s make sure you’ve got everything ready:
- Mixing Bowls: For combining crust, filling, and topping separately.
- Hand Mixer or Stand Mixer: To whip the filling until silky smooth.
- 9×13-inch Baking Pan: Perfect size for layering these bars.
- Spatula: Helps spread layers evenly.
- Saucepan: For melting the chocolate topping.
Ingredients in Peanut Butter Dream Bars
The beauty of these bars lies in how simple ingredients harmonize to create pure magic.
- All-Purpose Flour: 2 cups – Forms the base of the cookie crust.
- Unsalted Butter: 1 cup (softened) – Adds richness and binds the crust.
- Brown Sugar: 1 cup (packed) – Sweetens the crust with a caramel note.
- Creamy Peanut Butter: 1 ½ cups – Provides the signature nutty layer.
- Powdered Sugar: 2 cups – Sweetens and thickens the peanut butter filling.
- Vanilla Extract: 1 teaspoon – Enhances the filling with warmth.
- Semi-Sweet Chocolate Chips: 2 cups – Creates the glossy topping.
- Heavy Cream: ½ cup – Smooths and softens the chocolate layer.
Ingredient Substitutions
Sometimes the pantry isn’t stocked, and that’s okay—here’s how you can adapt:
- Unsalted Butter: Use margarine if needed.
- Brown Sugar: White sugar with a touch of molasses works.
- Creamy Peanut Butter: Almond or cashew butter makes a great twist.
- Heavy Cream: Swap for whole milk with a touch of butter.
Ingredient Spotlight
Peanut Butter: Creamy peanut butter is the heart of this recipe, bringing that luscious nutty richness that pairs so beautifully with chocolate.
Chocolate Chips: Semi-sweet chips strike the perfect balance, ensuring the topping is rich but not overwhelmingly sweet.
Instructions for Making Peanut Butter Dream Bars
Making these bars feels like building layers of happiness. Here’s how we do it:
- Preheat Your Equipment: Preheat your oven to 350°F (175°C). Line your baking pan with parchment paper.
- Combine Ingredients: In a bowl, beat together butter and brown sugar until creamy. Stir in flour until a soft dough forms.
- Prepare Your Cooking Vessel: Press the dough evenly into the bottom of the baking pan.
- Assemble the Dish: Bake the crust for 15 minutes, then let it cool. In another bowl, beat peanut butter, powdered sugar, and vanilla until smooth. Spread over cooled crust.
- Cook to Perfection: Melt chocolate chips with heavy cream in a saucepan over low heat, stirring until glossy.
- Finishing Touches: Pour chocolate mixture over peanut butter layer, spreading evenly.
- Serve and Enjoy: Refrigerate for at least 2 hours, slice into squares, and enjoy the dreamiest bars ever.
Texture & Flavor Secrets
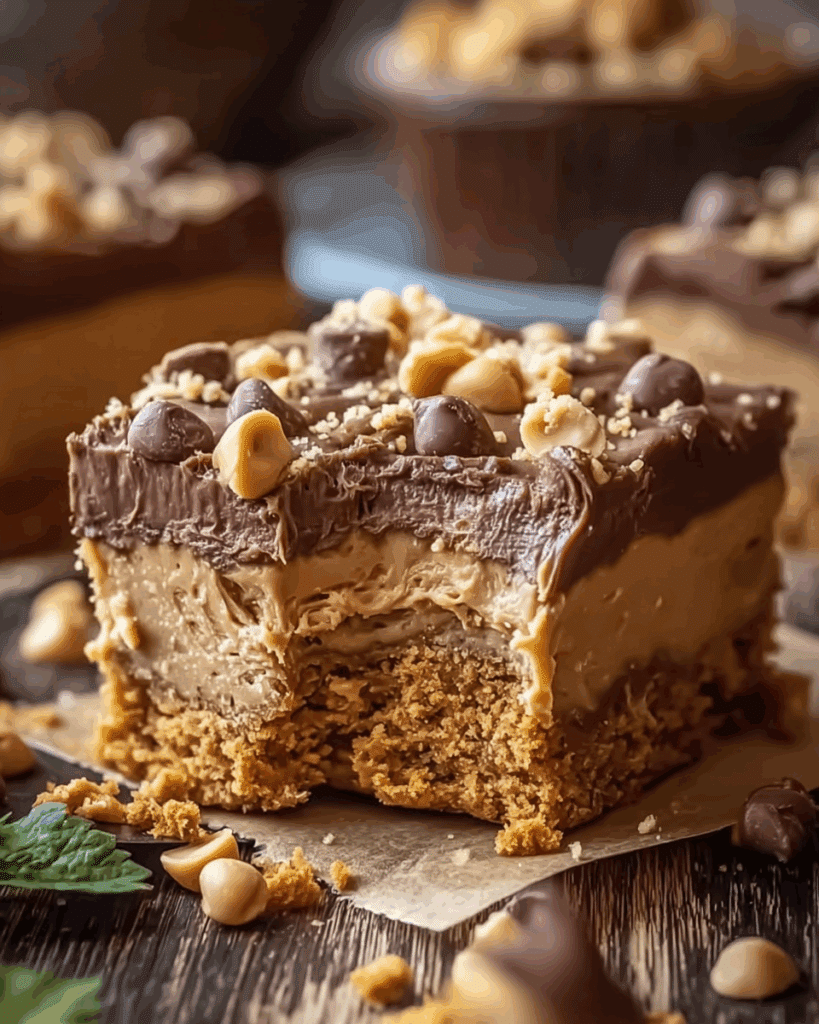
The magic of these bars lies in contrasts—the buttery crust provides a subtle crunch, the peanut butter layer melts into creamy sweetness, and the chocolate topping snaps slightly when bitten into. Each bite feels like a balance of textures dancing together.
Cooking Tips & Tricks
Here are a few more secrets for success:
- Always let the crust cool before adding the filling, or it may melt.
- For extra flair, sprinkle flaky sea salt over the chocolate topping.
- If you love crunch, stir crushed pretzels or nuts into the peanut butter filling.
What to Avoid
Even the best bakers can slip up, so here’s what to watch for:
- Overbaking the crust can make it dry and crumbly.
- Using natural peanut butter can cause separation in the filling.
- Cutting before the bars are chilled will result in messy edges.
Nutrition Facts
Servings: 16
Calories per serving: 380
Note: These are approximate values.
Preparation Time
Prep Time: 20 minutes
Cook Time: 15 minutes
Total Time: 2 hours 35 minutes (including chilling)
Make-Ahead and Storage Tips
One of the joys of these bars is how well they keep. You can make them the day before and refrigerate, which actually helps the flavors meld together. Store them covered in the fridge for up to a week, or freeze for up to 2 months. To enjoy again, simply thaw overnight in the refrigerator.
How to Serve Peanut Butter Dream Bars
These bars are delicious on their own, but you can dress them up too. Serve with a scoop of vanilla ice cream, a drizzle of caramel sauce, or even alongside fresh berries to balance the richness.
Creative Leftover Transformations
If you somehow have leftovers, don’t worry—they can be reinvented:
- Chop them into chunks and mix into vanilla ice cream for a dreamy sundae.
- Crumble them as a topping for yogurt parfaits.
- Use as a decadent layer in a trifle with whipped cream and bananas.
Additional Tips
For an extra touch of elegance, swirl a little white chocolate into the topping before it sets. You can also cut the bars into mini squares for bite-sized party treats.
Make It a Showstopper
Presentation matters. Slice into perfect squares and serve on a white platter with a dusting of cocoa powder around the edges. Garnish with a sprinkle of crushed peanuts or a light drizzle of melted chocolate for that wow factor.
Variations to Try
- Nutty Crunch Bars: Add chopped peanuts or pretzels to the peanut butter layer.
- Oreo Dream Bars: Use a crushed Oreo cookie crust instead of the flour base.
- Peanut Butter Banana Bars: Add thin banana slices between the crust and peanut butter layer.
- Salted Caramel Twist: Drizzle caramel sauce over the peanut butter layer before adding chocolate.
- White Chocolate Version: Swap the semi-sweet chocolate for white chocolate for a sweeter twist.
FAQ’s
Q1: Can I make these without baking?
Yes, you can use a graham cracker crust pressed firmly into the pan and skip the oven.
Q2: Can I use crunchy peanut butter?
Absolutely, it will add extra texture.
Q3: How long do they last in the fridge?
Up to 1 week if stored in an airtight container.
Q4: Can these be frozen?
Yes, freeze for up to 2 months and thaw in the fridge before serving.
Q5: Can I make them gluten-free?
Yes, use gluten-free flour or a gluten-free cookie crust.
Q6: Can I double the recipe?
Definitely, just use a larger baking pan.
Q7: What chocolate works best?
Semi-sweet gives the best balance, but dark chocolate works well too.
Q8: Can I reduce the sugar?
Yes, but the filling may be less firm.
Q9: Do I need parchment paper?
It makes removal much easier, but you can grease the pan instead.
Q10: Can I add flavors to the filling?
Yes, a touch of cinnamon or espresso powder pairs beautifully with peanut butter.
Conclusion
Peanut Butter Dream Bars are the kind of dessert that feels both nostalgic and indulgent, the ones you’ll find yourself making again and again. From their buttery crust to their creamy peanut butter filling and glossy chocolate top, they’re a dream come true for peanut butter lovers. So gather your ingredients, line that pan, and let yourself indulge in a treat that truly lives up to its name