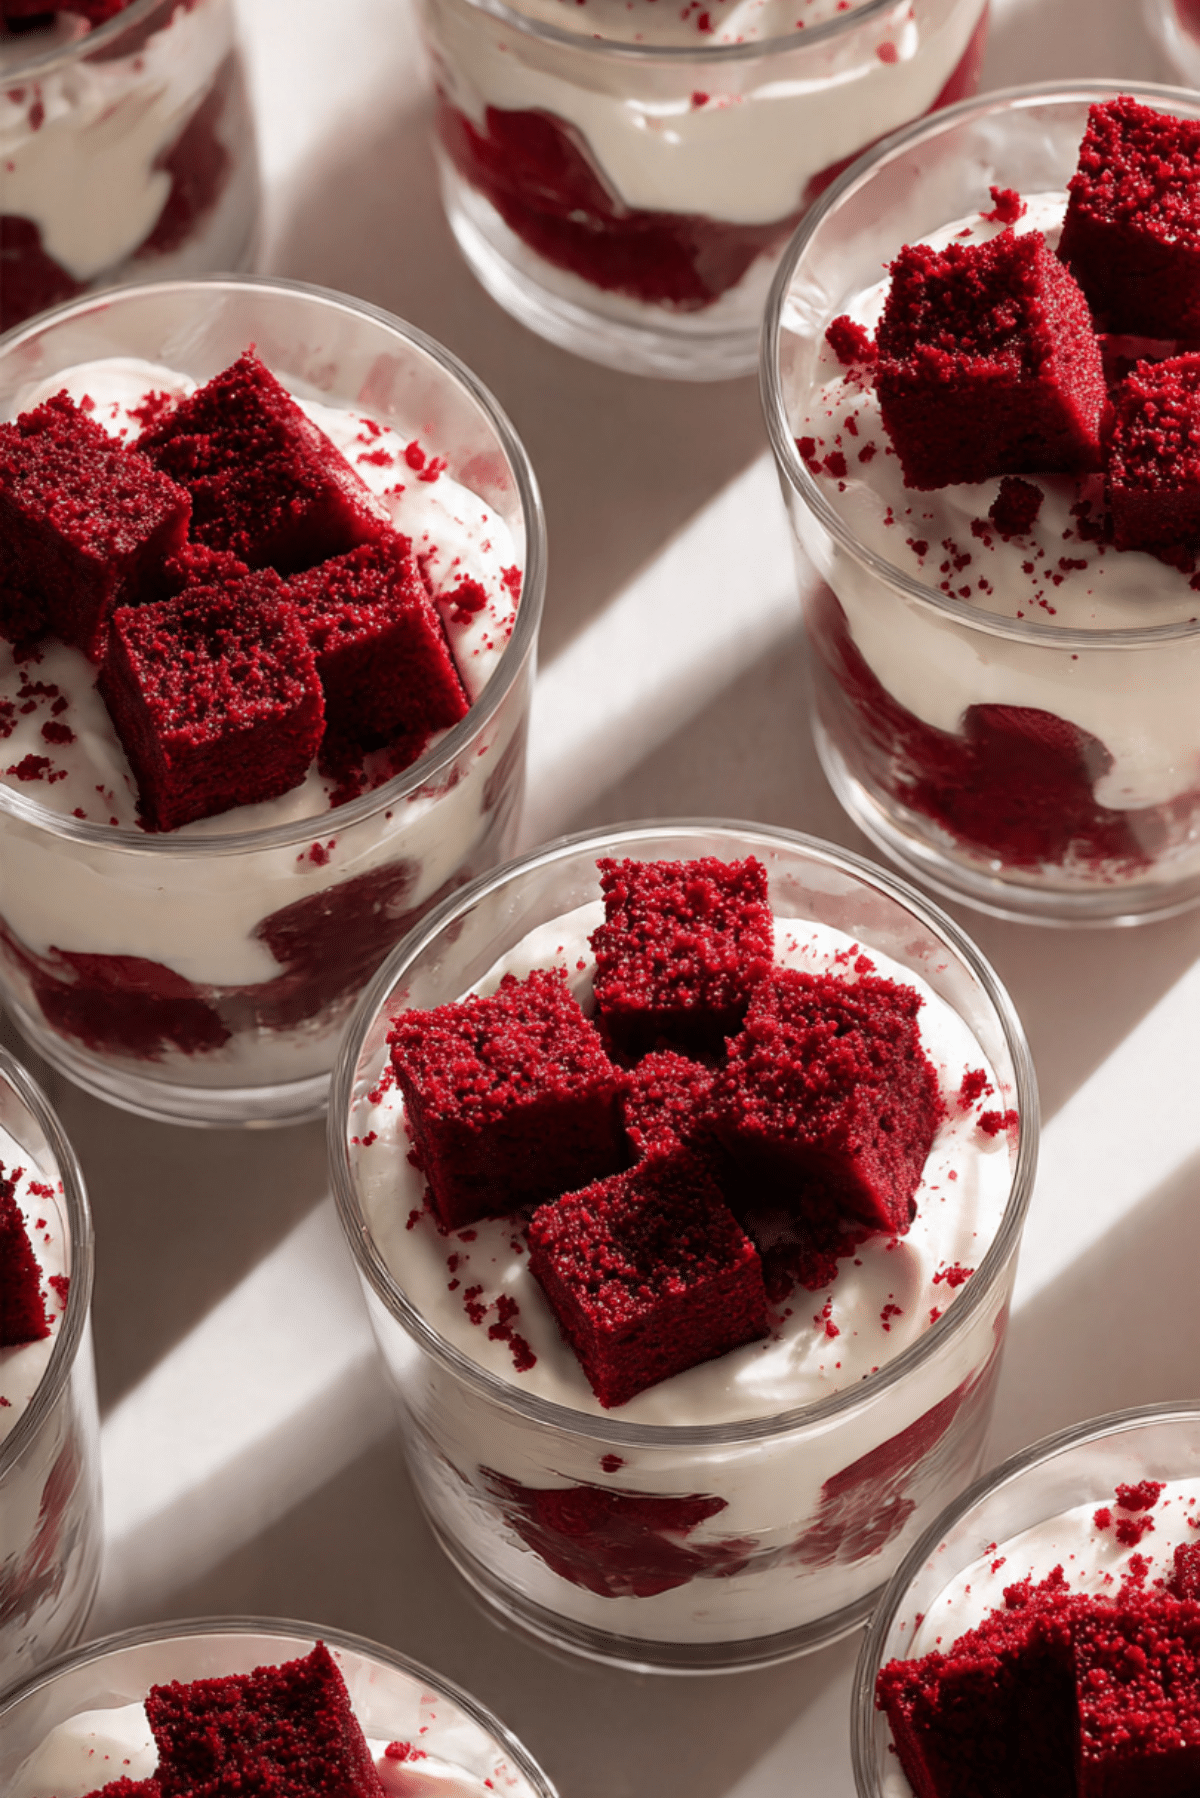
Red Velvet Trifle Cups
There is something about layers in a dessert that just makes it feel special. When you scoop your spoon all the way down and catch a bit of everything, that soft red velvet cake, that cloud-like cream, and those tiny crumbs on top, it feels like a little celebration in a glass. Trust me, you’re going to love this. These Red Velvet Trifle Cups are rich, creamy, and surprisingly simple to make, which makes them perfect for holidays, birthdays, or even just a random Tuesday when you need something sweet.
Why These Little Cups Steal the Show Every Time
It starts with the color. That deep, velvety red against the bright white cream is stunning, especially when served in clear glasses. But it is not just about looks. Each spoonful is soft, slightly chocolatey, and balanced with a creamy tang that keeps it from feeling too heavy. This one’s a total game-changer when you want something impressive without spending hours in the kitchen.
A Sweet Southern Classic with a Modern Twist
Red velvet cake has roots in Southern baking traditions, where it became a staple for special occasions. Over time, it evolved from a simple cocoa cake with a subtle reddish hue into the bold, vibrant dessert we know today. Turning it into individual trifles is a more modern take, making it easy to serve and even easier to love. Instead of slicing and plating, you get personal portions that feel thoughtful and festive.
Why You Can Count on This Dessert Every Time
Before we dive into the details, let me tell you why this one deserves a permanent spot in your dessert rotation.
Versatile: You can serve these at fancy gatherings or casual family dinners, and they always fit right in.
Budget-Friendly: Simple pantry staples and a few fresh ingredients come together beautifully without breaking the bank.
Quick and Easy: Using baked cake that you crumble saves time, and layering takes just minutes.
Customizable: You can adjust sweetness, add fruit, or switch up the cream to suit your taste.
Crowd-Pleasing: The combination of soft cake and creamy filling is almost impossible to resist.
Make-Ahead Friendly: These can chill in the fridge until you are ready to serve.
Great for Leftovers: Extra cups keep well, and the flavors deepen as they sit.
Pro Tips for Bakery Style Results at Home
If you want these to look and taste like they came from a high-end bakery, keep these tips in mind.
- Use completely cooled cake before assembling so the cream stays fluffy.
- Cut or crumble the cake into even pieces for clean, defined layers.
- Chill the cups for at least one hour to help the layers set.
- Use a piping bag for the cream layer to keep the glass sides neat.
Tools That Make It All Come Together Smoothly
You do not need fancy equipment, but a few basics make the process easier.
Mixing Bowls: For preparing the cream filling and cake batter if baking from scratch.
Hand or Stand Mixer: Helps achieve a smooth, fluffy cream layer.
Measuring Cups and Spoons: Accuracy keeps the texture balanced.
Clear Glass Cups: Show off those beautiful layers.
Spatula or Spoon: For gentle layering and smoothing.
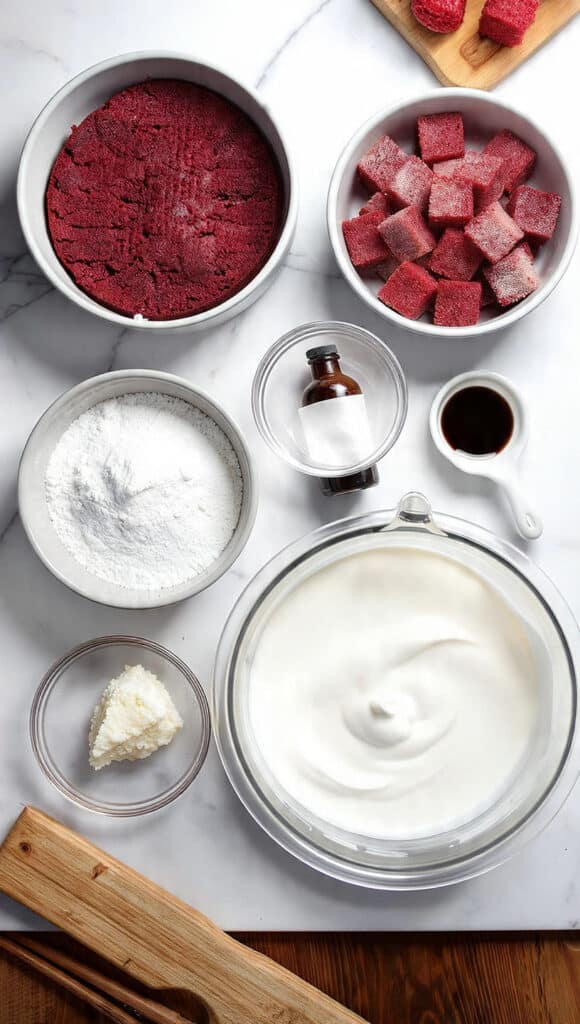
Ingredients That Build Every Beautiful Layer
The magic of these Red Velvet Trifle Cups comes from simple ingredients working together in perfect harmony.
- Red Velvet Cake: 1 prepared 9 inch red velvet cake, cooled and cut into cubes, this forms the soft, chocolate-kissed base of every layer.
- Cream Cheese: 8 ounces, softened, adds a slight tang and richness to the filling.
- Powdered Sugar: 1 cup, sweetens the cream smoothly without any graininess.
- Vanilla Extract: 1 teaspoon, enhances the overall flavor with warmth.
- Heavy Whipping Cream: 1 ½ cups, whipped to soft peaks for a light and airy texture.
Easy Ingredient Swaps If You Need Them
Sometimes you work with what you have, and that is perfectly fine.
Cream Cheese: Mascarpone for a milder flavor.
Heavy Whipping Cream: Store bought whipped topping for convenience.
Vanilla Extract: Almond extract for a subtle nutty note.
Spotlight on the Stars of the Show
Red Velvet Cake: Its soft crumb and subtle cocoa flavor give structure and depth to every bite.
Cream Cheese: The slight tang balances the sweetness and keeps the dessert from feeling overly rich.
Let’s Build These Beautiful Layers Together
Now let’s dive into the fun part. Here are the steps you are going to follow.
- Preheat Your Equipment: If baking the cake from scratch, preheat your oven according to your cake recipe and allow the cake to cool completely before assembling.
- Combine Ingredients: In a mixing bowl, beat the softened cream cheese until smooth. Add powdered sugar and vanilla extract, mixing until fully incorporated. In a separate bowl, whip the heavy cream to soft peaks, then gently fold it into the cream cheese mixture.
- Prepare Your Cooking Vessel: Arrange clear glass cups on a flat surface so you can easily layer the ingredients.
- Assemble the Dish: Add a layer of red velvet cake cubes at the bottom of each cup. Spoon or pipe a layer of cream mixture over the cake. Repeat the layers once more, finishing with cream on top. Sprinkle a few cake crumbs for garnish.
- Cook to Perfection: No additional baking is needed, but refrigerate the assembled cups for at least 1 hour to let the flavors meld.
- Finishing Touches: Before serving, add a small crumble of cake or a smooth swirl of cream on top for a polished look.
- Serve and Enjoy: Serve chilled and enjoy every creamy, velvety spoonful.
A Perfect Balance of Creamy and Crumbly
What makes this dessert so satisfying is the contrast. The cake is tender and slightly dense, while the cream layer is light and fluffy. As the cups chill, the cream seeps gently into the cake, making it even softer. Each bite feels rich but not overwhelming, with just the right hint of cocoa and sweetness.
Helpful Tips for the Best Results
A few small adjustments can make a big difference.
- Chill the mixing bowl before whipping cream for better volume.
- Do not overmix the cream once folded, or it may deflate.
- Use a spoon to gently press the cake layer so it sits evenly.
Common Mistakes and How to Avoid Them
Even simple desserts can go wrong, but these are easy fixes.
- Using warm cake, which can melt the cream. Let it cool fully.
- Overwhipping the cream, which can turn grainy. Stop at soft peaks.
- Skipping chill time, which affects texture and flavor blending.
Nutrition Snapshot Per Serving
Servings: 6
Calories per serving: 420
Note: These are approximate values.
Time Breakdown for Planning Ahead
Prep Time: 20 minutes
Cook Time: 30 minutes if baking cake
Total Time: 50 minutes plus chilling time
Make Ahead and Storage Made Simple
These Red Velvet Trifle Cups are perfect for preparing in advance. You can assemble them up to 24 hours ahead and store them covered in the refrigerator. They do not freeze well once assembled because the cream texture may change, but leftover cake can be frozen separately. Keep the cups chilled until serving for the best texture.
How to Serve Them for Maximum Wow Factor
Serve in clear glass cups to show off those layers. Add a small spoon on the side and maybe a fresh berry for color. Let me tell you, it’s worth every bite when your guests break through that top layer.
Turn Leftovers into Something New
If you somehow have leftovers, crumble them over vanilla ice cream or layer into a larger trifle bowl for a second round of indulgence. You can even mix the components into a parfait with fresh fruit.
Extra Tips for Flavor and Ease
Use high quality vanilla for deeper flavor. Taste the cream before layering and adjust sweetness if needed. Keep everything chilled for clean layers.
Make It Look Like a Bakery Creation
Use a piping bag for smooth, even cream layers. Wipe the inside of the glass gently if needed for clean presentation. A neat top layer makes all the difference.
Fun Variations to Try
Try adding a layer of chocolate chips for extra texture.
Mix in fresh strawberries for a fruity twist.
Add a hint of espresso powder to the cake for depth.
Top with white chocolate shavings for elegance.
FAQ’s
Q1: Can I use store bought cake?
Yes, store bought red velvet cake works perfectly and saves time.
Q2: Can I make this gluten free?
Yes, simply use a gluten free red velvet cake.
Q3: How long do they last in the fridge?
They stay fresh for up to 2 days when covered.
Q4: Can I freeze the assembled cups?
Freezing is not recommended because the cream texture may change.
Q5: Can I use whipped topping instead of fresh cream?
Yes, it is a convenient alternative.
Q6: Do I have to use clear cups?
Clear cups are ideal for presentation, but any small dessert dish works.
Q7: Can I make one large trifle instead?
Absolutely, layer everything in a large glass bowl.
Q8: Is this very sweet?
It is sweet but balanced by the tangy cream cheese.
Q9: Can I add fruit?
Yes, berries pair beautifully with the flavors.
Q10: Can I prepare components separately?
Yes, store cake and cream separately and assemble before serving.
Conclusion
There is just something magical about digging your spoon into those soft layers and tasting that creamy, velvety goodness. These Red Velvet Trifle Cups are simple, stunning, and completely satisfying. Whether you are hosting a party or just treating yourself, this dessert delivers every single time. Give it a try, and I promise it will become one of your favorites.
Print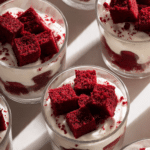
Red Velvet Trifle Cups
- Total Time: 50 minutes plus 1 hour chilling
- Yield: 6 servings 1x
- Diet: Vegetarian
Description
Beautiful layered Red Velvet Trifle Cups made with moist red velvet cake, fluffy cream cheese filling, and whipped cream. These individual desserts are rich, creamy, and perfect for holidays, parties, or anytime you want an elegant yet easy sweet treat.
Ingredients
- 1 prepared 9 inch red velvet cake, cooled and cut into cubes
- 8 ounces cream cheese, softened
- 1 cup powdered sugar
- 1 teaspoon vanilla extract
- 1 1/2 cups heavy whipping cream
Instructions
- If baking the cake from scratch, preheat your oven according to your cake recipe and allow the cake to cool completely before assembling.
- In a mixing bowl, beat the softened cream cheese until smooth. Add powdered sugar and vanilla extract, mixing until fully incorporated.
- In a separate bowl, whip the heavy whipping cream to soft peaks.
- Gently fold the whipped cream into the cream cheese mixture until smooth and fluffy.
- Arrange clear glass cups on a flat surface for easy assembly.
- Add a layer of red velvet cake cubes to the bottom of each cup.
- Spoon or pipe a layer of the cream mixture over the cake.
- Repeat the layers once more, finishing with a cream layer on top.
- Sprinkle a few red velvet cake crumbs on top for garnish.
- Refrigerate for at least 1 hour before serving to allow the flavors to meld.
Notes
- Make sure the cake is completely cooled before layering to prevent the cream from melting.
- Chill the mixing bowl before whipping cream for better volume.
- Do not overwhip the cream or it may become grainy.
- These cups can be assembled up to 24 hours in advance and stored covered in the refrigerator.
- Prep Time: 20 minutes
- Cook Time: 30 minutes
- Category: Dessert
- Method: No Bake Assembly
- Cuisine: American
Nutrition
- Serving Size: 1 cup
- Calories: 420
- Sugar: 32g
- Sodium: 260mg
- Fat: 28g
- Saturated Fat: 17g
- Unsaturated Fat: 9g
- Trans Fat: 0g
- Carbohydrates: 40g
- Fiber: 1g
- Protein: 5g
- Cholesterol: 85mg
Keywords: red velvet trifle cups, layered red velvet dessert, individual trifle cups, red velvet cake parfait, easy party dessert