Espresso Brownies
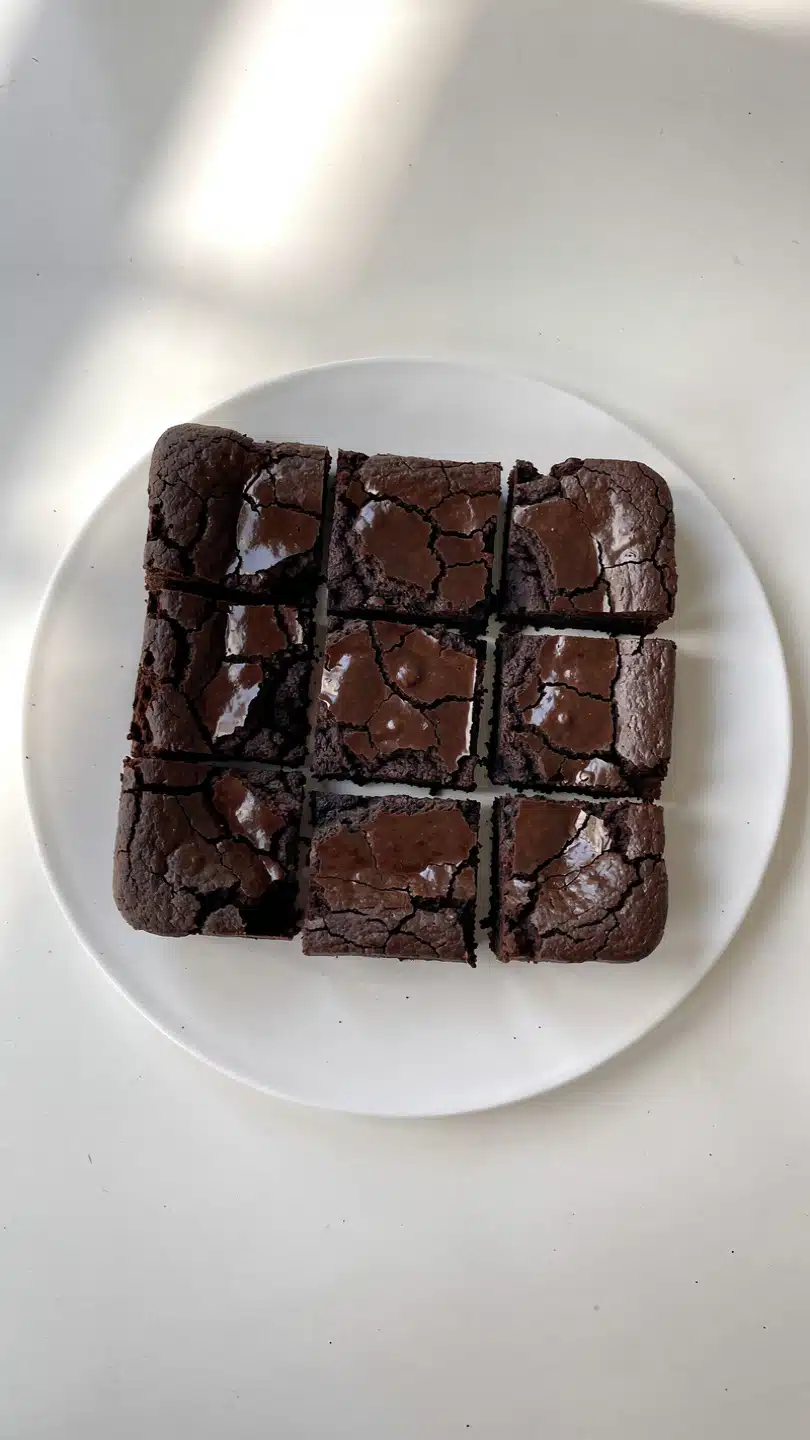
There are brownies, and then there are espresso brownies. The first time I added espresso powder to my brownie batter, I was not trying to make them taste like coffee. I simply wanted deeper chocolate flavor. What happened was something magical. The cocoa became richer, darker, and more intense, without overpowering sweetness. When I pulled them from the oven, the tops were shiny and crackled, and the center stayed perfectly fudgy. Trust me, you’re going to love this. They are rich, bold, and absolutely worth every bite.
Why Espresso Makes Chocolate Better
Espresso does not make these brownies taste like coffee. Instead, it enhances the chocolate, bringing out depth and complexity. It amplifies the cocoa notes and adds a subtle warmth that lingers just slightly.
This one’s a total game changer because a small spoonful of espresso powder transforms an ordinary brownie into something unforgettable.
And now let’s dive into what makes them perfectly fudgy.
The Secret to That Crackly Top
The glossy crackled surface comes from properly dissolving sugar into warm melted butter and chocolate. Beating the eggs well also helps create that delicate crust. It is a small detail, but it makes a big difference in texture and appearance.
Simple technique, bakery style results.
Why You’ll Make These Again and Again
Before we preheat the oven, here is why this recipe deserves a permanent place in your dessert lineup.
Deep Chocolate Flavor: Espresso enhances richness.
Fudgy Texture: Dense and moist center.
Crackly Top: Beautiful glossy finish.
Easy to Make: Simple pantry ingredients.
Perfect for Sharing: Crowd favorite dessert.
Freezer Friendly: Stores beautifully.
And now let’s get everything ready.
Tips for Perfect Espresso Brownies
- Use good quality cocoa powder.
- Do not overbake for fudgy texture.
- Let brownies cool completely before slicing.
- Line pan with parchment for easy removal.
With those tips in mind, let’s gather the tools.
Kitchen Tools You’ll Need
8×8 Inch Baking Pan: For baking.
Mixing Bowls: For combining ingredients.
Whisk: For blending batter.
Spatula: For folding and spreading.
Now let’s talk ingredients.
Ingredients You Will Need For These Espresso Brownies
Each ingredient builds richness and structure.
- Unsalted Butter: 1/2 cup.
- Granulated Sugar: 1 cup.
- Brown Sugar: 1/2 cup.
- Eggs: 2 large.
- Vanilla Extract: 1 teaspoon.
- All Purpose Flour: 3/4 cup.
- Unsweetened Cocoa Powder: 1/2 cup.
- Espresso Powder: 2 teaspoons.
- Salt: 1/2 teaspoon.
- Chocolate Chips: 1/2 cup.
And now let’s bring them to life.
Let’s Make These Espresso Brownies
Here are the steps you are going to follow.
- Preheat the Oven: Set oven to 350°F. Line an 8×8 inch pan with parchment paper.
- Melt the Butter: In a microwave safe bowl, melt butter. Stir in granulated sugar and brown sugar while butter is still warm.
- Add Eggs and Vanilla: Whisk in eggs one at a time. Add vanilla extract and mix until smooth.
- Combine Dry Ingredients: In a separate bowl, whisk flour, cocoa powder, espresso powder, and salt.
- Mix the Batter: Fold dry ingredients into wet ingredients just until combined. Stir in chocolate chips.
- Bake: Spread batter evenly into prepared pan. Bake for 20 to 25 minutes until center is just set.
- Cool and Slice: Let cool completely before cutting into squares.
- Serve and Enjoy: Enjoy as is or with a scoop of vanilla ice cream.
And now let’s talk about the texture.
Texture and Flavor in Every Bite
The center is dense and fudgy. The top is thin and crackly. The espresso deepens the chocolate flavor without tasting like coffee. Each bite feels rich, balanced, and intensely chocolatey.
Time Breakdown
Prep Time: 15 minutes
Bake Time: 25 minutes
Total Time: 40 minutes
Make Ahead and Storage Tips
Store in an airtight container at room temperature for up to four days. Freeze for up to two months.
Creative Variations
- Add chopped walnuts for crunch.
- Sprinkle flaky sea salt on top before baking.
- Swirl in peanut butter for contrast.
- Add a handful of dark chocolate chunks.
Final Thoughts
Espresso brownies are bold, fudgy, and deeply satisfying. With their glossy top and intense chocolate flavor, they bring a bakery quality dessert right into your kitchen. Once you taste how espresso enhances the cocoa, you may never go back to plain brownies again.
Print
Espresso Brownies
- Total Time: 40 minutes
- Yield: 9 brownies 1x
- Diet: Vegetarian
Description
Rich espresso brownies with deep chocolate flavor, a crackly top, and a fudgy center enhanced by espresso powder.
Ingredients
- 1/2 cup unsalted butter
- 1 cup granulated sugar
- 1/2 cup brown sugar
- 2 large eggs
- 1 teaspoon vanilla extract
- 3/4 cup all purpose flour
- 1/2 cup unsweetened cocoa powder
- 2 teaspoons espresso powder
- 1/2 teaspoon salt
- 1/2 cup chocolate chips
Instructions
- Preheat oven to 350°F and line an 8×8 inch pan.
- Melt butter and mix with sugars.
- Whisk in eggs and vanilla.
- Combine flour, cocoa powder, espresso powder, and salt.
- Fold dry ingredients into wet and stir in chocolate chips.
- Bake 20 to 25 minutes until just set.
- Cool completely before slicing.
Notes
- Do not overbake for fudgy texture.
- Cool fully before cutting.
- Store in airtight container.
- Prep Time: 15 minutes
- Cook Time: 25 minutes
- Category: Dessert
- Method: Baking
- Cuisine: American
Nutrition
- Serving Size: 1 brownie
- Calories: 260
- Sugar: 22g
- Sodium: 140mg
- Fat: 14g
- Saturated Fat: 8g
- Unsaturated Fat: 4g
- Trans Fat: 0g
- Carbohydrates: 32g
- Fiber: 2g
- Protein: 3g
- Cholesterol: 55mg
Keywords: espresso brownies, fudgy chocolate brownies, coffee chocolate brownies, rich homemade brownies