Onigiri (Japanese Rice Balls)
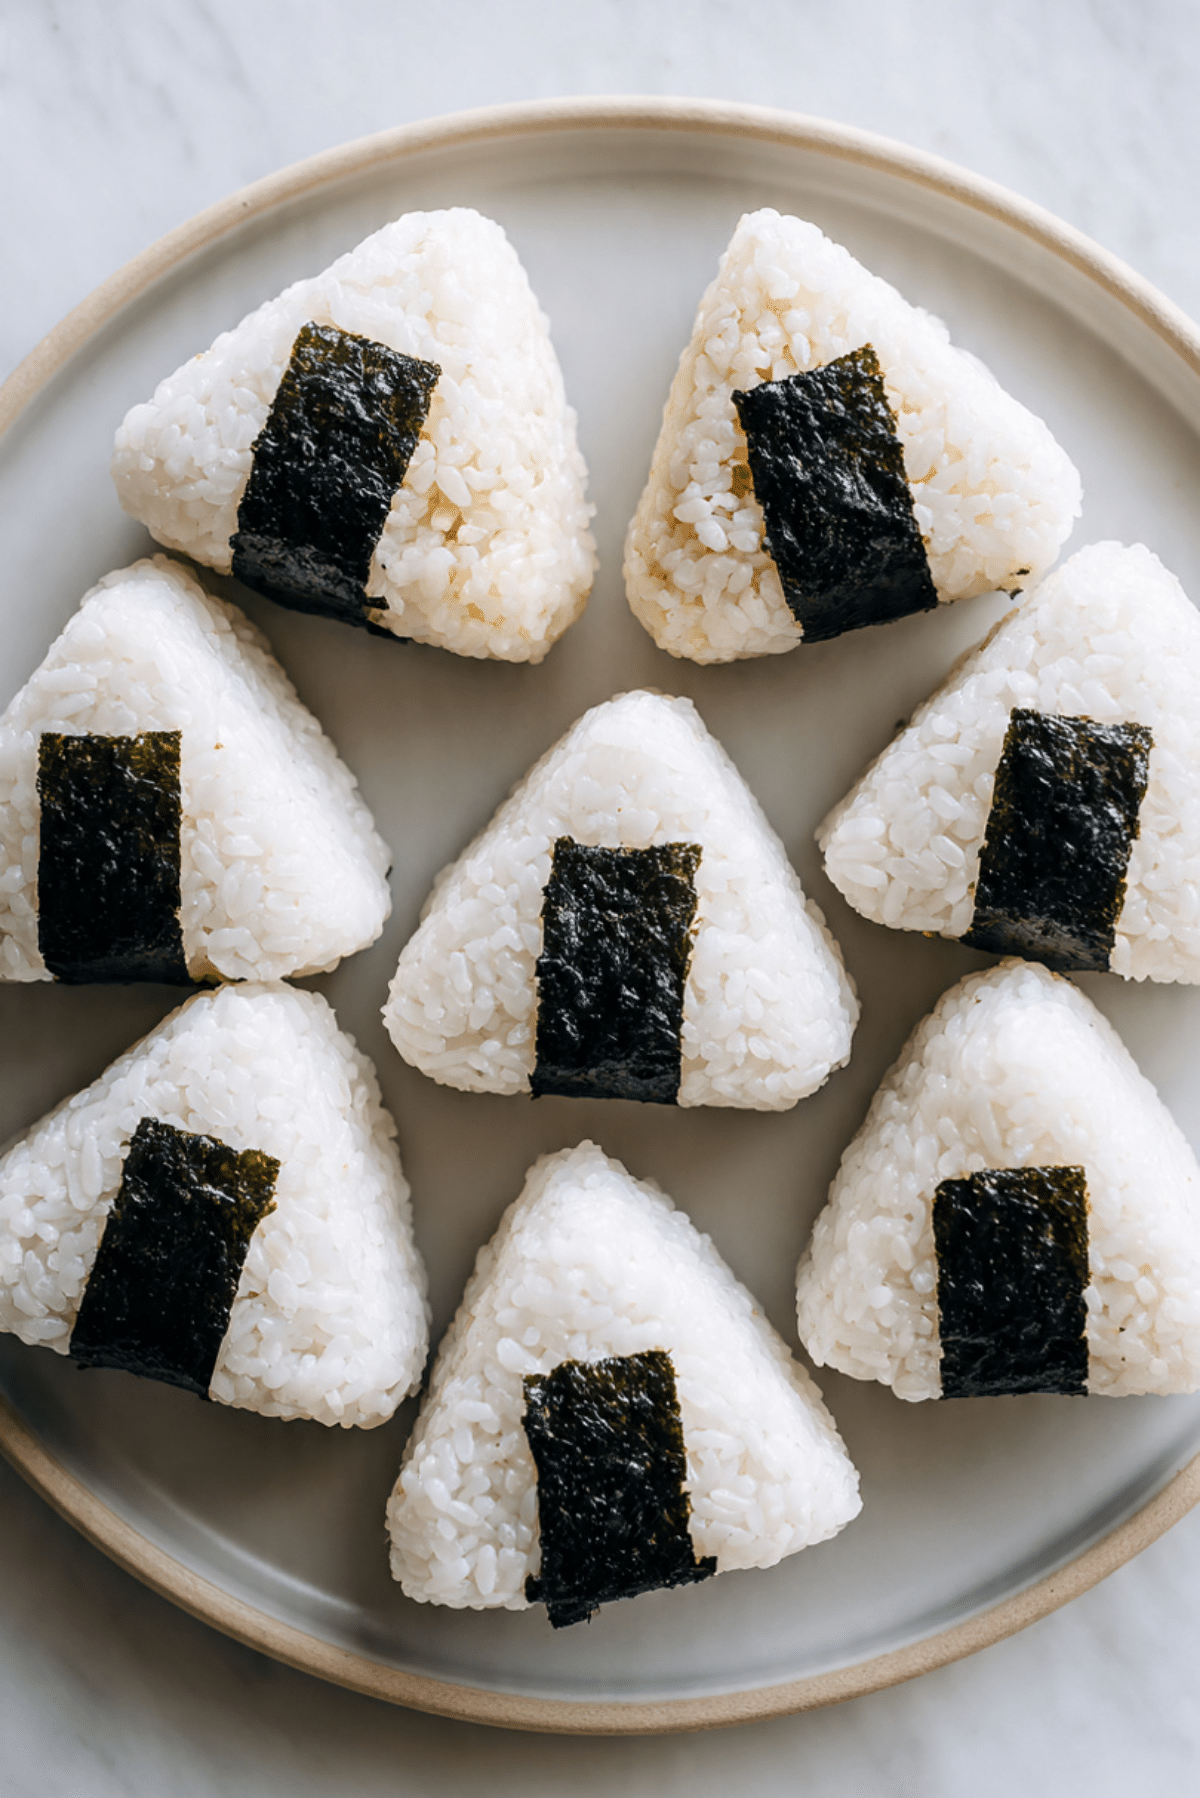
There is something beautifully simple about holding a freshly made onigiri in your hands. The rice is soft and warm, gently shaped into a neat triangle, wrapped with a strip of crisp nori that adds just the right touch of savory depth. It feels comforting and practical at the same time. Trust me, you’re going to love this. Onigiri are humble, satisfying, and quietly elegant, perfect for lunchboxes, picnics, or a light homemade meal.
Why These Japanese Rice Balls Are So Special
Onigiri may look simple, but that simplicity is exactly what makes them wonderful. The tender rice holds a flavorful filling at the center, creating a perfect balance in every bite. The nori adds texture and a subtle ocean like note that complements the rice beautifully.
They are portable, customizable, and incredibly comforting. This one’s a total game changer when you want something filling yet light, and easy to prepare ahead of time.
A Beloved Japanese Staple with Deep Roots
Onigiri have been part of Japanese cuisine for centuries. Long before modern lunchboxes, travelers and workers carried rice balls wrapped in bamboo leaves as a convenient meal.
Over time, different regions developed their own fillings and shapes. From salted salmon to pickled plum, each variation reflects tradition and personal taste. Today, onigiri are found everywhere in Japan, from homemade kitchens to convenience stores, and they remain a symbol of comfort food.
Why This Recipe Is Reliable and Rewarding
Before we rinse the rice, here is why making onigiri at home is worth it.
Versatile: Fill them with your favorite savory ingredients.
Budget-Friendly: Rice and simple fillings keep costs low.
Quick and Easy: Straightforward steps once the rice is cooked.
Customizable: Adjust fillings and shapes to your preference.
Crowd-Pleasing: Loved by both kids and adults.
Make-Ahead Friendly: Prepare earlier and enjoy later in the day.
Great for Leftovers: Perfect way to use cooked rice creatively.
Expert Tips for Perfect Texture
A few details make all the difference.
- Use short grain Japanese rice for best stickiness.
- Rinse rice thoroughly until water runs clear.
- Handle rice while slightly warm for easier shaping.
- Wet your hands with salted water to prevent sticking.
- Press gently, do not over compress.
Kitchen Tools You Will Need
Simple tools help achieve beautiful shapes.
Rice Cooker or Pot: For perfectly cooked rice.
Mixing Bowl: For rinsing rice.
Clean Kitchen Towel: To keep rice covered and warm.
Sharp Knife or Scissors: For cutting nori sheets neatly.
Ingredients That Create Authentic Flavor
Each ingredient plays a specific role in balance and texture.
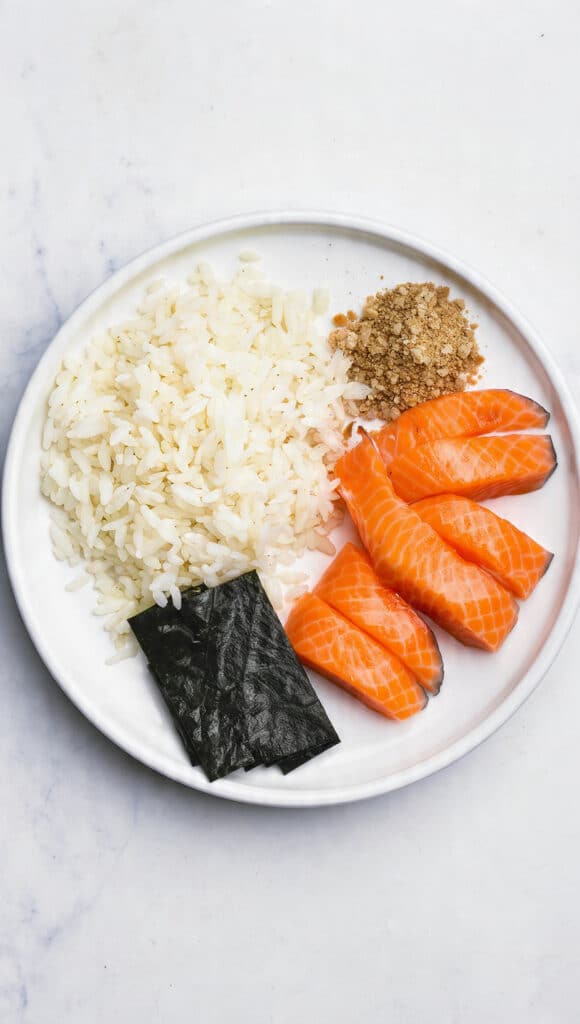
- Japanese Short Grain Rice: 2 cups uncooked, provides the sticky base.
- Water: 2 1/2 cups, for cooking rice.
- Salt: 1/2 teaspoon, lightly seasons hands and rice surface.
- Cooked Salmon: 1/2 cup flaked, classic savory filling.
- Nori Sheets: 4 sheets cut into strips, add texture and flavor.
Easy Filling Variations
Onigiri are endlessly adaptable.
Cooked Salmon: Substitute with canned tuna mixed with a small amount of mayonnaise.
Salted Plum: Use a small piece of pickled plum for a traditional option.
Teriyaki Chicken: Finely chopped cooked chicken adds a sweet savory twist.
Spotlight on the Key Ingredient
Japanese Short Grain Rice: This rice has higher starch content, which creates the sticky texture necessary for shaping. Long grain rice will not hold together the same way, so choosing the right rice truly matters.
Let’s Shape These Classic Rice Balls
Now it is time to bring everything together.
- Preheat Your Equipment: Rinse rice under cold water until water runs clear. Cook rice with water in a rice cooker or pot according to package instructions.
- Combine Ingredients: Once rice is cooked, let it steam for 10 minutes with the lid on, then gently fluff with a rice paddle.
- Prepare Your Cooking Vessel: In a small bowl, mix water with salt. Wet your hands lightly with salted water.
- Assemble the Dish: Place about 1/2 cup warm rice in your palm. Create a small indentation in the center and add 1 tablespoon of flaked salmon. Cover filling with a little more rice.
- Cook to Perfection: Gently shape rice into a triangle using both hands, pressing just enough to hold together. Repeat with remaining rice and filling.
- Finishing Touches: Wrap a strip of nori around the base of each onigiri just before serving.
- Serve and Enjoy: Serve at room temperature for best flavor and texture.
The Texture and Flavor Experience
The rice is soft and slightly chewy, holding its shape while remaining tender. The salmon adds a savory, lightly salty center, and the nori provides a subtle crisp bite. Each mouthful feels balanced, simple, and deeply comforting.
Helpful Tips for Best Results
A few adjustments help ensure success.
- Keep hands moist but not dripping.
- Work while rice is warm but not too hot.
- Add filling in small portions to prevent splitting.
What to Avoid When Making Onigiri
Avoid these common mistakes for best texture.
- Using cold rice makes shaping difficult.
- Overpacking rice makes it dense and heavy.
- Wrapping nori too early can cause it to soften excessively.
Nutrition Overview
Servings: 8 rice balls
Calories per serving: 180
Note: These are approximate values.
Time Breakdown
Prep Time: 15 minutes
Cook Time: 20 minutes
Total Time: 35 minutes
Make Ahead and Storage Tips
Onigiri are best enjoyed the same day. Store at room temperature for up to 6 hours if properly wrapped. Refrigeration can harden the rice, so avoid chilling unless necessary.
How to Serve
Pack into lunchboxes, serve with miso soup, or arrange on a platter for a picnic. Pair with sliced cucumbers or a light salad for balance.
Creative Leftover Ideas
Crumble leftover rice balls into a bowl and top with soy sauce. Slice and lightly pan sear for crispy rice edges. Chop and mix into a quick fried rice.
Additional Tips
Use plastic wrap while shaping if you prefer less direct handling. Sprinkle sesame seeds on the outside for added flavor and visual appeal.
Make It a Showstopper
Arrange neatly on a white platter with nori facing outward. Keep shapes uniform for a clean presentation. Add a small garnish of fresh herbs beside the plate for visual contrast.
Variations to Try
Add finely chopped pickled vegetables for tang.
Use spicy tuna for heat.
Mix a small amount of furikake seasoning into the rice.
Shape into rounds instead of triangles for variety.
FAQ’s
Q1: Can I use regular long grain rice?
Short grain rice is recommended for proper stickiness.
Q2: How do I prevent sticking?
Wet hands with salted water before shaping.
Q3: Can I refrigerate them?
It is not ideal, as rice hardens when cold.
Q4: What other fillings work well?
Tuna, salted plum, or teriyaki chicken are popular options.
Q5: How tight should I press?
Firm enough to hold shape, but not compact.
Q6: Can I freeze onigiri?
Freezing plain rice balls is possible, but texture may change.
Q7: Why is my rice falling apart?
It may not be sticky enough or was shaped while too cool.
Q8: When should I add nori?
Wrap just before serving for best texture.
Q9: Are they eaten warm?
They are usually enjoyed at room temperature.
Q10: Can kids help shape them?
Yes, shaping can be a fun hands on activity.
Conclusion
Onigiri (Japanese Rice Balls) are a beautiful example of how simple ingredients can create something deeply satisfying. Soft rice, savory filling, and crisp nori come together in a way that feels comforting and timeless. Let me tell you, it’s worth every bite. Once you make them at home, you may find yourself reaching for this classic again and again.
Print
Onigiri (Japanese Rice Balls)
- Total Time: 35 minutes
- Yield: 8 rice balls 1x
- Diet: Gluten Free
Description
Classic Japanese rice balls made with tender short grain rice, savory salmon filling, and wrapped with crisp nori. Simple, comforting, and perfect for lunchboxes or light meals.
Ingredients
- 2 cups Japanese short grain rice, uncooked
- 2 1/2 cups water
- 1/2 teaspoon salt
- 1/2 cup cooked salmon, flaked
- 4 nori sheets, cut into strips
Instructions
- Rinse the rice under cold water until the water runs clear.
- Cook rice with 2 1/2 cups water in a rice cooker or pot according to package instructions.
- Let cooked rice steam for 10 minutes with the lid on, then gently fluff with a rice paddle.
- In a small bowl, mix salt with a few tablespoons of water.
- Lightly wet your hands with the salted water to prevent sticking.
- Place about 1/2 cup of warm rice in your palm and create a small indentation in the center.
- Add about 1 tablespoon of flaked salmon into the indentation.
- Cover filling with a small amount of rice and gently shape into a triangle, pressing lightly to hold together.
- Repeat with remaining rice and filling.
- Wrap a strip of nori around the base of each rice ball just before serving.
Notes
- Use short grain Japanese rice for proper stickiness.
- Handle rice while warm for easier shaping.
- Wrap nori just before serving to maintain its crisp texture.
- Prep Time: 15 minutes
- Cook Time: 20 minutes
- Category: Main Course
- Method: Stovetop
- Cuisine: Japanese
Nutrition
- Serving Size: 1 rice ball
- Calories: 180
- Sugar: 0g
- Sodium: 120mg
- Fat: 2g
- Saturated Fat: 0g
- Unsaturated Fat: 1g
- Trans Fat: 0g
- Carbohydrates: 35g
- Fiber: 1g
- Protein: 6g
- Cholesterol: 10mg
Keywords: onigiri, japanese rice balls, salmon rice balls, homemade onigiri, japanese lunch recipe